UK: +44 2038074555 info@atamgo.com
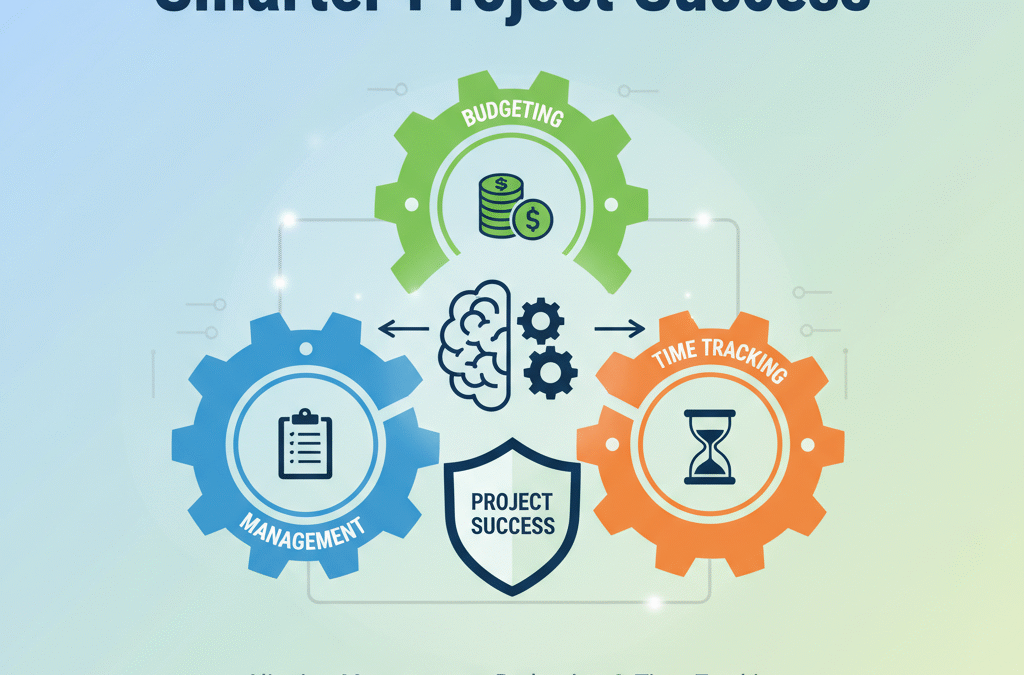
Smarter Project Success: Aligning Management, Budgeting & Time Tracking

Smarter Project Success: Aligning Management, Budgeting & Time Tracking

Project Success

In today’s competitive business landscape, speed and efficiency define success. Companies no longer have the luxury of delays, cost overruns, or missed deadlines. Whether you’re running a large organization with multiple departments or managing a small software development team, success hinges on how well you plan, budget, and track execution.

That’s where three essential tools come into play: project management solutions, project budgeting software, and developer time tracking software. Individually, each tool addresses a different pain point. But when combined, they form a powerful system that helps teams deliver projects on time, within budget, and with better productivity.

Why Projects Are Harder to Manage Today

Modern projects are more complex than ever. Businesses deal with multiple stakeholders, strict timelines, distributed teams, and evolving client expectations. With so many moving parts, projects can easily drift off course if not managed properly.

The challenges often include:

  • Miscommunication between teams.


  • Missed tasks or unclear responsibilities.


  • Budget overruns due to inaccurate estimates.


  • Burnout among employees when workloads aren’t balanced.


Project management solutions are designed to tackle these issues head-on. They help by:

  • Breaking projects into smaller, manageable tasks.


  • Assigning responsibilities and tracking progress in real time.


  • Ensuring teams stay aligned with deadlines and milestones.


But even the best planning won’t guarantee success if financial oversight is missing. That’s where smart budgeting enters the picture.

Why Smart Budgeting Makes or Breaks Projects

Delivering on time is only half the equation, keeping costs under control determines whether a project is truly successful. Many businesses still rely on spreadsheets, but spreadsheets are error-prone, static, and difficult to update in real time. This often results in inaccurate forecasts and unexpected cost escalations.

Project budgeting software offers a smarter, data-driven way to manage finances. It allows businesses to:

  • Forecast costs accurately based on project scope.


  • Monitor expenses against the approved budget.


  • Receive instant alerts if spending is at risk of exceeding limits.


This proactive approach ensures financial control throughout the project lifecycle. However, one of the biggest cost drivers-developer time, often remains overlooked.

Why Developer Time Tracking Software Matters

In software development, labor costs consume the largest share of the budget. A project can spiral out of control if developers spend longer than expected on certain tasks, or if workload distribution isn’t carefully managed. Breeze helps teams keep track of time and resources, ensuring that labor costs stay under control throughout the project.

This is why developer time tracking software is critical. It enables organizations to:

  • Track hours worked versus estimated time.


  • Analyze productivity patterns across projects.


  • Distribute workloads evenly to prevent burnout.


The benefits go beyond management. Developers also gain insights into their working habits, helping them streamline workflows and improve efficiency. Ultimately, time tracking ensures both productivity and financial discipline.

How These Tools Work Better Together

While each tool, management, budgeting, and time tracking has its own strengths, the real transformation comes when they are connected. Integration creates a seamless workflow where information flows between systems automatically, reducing manual effort and eliminating blind spots.

Here’s how the integration works in practice:

  1. From Planning to Budgeting: Tasks created in project management solutions sync with project budgeting software, enabling precise cost estimates tied to specific activities. With this integration in mind, choosing the right project management software for small business can help streamline both task tracking and budget planning.


  2. From Execution to Financial Tracking: When developers log hours in time tracking software, that data updates the budgeting system instantly, allowing managers to compare planned vs. actual costs.


  3. From Insights to Smarter Decisions: The combined insights flow back into the project management platform, improving future timelines, budgets, and overall decision-making.


Instead of juggling disconnected tools, integration ensures project managers, finance teams, and developers are always working from the same playbook.

Key Benefits of Connecting Management, Budgeting & Time Tracking

When businesses integrate these three essential tools, they unlock multiple advantages that directly impact success:

  • Improved Efficiency – Less time wasted switching between platforms means teams focus more on delivering work.


  • Better Financial Control – Real-time cost visibility ensures budgets stay accurate and manageable.


  • Higher Developer Productivity – Time tracking balances workloads, preventing fatigue and improving output.


  • Data-Driven Forecasting – Reliable insights help leaders make smarter predictions for future projects.


  • Stronger Team Collaboration – Managers, finance teams, and developers work seamlessly with shared visibility.


This connected approach is not limited to software development. Whether you’re managing marketing campaigns, product launches, or large-scale IT initiatives, the integration of these tools ensures projects run smoother and deliver stronger results.

Final Thoughts: The Smarter Path to Project Success

Today’s business leaders know that working harder is no longer enough working smarter is the real differentiator. By combining project management solutions, project budgeting software, and developer time tracking software, companies can move from firefighting issues to running projects with clarity, confidence, and control.

For software development teams especially, this integrated approach transforms project delivery. Instead of facing budget shocks or missed deadlines, teams operate with transparency and predictability. The result? Happier clients, higher productivity, and more successful projects.

If your current setup feels fragmented or leaves gaps between planning, budgeting, and execution, it’s time to rethink your approach. With the right combination of tools, you’re not just managing projects, you’re mastering them.

Which Solar Field Service Management Software is Best Suited for Solar Installers?

Which Solar Field Service Management Software is Best Suited for Solar Installers?

olar Field Service Management Software

The solar energy market is booming. In the U.S., solar power generation has more than tripled over the past decade, with 27% growth in 2024 alone. Nearly 30% of U.S. solar output now comes from rooftop and small-scale systems. As more homeowners and businesses adopt solar, installation companies must handle more projects, crews, and compliance tasks.

Many software tools focus on sales (system design, proposals, CRM), but installers face job-day execution challenges. They need to schedule crews, manage permits and inspections, track materials, and keep customers informed. The right field service management (FSM) software can bridge that gap. This post compares top solar field service management solutions by features, unique value, and pricing. By the end, you’ll have a clear sense of which platform best fits your business.

What is Solar Field Service Management Software?

Before diving into options, let’s first define the solution itself. Field Service Management software is a cloud-based system that coordinates all field operations, like scheduling jobs, dispatching technicians, and tracking work. In general, FSM enables offices to assign work orders and let techs view them on mobile devices.

Solar-specific FSM goes further. It handles solar workflows such as site surveys, system engineering data (panel/inverter layouts), permits and inspections, plus final commissioning.

In practice, a good solar field service software links the sales process (customer, proposal, equipment lists) to operations (permits, schedules, crews) to post-install service. It ensures every crew has the latest site data and that customers see real-time updates.

Why Solar Installers Need FSM Software

Solar installation involves many moving parts. Without dedicated FSM software, companies rely on spreadsheets, calls, or disjointed apps, which leads to errors and delays. Key solar challenges include:

  • Complex scheduling & dispatch

Installations often involve multiple crews (e.g. delivery team, electrical, roofers, inspectors) and strict deadlines. FSM software prevents double-booking and optimizes routes. A drag-and-drop dispatch calendar can automatically reassign jobs if delays occur. Integrated maps and GPS tracking let managers see which technician is nearest when a new job arises.

  • Permits, inspections & compliance

Every solar job needs permitting paperwork and final inspections. Mobile FSM apps allow technicians to fill out digital forms and safety checklists on-site, eliminating clipboards and error-prone paper. For example, a digital form can include the exact checklist for electrical safety. These forms sync instantly with the office, so no compliance step is forgotten.

  • Materials, equipment & inventory tracking

Solar projects require tracking expensive components (panels, inverters, batteries) and specialized equipment (lifts, safety gear). FSM systems often include inventory modules or part-line items, providing job-day inventory visibility. Dispatchers can ensure each crew has the right kit before leaving. If extra panels are needed mid-job, managers see it in real-time.

  • Customer communication

Homeowners expect better service nowadays. A solar FSM can automatically send appointment confirmations, SMS/email reminders, and live ETA notifications. In practice, customers get a 2-hour arrival window and a real-time tech tracker, reducing no-shows and calls.

  • Mobile access

Solar crews often work on remote sites or rooftops with spotty signal. The FSM mobile app must work offline. A mobile app offers limited offline functionality, allowing your techs to work and update progress no matter where they are. This ensures forms and time entries are stored on the device until connectivity returns.

In short, solar installers need FSM software to streamline on-site work. It ensures every permit is filed, every installation is done correctly, and every homeowner stays informed until the job is done.

Best Solar Field Service Management Software for Installers

Here are five popular options, with use cases and benefits highlighted for solar:

  • Arrivy

Key strengths

  • Built for service businesses including solar, roofing, HVAC
  • Focuses on job-day execution, providing real-time crew tracking, customer updates, digital forms, route optimization, instant invoices, and a mobile app.
  • Self-scheduling portal for clients, and a dynamic scheduling board with drag-and-drop reschedules
  • Digital forms for site surveys, inspections, safety checklists

Integrations & Pricing

40+ bi-directional integrations (QuickBooks, HubSpot, Salesforce, etc.)

Pricing: starts at $25/user/month (scheduling, SMS, reporting).

Premium: $50/user/month (adds digital forms and routing).

Unique Scaling Value: Offers 2X limited-access users for each full user without an added price

Use case

Best for installers who want mobile-first scheduling and communication to improve on-site efficiency.

  • OpenSolar

Key strengths

  • Free, cloud-based platform with 25,000+ users worldwide
  • Advanced 3D solar design with satellite imagery and ROI modeling
  • Built-in CRM, proposal management, financing tools

Limitations

No scheduling, dispatch, or mobile FSM tools

Requires pairing with another FSM (e.g. Arrivy) for installation management

Use case

Best for startups and small installers needing professional designs and proposals at zero cost.

  • Aurora Solar

Key strengths

  • Industry leader in design and engineering
  • LIDAR-based shading analysis, precise layouts, and performance modeling
  • Eliminates many manual site visits, integrates with CRM and finance tools

Limitations

Not a dispatch or FSM tool

Lacks mobile field apps, real-time crew tracking, or compliance checklists

Pricing

Basic: $159/user/month

Premium: $259/user/month

Use case

Ideal for engineering-heavy teams needing highly accurate designs, but must be paired with an FSM for install-day execution.

  • Service Fusion

Key strengths

  • All-in-one FSM platform with solar-specific edition
  • Drag-and-drop scheduling with route optimization
  • Mobile app for assignments, photos, signatures, payments
  • Office-side tools for estimates, job tracking, customer booking

Integrations & Pricing

Bi-directional QuickBooks sync (Online/Desktop)

Feature-based pricing (not per-user)

Plans start in the low hundreds of dollars per month (basic is $59/month and allows 1 user)

Use case

Great for mid-size solar contractors who want a mature FSM covering scheduling, dispatch, and accounting in one system.

  • JobNimbus

Key strengths

  • CRM-first platform popular in roofing and solar
  • Manages contacts, estimates, tasks, and billing end-to-end
  • Mobile app (rated 4.8/5) for updates, photos, and payments
  • Built-in payment processing and financing

Integrations & Pricing

200+ integrations (QuickBooks, EagleView, Zapier, etc.)

Pricing: around $300/user/month for base features; higher for advanced tools

Use case

Best for installers who want a strong CRM with mobile FSM capabilities and are willing to pay a premium for convenience.

How to Choose the Right FSM Software for Your Solar Business

The “best” FSM depends on your size, needs, and pain points:

Small contractors (1–10 employees)

You may prioritize cost and ease of use. Free or low-cost tools (like OpenSolar) can work for sales, but for actual installs look for simple FSMs with flat pricing. Solutions like Arrivy’s core plan (starting ~$25/user) or lower-tier JobNimbus may fit. Key features include basic scheduling, mobile forms, and customer notifications.

Mid-size companies (10–50 employees)

You’ll likely need robust scheduling and compliance tools. Focus on FSMs that handle multiple crews, automated dispatch, and built-in forms for permits/inspections. Integration with CRM/ERP becomes important to avoid double data entry. For example, companies that need a specialized CRM for roofing may also integrate it with FSM platforms like Service Fusion or Arrivy, which offer advanced scheduling and route optimization.

Large enterprises (50+ employees)

Your priorities may be scalability and integrations. Look for platforms with open APIs and enterprise modules. You may even consider ERP systems with field modules. At this scale, ensure the FSM integrates with your quoting/design tools (Aurora, HelioScope), accounting (SAP, NetSuite), and workforce management (IoT sensors, ERP). All-in-one platforms or custom deployments might be needed.

In every case, start by mapping your top pain points to software features. Do you need digital permit checklists? Then mobile form support is crucial. Is on-time arrival the biggest issue? Then automated notifications and routing matter. Free trials and demos can help, and don’t forget to consider user reviews. Always evaluate factors like ease of use, support, and value-for-money for your specific context.

Why Arrivy Stands Out for Solar Installers

Among the options above, Arrivy distinguishes itself by focusing on the actual field operations of solar installations – the “day-of” execution that CRM/design tools don’t cover. Key strengths include:

  • End-to-end job execution focus. Arrivy was built for operations teams and field crews. It manages everything from the moment an install is scheduled until final sign-off. Whereas platforms like Aurora stop at project planning, Arrivy provides real-time crew tracking and updates throughout the install.
  • Mobile data capture. Technicians carry tablets loaded with Arrivy’s mobile app to complete site surveys, safety checklists, and inspections. These digital forms can be customized for solar-specific needs (e.g. module serial numbers, inverter model, roof condition). This eliminates paper forms and speeds up reporting, while ensuring compliance data is accurately captured.
  • Live customer communication. Arrivy gives homeowners a modern experience through text/email alerts, a live map with the technician’s ETA, and detailed service summaries. Customers see exactly when crews arrive and can digitally sign off on work. These features reduce missed appointments and boost satisfaction on complex solar jobs.
  • Clean integrations. Arrivy is designed to connect with your existing software. Its 40+ integrations and open APIs let you link CRM and finance systems directly into field ops. For example, a signed contract in HubSpot or Salesforce can automatically create an install job in Arrivy. Completed job data (hours, materials used, signed forms) can then flow into QuickBooks or ERP for billing. This ensures no information falls through the cracks between sales, operations, and accounting.

In sum, Arrivy provides a unified bridge between the office and the roof. It handles on-site specifics, like digital forms, dispatch updates, and crew coordination, while connecting back to sales and back-office systems. For solar installers who need to streamline the installation process itself (not just design and sales), Arrivy’s feature set is a natural fit.

Conclusion

Choosing the right solar FSM comes down to matching software capabilities to your workflow. For many installers, a dedicated field operations platform like Arrivy (with strong mobile forms, routing, and customer updates) will make the biggest difference in efficiency and service quality.

FAQs

How much does solar field service management software cost?

Solar FSM software typically costs between $25–$50 per user per month. Enterprise plans or solar-specific platforms may charge more based on advanced features, integrations, and support. 

What features should solar installers look for in FSM software?

Key features include crew scheduling, permit and inspection tracking, inventory management, mobile apps for technicians, customer notifications, and integrations with CRM or accounting tools.

Is solar FSM software different from solar CRM or solar design tools?

Yes. Solar FSM software like Arrivy manages job-day execution such as scheduling, dispatch, and field reporting, while CRM tools handle sales pipelines and customer relationships, and design tools focus on system modeling and proposals. However, Arrivy integrates with CRM and other software to provide a connected solution.

Which software is best for managing solar installation crews?

Arrivy is widely used for real-time crew scheduling, job tracking, and customer updates. Other options include Service Fusion, JobNimbus, and BuildOps.

What software do solar companies use to track customer communication and updates?

Tools like Arrivy, ServiceTitan, and JobNimbus provide customer portals, automated notifications, and two-way messaging to keep homeowners updated during installs.

Can solar FSM software integrate with QuickBooks, HubSpot, or other CRMs?

Yes. Leading FSM platforms integrate with QuickBooks for accounting, HubSpot for sales data, and other CRMs to create seamless handoffs from sales to operations.

What’s the difference between generic FSM software and solar-specific FSM software?

Solar-specific FSM software like Arrivy includes workflows for permits, inspections, and site surveys, while generic FSM tools cover general scheduling and dispatch without solar-focused compliance features.

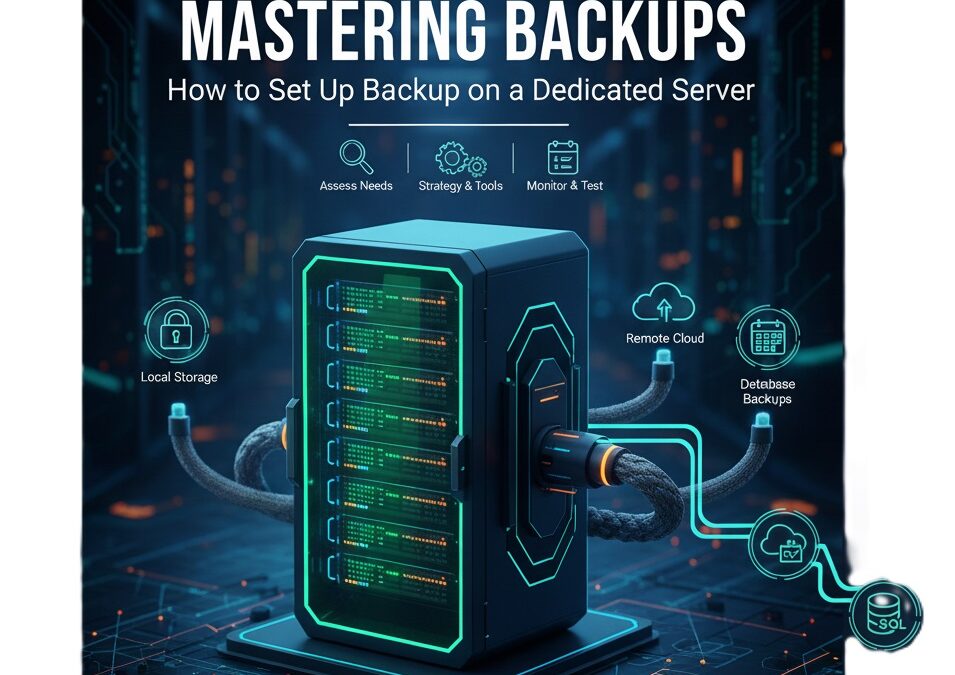
Mastering Backups: How to Set Up Backup on a Dedicated Server

Mastering Backups: How to Set Up Backup on a Dedicated Server

Mastering Backups

Setting up backups on a dedicated server might sound like one of those tedious “IT chores,” but in reality, it’s more like installing an insurance policy for your digital life. Imagine spending months building a website or storing critical business data, only to lose it all in a blink. Nightmare, right? That’s why understanding how to configure reliable backup systems is not just smart—it’s essential. In this article, we’ll explore how backup works on dedicated servers, practical steps, common pitfalls, and creative ways to protect your data.

Why Backups Matter: A Reality Check

Before diving into the mechanics, let’s pause for a moment. Many people think “my data is safe because it’s on a dedicated server.” Sorry to break it to you, but server crashes, hardware failures, accidental deletions, or even cyberattacks don’t care about your assumptions. Backups act as your safety net. Think of it as having a duplicate key to your house—you hope you never need it, but the day you do, you’re incredibly thankful.

On a dedicated server, the stakes are even higher. You control everything: software, configurations, databases, and sometimes sensitive customer data. Losing this isn’t just inconvenient—it can be catastrophic.

Choosing Your Backup Strategy

When it comes to backups, there isn’t a one-size-fits-all approach. The first step is deciding what to back up and how often.

  1. Full Backups – This is a snapshot of the entire server, including OS, databases, applications, and user files. It’s thorough but can consume significant storage and take time. Think of it like photographing every room in your house, furniture included.
  2. Incremental Backups – Only new or changed data is saved since the last backup. Efficient, fast, and storage-friendly. It’s like taking a picture only of the things that moved since yesterday.
  3. Differential Backups – Saves changes since the last full backup. A middle ground between full and incremental methods.

Frequency matters, too. Critical databases might need hourly backups, while static web content could survive daily backups. On a dedicated server, you have the control to schedule tasks via cron jobs or backup software, ensuring your data is always up-to-date. Using reliable data backup solutions further guarantees that your information is securely stored and quickly recoverable in case of any failure.

Tools and Methods: From Simple to Advanced

There are several ways to set up backups on a dedicated server, ranging from built-in tools to advanced commercial solutions.

  • rsync and cron – The classic Linux combo.rsynccopies files efficiently, andcronschedules automatic runs. It’s free, reliable, and highly customizable. For example, you can back up/var/www/to an external drive every night at 2 a.m.
  • Snapshots – Many servers support filesystem snapshots, such as LVM snapshots. Snapshots create a point-in-time copy almost instantly, useful for quick recovery.
  • Backup Software – Solutions like Bacula, R1Soft, or Acronis allow professional-grade backup setups with automation, encryption, and remote storage. Think of them as personal security teams for your data.

And yes, you can always mix methods: local backups for speed and cloud backups for disaster recovery.

Storage Options: Local, Remote, or Cloud

Where to store your backups is a strategic decision.

  • Local Storage – Keeping backups on the same server is fast but risky; if the server fails, both the original data and the backup may be lost.
  • Remote Storage – Storing backups on a separate physical server provides safety against hardware failures.
  • Cloud Storage – Services like AWS S3, Google Cloud Storage, or even DeltaHost’s backup solutions offer offsite protection with almost unlimited capacity. It’s like having a safety deposit box for your digital treasures.

A clever setup often combines all three: daily local backups for speed, weekly remote backups for security, and monthly cloud snapshots for disaster recovery.

Automation: Because Life’s Too Short

Manually running backups is a recipe for disaster—you’ll forget, procrastinate, or misconfigure something. Automation is your friend. Use cron jobs, backup scripts, or management panels to schedule backups. Ensure alerts and logs are in place so you’re notified if something goes wrong. Nothing worse than discovering your backups failed after a crash.

Testing Your Backups: The Step Most People Skip

Here’s an ironic twist: many administrators spend hours setting up backups but never test restoring data. Imagine creating a full backup of your server and then, during a critical outage, realizing it’s corrupted. Ouch. Regularly test restores to verify data integrity and recovery procedures. Think of it as fire drills—annoying, yes, but life-saving in an emergency.

Real-Life Example: From Chaos to Calm – Detailed Breakdown

Imagine a small e-commerce company, “ShopExpress,” running on a dedicated server. Their website handles hundreds of daily orders, stores customer data, and processes payments. One Monday morning, disaster strikes: the server’s primary hard drive fails suddenly. The website goes offline, orders stop coming in, and the IT team receives urgent calls from worried customers.

Step 1: Immediate Assessment

The IT administrator quickly logs into the server management console. The system reports disk errors, and attempts to access the website result in timeouts. The first panic reaction is natural—but there’s no time to waste.

  • They check which data is affected. The main web application, customer database, and transaction logs are at risk.
  • They also verify the status of backups: automated incremental backups on a remote server and weekly full snapshots stored in the cloud.

Step 2: Decision on Recovery Strategy

Because the failure is hardware-related, repairing the hard drive isn’t practical; replacing it will take time. Here, the backup plan kicks in. The IT team decides:Restore the latest incremental backups first, to recover the most recent changes in the database and website content.

  1. If anything is missing or corrupted, use the weekly cloud snapshots as a fallback.

This dual-layer strategy ensures minimal data loss and quick restoration.

Step 3: Executing Incremental Backup Restore

The IT team connects to the remote backup server. Incremental backups are structured by date and time. Using automated restore scripts:

  • They first restore the website files to a new clean drive.
  • Next, the database is restored using SQL dump files from the last incremental backup.
  • Transaction logs from the past few hours are applied to ensure that recent customer orders are not lost.

Within 30–40 minutes, the website is running on a temporary environment.

Step 4: Verifying Integrity

Before going live, the team performs several checks:

  • Test login and purchase functions.
  • Compare database records with the last known correct snapshot to ensure no orders are missing.
  • Check for broken links or corrupted files.

Everything matches expectations—no orders were lost, and the website functions correctly.

Step 5: Full Recovery and Permanent Fix

Finally, they replace the faulty hard drive on the dedicated server. Once the new drive is set up:

  • The restored data is migrated back from the temporary environment to the main server.
  • Regular backup routines are restarted to resume automated incremental and cloud backups.
  • IT team documents the incident and reviews the backup schedules for improvements.

Step 6: Lessons Learned

Thanks to having automated incremental backups on a remote server and weekly cloud snapshots:

  • Downtime was minimal: The website was restored within an hour.
  • No customer orders were lost: All transactions were recovered.
  • Business continuity was preserved: Operations resumed without financial or reputational damage.

The key takeaway is that properly configured backups, tested recovery processes, and layered strategies (remote + cloud) transform potential chaos into calm.

Conclusion: Your Data Deserves Protection

Configuring backup on a dedicated server isn’t just about ticking a box—it’s about responsibility. Understand your data, choose a backup strategy, automate tasks, and test restores. Combine local, remote, and cloud storage for the ultimate safety net.

Remember, every dedicated server is a fortress, but even fortresses need lifeboats. Protect your digital kingdom, experiment safely, and make backups a natural habit. Your future self—and your data—will thank you.

6 Genius Ways to Instantly Extract Music from Any Video

6 Genius Ways to Instantly Extract Music from Any Video

extract music from video

Introduction: Why You Might Want to Extract Music from Video

Extract music from video — we’ve all been there. You watch a video and instantly fall in love with the background music. Maybe it’s a catchy track from a YouTube vlog, a background score in a short film, or even a motivational speech with epic music behind it. The problem? The song isn’t available on Spotify or Apple Music, and you desperately want to add it to your playlist. That’s where the magic happens: you can extract music from video and save it for personal use.

Whether you’re learning how to extract music from YouTube video clips, pulling audio from your own projects, or grabbing a track for offline listening, extracting music from video is surprisingly easy once you know your options. Some methods are beginner-friendly and take less than a minute, while others give you advanced controls to tweak quality, formats, and even editing.

In this guide, I’ll walk you through six genius ways to instantly grab the music you want, whether you’re on desktop, mobile, or even working with advanced command-line tools. I’ll also sprinkle in tips for keeping the best quality and staying on the right side of copyright laws. By the end, you’ll know exactly which method works best for your situation.

Find More: 7 Powerful Reasons Why GetVid Is the Easiest Way to Download Any Video Online

6 Genius Ways to Instantly Extract Music from Any Video

1. Use Free Online Converters

CloudConvert

The fastest and easiest way to extract music from video is by using free online tools. These websites do all the heavy lifting for you — no installation, no setup, just upload and download. Popular options include Online Audio Converter, YTMP3, and AudioExtract.

How it works:

  • Upload your video file (or paste a YouTube link).
  • Select your output format (MP3, WAV, etc.).
  • Hit convert and download your new audio file.

Pros:

  • Super quick and user-friendly.
  • No software installation required.
  • Works on both desktop and mobile browsers.

Cons:

  • Free tools often limit file size.
  • Some sites are cluttered with ads or popups.
  • Not ideal for large or very high-quality video files.

If you’re only looking to save a track here and there, this method is your go-to. For frequent use or higher control, you’ll want to explore other options below.

2. Extract Music from Video with VLC Media Player

VLC Media Player

If you don’t already have VLC Media Player, download it today. It’s hands down one of the most versatile free tools out there. Besides playing any video file you throw at it, VLC doubles as a great solution for extracting music from video.

Step-by-step guide:

  1. Open VLC and load your video file.
  2. Go to Media > Convert/Save.
  3. Add your video file and click Convert.
  4. Choose your desired audio format (MP3, OGG, FLAC).
  5. Hit Start and wait while VLC extracts the audio.

Why VLC is great: It’s completely free, lightweight, and works on both Windows and Mac. Best of all, it preserves audio quality and doesn’t watermark or limit you like some free tools do.

A hidden perk is that VLC lets you trim the video first, so you can extract only the part of the audio you need — like a chorus or speech segment.

3. Use Dedicated Audio Extraction Software

Audacity

If you extract audio often, investing in dedicated software will save you time and give you more features. Tools like Audacity (free), Adobe Audition (pro-level), or Wondershare UniConverter (beginner-friendly) give you flexibility beyond just extracting audio.

What makes them powerful:

  • Trim, clean up, and enhance audio before saving.
  • Batch process multiple videos at once.
  • Support a wide variety of formats and bitrates.
  • Reduce background noise and boost clarity.

The trade-off is learning curve and cost. Free tools like Audacity are amazing but require some patience to learn. Paid software like Audition offers top-notch professional editing but comes with a monthly subscription.

If you’re serious about creating content or need polished audio, this is the best long-term solution.

4. Extract Music from Video on Mobile (iOS & Android)

Not everyone wants to sit at a computer to extract audio. Sometimes you just want to grab a quick sound from a social media video right on your phone. That’s where mobile apps come in handy.

Best apps to try:

  • iOS: Audio Converter, GarageBand.
  • Android: Timbre, MP3 Video Converter.

How it usually works: Import your video into the app, choose “Extract Audio,” and save it. Some apps even let you trim, merge, or convert the file format directly on your phone.

The best part? You can share the audio file instantly through messaging apps or upload it to your music library without needing a laptop.

This method is perfect for TikTok sounds, Instagram reels, or any quick clip you want to save on the go.

5. Extract Music Using Video Editing Software

If you’re already working with video editing software like Adobe Premiere Pro, Final Cut Pro, or iMovie, then extracting audio is a breeze. This method is particularly useful for content creators who edit regularly.

How creators do it:

  • Import your video into the editor.
  • Right-click the video and select “Detach Audio” or “Extract Audio.”
  • Delete the video track if you don’t need it.
  • Export the audio as MP3, WAV, or another preferred format.

What makes this method shine is flexibility. You can remove background noise, cut out unwanted sections, or combine the audio with other tracks. If you’re making YouTube content, podcasts, or even remixing, this workflow is a game-changer.

6. Use Command-Line Tools (Advanced Method)

For tech-savvy users, command-line tools like FFmpeg are unbeatable. FFmpeg is free, open-source, and incredibly powerful — the only catch is learning a few commands.

Example command:

ffmpeg -i inputvideo.mp4 -q:a 0 -map a outputaudio.mp3

This simple line of code tells FFmpeg to grab the audio track from your video and save it as an MP3. You can change formats, bitrates, or even extract specific sections with more advanced commands.

Why advanced users love it:

  • Lightning-fast processing.
  • Supports every format you can imagine.
  • Perfect for automation and batch processing.

Pro tip: Don’t be intimidated by the command line. Once you’ve used it a couple of times, it’s faster than any graphical tool.

Additional Tips for Better Audio Extraction

  • Pick the right format: MP3 is ideal for everyday listening, but WAV or FLAC is better for high-fidelity needs.
  • Mind the bitrate: Choose 320kbps for crisp quality. Lower settings save space but lose clarity.
  • Test before saving: Always play back your file to check for glitches or low volume.
  • Stay legal: Extracting audio for personal use is usually fine, but sharing or distributing copyrighted music can get you in trouble. Always respect copyright.

Conclusion: Choose the Best Way to Extract Music from Video

There you have it — six genius ways to extract music from video instantly. From quick and free online converters to advanced tools like FFmpeg, you’ve got plenty of options at your fingertips.

If you just need something fast, go with an online tool or VLC. If you’re a creator who wants polished sound, editing software or professional programs will give you better results. And if you’re the techy type who loves control, FFmpeg is your ultimate weapon.

The point is: you don’t have to let that amazing soundtrack slip away. Pick the method that fits your needs, save the music, and enjoy it anytime, anywhere.

Find More: Boost Your Sales With SEO Services

FAQs

1. How do I extract music from a video for free?

You can use free online converters, VLC Media Player, or mobile apps like Timbre. These are completely free and beginner-friendly.

2. What’s the best app to extract audio from video?

For mobile, Timbre (Android) and Audio Converter (iOS) are excellent. For desktop, VLC and Audacity are the top free choices.

3. Can I extract music without losing quality?

Yes. Tools like Audacity or FFmpeg let you save in lossless formats like WAV or FLAC, ensuring no compression.

4. Is it legal to extract music from YouTube videos?

It depends on your purpose. For personal use, it’s usually fine. But uploading or distributing copyrighted audio without permission is against the law.

5. Which format is best when saving extracted audio?

MP3 is the most widely supported, but WAV and FLAC give you better quality if you’re picky about sound.

6. Can I extract only part of the audio from a video?

Yes! VLC, Audacity, and most editing software let you trim the audio before exporting.

Tags:
7 Must-Try M4V to MP4 Converters That Actually Work in 2025

7 Must-Try M4V to MP4 Converters That Actually Work in 2025

m4v to mp4 Converters

Introduction

M4V to MP4 might sound like a small technical detail, but if you’ve ever struggled to play an M4V file on your phone, TV, or even share it with friends, you know how frustrating it can be. MP4 is one of the most widely supported video formats in the world, and converting your M4V files into MP4 makes life a whole lot easier. It means fewer playback errors, smoother sharing, and no annoying compatibility issues. If you’ve been searching for a reliable M4V to MP4 converter, you’ve probably noticed the huge number of tools available—and it can be confusing to know which ones are worth your time.

That’s where this guide comes in. I’ve gathered the 7 best M4V to MP4 converters in 2025 that actually work. These aren’t just random picks; they’re tried-and-tested tools that help you convert without stress. Along the way, I’ll also share practical tips on how to convert M4V to MP4 efficiently, what to look for when choosing a converter, and how to avoid the most common mistakes people make when converting videos.

Find More: 6 Free MOV to MP3 Converters You’ll Wish You Knew Earlier

7 Must-Try M4V to MP4 Converters That Actually Work in 2025

1. HandBrake (Free & Open-Source)

HandBrake

Key Features:

  • Completely free and open-source
  • Supports M4V, MP4, and many other formats
  • Advanced settings for video quality and compression
  • Works on Windows, macOS, and Linux

Pros: Reliable, free, customizable, and used by video enthusiasts worldwide.
Cons: Can be overwhelming for beginners with too many settings.
Best For: People who don’t mind learning a little to get the best results.

HandBrake is a classic for a reason. If you like control over bitrate, resolution, and codecs, this is the perfect choice. Plus, being open-source means it’s updated regularly by a passionate community.

2. VLC Media Player (Free)

VLC Media Player

Key Features:

  • Plays almost any video format
  • Built-in M4V to MP4 converter
  • Lightweight and easy to use
  • Runs on almost any device

Pros: Free, no ads, works on all platforms.
Cons: Conversion speed isn’t the fastest.
Best For: Quick, no-fuss conversions.

VLC isn’t just a player—it’s also a surprisingly effective converter. If you already have it installed, you don’t need to download anything else. Just open your M4V file and export it to MP4.

3. Wondershare UniConverter (Paid with Free Trial)

Wondershare UniConverter

Key Features:

  • High-speed conversions without quality loss
  • Supports over 1,000 video formats
  • Batch conversion + editing tools
  • DVD burning and screen recording features

Pros: Very fast, modern interface, extra editing features.
Cons: Paid after the free trial.
Best For: Professionals or anyone converting videos regularly.

Wondershare UniConverter is polished and professional. It’s especially useful if you work with videos every day because it not only converts but also compresses and edits.

4. Movavi Video Converter (Paid with Free Trial)

Movavi Video Converter

Key Features:

  • Simple drag-and-drop interface
  • High-quality output
  • Compresses large video files
  • Includes editing features like trimming and merging

Pros: Beginner-friendly, reliable results, sleek interface.
Cons: Limited features on the free trial.
Best For: Beginners who want a straightforward experience.

Movavi is great if you want to get from M4V to MP4 in just a couple of clicks without worrying about advanced settings.

5. Freemake Video Converter (Free with Limitations)

Freemake Audio Converter

Key Features:

  • Easy-to-use interface
  • Converts M4V to MP4 and many other formats
  • Supports direct uploads to YouTube
  • Works on Windows PCs

Pros: Great for casual users, simple setup, friendly UI.
Cons: Free version adds a watermark.
Best For: Casual users who don’t mind a watermark.

Freemake is a solid beginner’s choice. The watermark in the free version can be a dealbreaker, but if that doesn’t bother you, it’s fast and reliable.

6. OnlineConvert (Free Online Tool)

OnlineConvert

Key Features:

  • No software installation required
  • Works directly in your browser
  • Multiple output format options
  • Quick and accessible on any device

Pros: Convenient, accessible from anywhere.
Cons: Limited by internet speed and file size.
Best For: Quick, one-time conversions.

If you’re on a friend’s laptop or don’t want to install software, OnlineConvert is a lifesaver. Just drag your file, hit convert, and you’re done.

7. CloudConvert (Free & Paid Options)

CloudConvert

Key Features:

  • Cloud-based, no downloads
  • Integrates with Google Drive & Dropbox
  • Supports batch conversion
  • Secure and privacy-focused

Pros: Easy cloud integration, great for larger projects.
Cons: Free version has daily limits.
Best For: People who use cloud storage regularly.

CloudConvert is perfect if you already rely on cloud services. It saves you from cluttering your hard drive with huge video files.

How to Choose the Best M4V to MP4 Converter

When you’re deciding on the best M4V to MP4 converter, think about these factors:

  • Speed: If you’re converting big files, speed matters.
  • Quality: Some tools compress too much and reduce clarity.
  • Ease of Use: Do you prefer drag-and-drop simplicity or advanced control?
  • Cost: Free tools work for casual needs, but paid ones are better for heavy use.
  • Platform: Make sure the tool runs on your operating system.

Online vs. Offline Tools: Which One Should You Use?

  • Online Tools: Great for quick, occasional conversions. Perfect if you just want to M4V convert to MP4 once in a while or if you’re using a device without much storage.
  • Offline Tools: Best for frequent or large file conversions. They’re faster, more reliable, and not dependent on internet speed. Ideal for people who work with video daily.

Step-by-Step Guide: How to Convert M4V to MP4 (With Any Tool)

Here’s a simple workflow you can follow with almost any converter:

  1. Import Your M4V File – Upload it into the software or website.
  2. Select MP4 as the Output Format – Look for MP4 in the output options.
  3. Adjust Settings (Optional) – Choose resolution, bitrate, or compression level depending on your needs.
  4. Start Conversion – Click the convert button and wait for the process to finish.
  5. Save & Enjoy – Download the file and play it on any device.

Extra Tips for a Smooth Conversion

  • Always check if your M4V file is DRM-protected before converting.
  • If you want smaller file sizes, lower the resolution or bitrate.
  • For the highest quality, choose tools like Wondershare or Movavi.
  • Keep backups of your original files just in case something goes wrong.

Conclusion

We’ve explored 7 tools that can reliably convert M4V to MP4 in 2025. From powerful free options like HandBrake and VLC to professional-grade software like Wondershare UniConverter and Movavi, there’s truly something here for everyone. If you only need a quick fix, OnlineConvert or CloudConvert will do the job. But if you want something long-term, HandBrake or Wondershare is worth your time.

The bottom line? Don’t let file formats get in the way of enjoying your videos. Pick the tool that suits your style, whether you’re a casual viewer or a professional editor, and start converting your M4V files to MP4 today.

Find More: Boost Your Sales With SEO Services

FAQs

1. Is converting M4V to MP4 legal?

Yes, as long as the file isn’t DRM-protected (like movies bought from iTunes). For personal videos or DRM-free files, it’s totally fine.

2. Will converting M4V to MP4 reduce video quality?

Not necessarily. Tools like Wondershare and Movavi preserve quality. But with free or online converters, you might lose a little clarity.

3. Can I convert M4V to MP4 for free?

Absolutely. VLC, HandBrake, and some online tools let you do it for free with no hidden fees.

4. What’s the fastest way to convert M4V to MP4 online?

CloudConvert and OnlineConvert are fast choices, though your internet connection speed plays a big role.

5. Do I need special software to convert M4V files from iTunes?

Yes, if they’re DRM-protected. You’ll need specific software like TunesKit DRM Media Converter to handle those.

6. Which converter works best on Mac?

HandBrake and Movavi are excellent for macOS users.

7. Which converter is safest for large files?

Offline tools like Wondershare or HandBrake are better since online tools often have size limits.

Tags:
Emerging Search Tools and the Marketer’s Next Move

Emerging Search Tools and the Marketer’s Next Move

Search Tools

The online world is evolving at unprecedented speeds, redefining how users come across brands, products, and content. Traditional Web Search Marketing remains possible but no longer the exclusive path to be viewed and interacted with. Emerging chatbots crafted with artificial intelligence and social media sites have created new discovery protocols, and companies have to embrace playbooks with sophisticated search, dialogue, and community convergence.

The Changing Face of Search

For years, search engines such as Google dominated user access to information. Today, the shopper no longer confines discovery to typed requests in search bars. AI chatbots fueled by generative AI are turning into “answer engines” that return answers to questions posed in natural language in an instant. Social media such as TikTok, Instagram, and YouTube are turning into discovery platforms in their own right, particularly among younger demographics that use these platforms as product suggestion sites, tutorials, and reviews.

This shift requires that companies look over the horizon at keyword placements themselves. Rather, they must know where intent, discussion, and visual storytelling come together on the platforms on which people spend most of their online life.

The Future for Brands: How Discovery Changes the Role of AI Chatbots

The capabilities of AI-powered chatbots like ChatGPT, Gemini, and Microsoft grow stronger with each passing day. Rather than having to click on several links from a search page, customers are given synthesized, natural language answers within a matter of seconds. This not only revolutionizes the consumption of information but also how brands need to position themselves.

To thrive in such a landscape, businesses need to:

  • Develop content that is readable, concise, and context-specific so it can be easily integrated into AI-created responses.
  • Invest in authority signals like expert-oriented content, case studies, and credible sources that will be easier for AI tools to reference.
  • Strategy in terms of “visibility beyond links,” or getting cited and gaining brand visibility in credible sets being inputted into AI.
  • AI chatbots are a move away from click optimization to answer optimization—a transition that revolutionizes search marketing practices.

Social Media Sites as Search Options

Another acute shift is that social sites are becoming discovery sites. TikTok, for example, is becoming a go-to destination for Gen Z consumers to search for “best restaurants” or “how-to” ideas on the platform. Instagram and YouTube are also visually-led navigators where individuals are looking for real-time, interactive, and connected content.

For marketers, this is about welcoming solutions that meet users where they’re searching. That is:

  • Keyword tagging of video content with keywords, captions, and hashtags that reflect natural search queries.
  • Community building through real participation in comments and enabling two-way conversations.
  • Influencer partnerships with authority leaders in the community niches.

Whereas traditional SEO is based on algorithms and ranking systems, success in social search is based on authenticity, creativity, and engagement.

The emergence of these tools is one fundamental fact: cached strategies are no longer effective. Companies who bet on search engines only won’t cut it, or lose business users who find brands in chatbots or social networks before searching engines. Those emphasizing solely social content, conversely, will overlook intent-based search.

The new playbook for marketing needs to:

  • Unite Channels – Integrate traditional SEO, chatbot optimization, and social discovery strategies into a single platform.
  • Prioritize User Intent – Answer actual questions in natural language, whether blog articles, FAQs, or brief video.
  • Measure Beyond Clicks – Monitor engagement, mentions, and brand sentiment, not web traffic.
  • Invest in Adaptability – Accept that search tools will keep getting better, and strategies must adapt in tandem.

Future digital discovery is hybrid, blending search engines, AI chatbots, and social spaces. For brands, this implies diversification of presence, fluid content forms, and in-graining authenticity in the heart of messages.

Ultimately, the victors won’t be those hanging onto tried-and-true formulas. But instead, those who will take on nimble, multi-channel strategies. Emerging search technologies don’t make classic web search marketing obsolete—instead, they magnify it. By creating agile playbooks, marketers can capture attention wherever and whenever today’s consumer prefers to search.