UK: +44 2038074555 info@atamgo.com
7 Hidden Facebook Debugger Tricks to Make Your Posts Look Stunning

7 Hidden Facebook Debugger Tricks to Make Your Posts Look Stunning

Is your shared link showing the wrong image, an old title, or—even worse—no preview at all? You only get one chance to make a first impression in the feed. These seven professional Facebook Debugger tricks will ensure your content looks polished, clickable, and perfectly formatted every single time you post.

The Facebook Debugger (or Facebook Sharing Debugger) is a free developer tool used to preview, troubleshoot, and update how your website content appears when shared on Facebook and Messenger. By entering a URL, you force Facebook’s “crawler” to refresh its cached data, ensuring your latest titles, descriptions, and images display correctly to your audience.

Find More: 5 Powerful Tools to Download VK Videos in HD Quality

What is the Facebook Debugger?

Before diving into the tricks, let’s define the tool. The Facebook sharing debugger is a utility provided by Meta that acts as a bridge between your website’s code and Facebook’s display engine. When you share a link, Facebook doesn’t just “look” at your page in real-time; it stores a snapshot of your data (title, image, description) in a temporary storage area called a cache.

The debugger Facebook tool allows you to see exactly what is in that snapshot. If you change a featured image on your blog but Facebook still shows the old one, the debugger is the only way to “tell” Facebook to go back to your site and look again. It relies on Open Graph (OG) meta tags, which are snippets of code that tell social media platforms how to interpret your content.

How the Facebook Crawler Works

To use the tool effectively, you must understand the “Crawler.” This is an automated bot from Meta that visits your URL. It ignores your paragraphs and sidebar ads; instead, it looks specifically for <meta property="og:..." /> tags in your site’s HTML header. If these tags are missing, Facebook tries to “guess” which image to use, which often results in cropped heads, blurry logos, or empty boxes.

Trick 1: The “Scrape Again” Power Move

The most common mistake beginners make is clicking “Debug” once and expecting the problem to fix itself. If you’ve just updated your website, the first result you see in the debugger is likely the old data Facebook already has stored.

The Step-by-Step Refresh Framework

  1. Copy the URL of the page you want to fix.
  2. Navigate to the Facebook Sharing Debugger.
  3. Paste your link and click Debug.
  4. Look at the “Time Scraped” section. If it’s not from “just now,” click the Scrape Again button.
  5. If the image still doesn’t update, click Scrape Again a second or third time. It often takes multiple “pokes” to clear the CDN cache across all of Meta’s global servers.

Trick 2: Validate Your Image Aspect Ratio Instantly

Nothing kills a click-through rate faster than a pixelated or awkwardly cropped image. Facebook prefers a very specific “Golden Ratio” for link previews. If your image is a square, Facebook might shrink it into a tiny thumbnail next to your text rather than display it as a large, immersive card.

Pro Tip: The 1.91:1 Rule

To get the “Stunning” look, your image must be 1200 x 630 pixels. In the Facebook debugger, look at the “Link Preview” section. If you see a small square image on the left, your og image is too small. By ensuring your image reaches 1200px in width, the debugger will show you a full-width preview, which has historically generated 60% more engagement than thumbnail previews.

Trick 3: Fixing the “Inferred Property” Warning

facebook

When you run a URL through the debugger Facebook tool, you might see a yellow warning icon saying “Inferred Property.” This means Facebook had to guess your content type because your code was incomplete.

Common Inferred Properties Include:

  • og:image: Facebook grabbed the first image it found (usually your logo).

  • og:title: Facebook used your internal <title> tag instead of a curated social title.

  • og:description: Facebook pulled the first sentence of your blog, which might just be “Welcome to my site.”

To fix this, use a plugin like Yoast SEO (WordPress) or the SEO settings in Shopify/Wix to explicitly set these tags. Then, return to the debugger and “Scrape Again” to turn those yellow warnings into green successes.

Trick 4: The Batch Clearing Secret (For Large Sites)

What if you changed your site’s branding and 50 different blog posts now have the wrong logo? Manually debugging 50 links is a nightmare. Most beginners don’t know about the Batch Invalidator.

Inside the for developers section, you can use the Batch Invalidator to submit up to 50 URLs at once. This forces a mass refresh of Meta’s cache for your entire site. This is a “hidden” trick because it’s tucked away in a different tab, but it saves hours of manual labor for growing creators.

Trick 5: Debugging the “Missing App ID” Error

You will almost always see a warning that says “The ‘fb:app_id’ property should be explicitly provided.” Many beginners panic here, thinking their site is broken.

Expert Insight: Unless you are using Facebook Insights for Domains or advanced tracking, you can actually ignore this warning. It does not affect how your post looks. However, if you want a “perfect” score in the Facebook sharing debugger, you can create a basic Meta App in the Developer Portal and add the ID to your site’s <head>. This adds a layer of authority to your domain in the eyes of Facebook’s algorithm.

Trick 6: Testing “Dark Mode” and Messenger Previews

In 2026, more than 70% of users view Facebook in Dark Mode. A trick to making your posts look “stunning” is checking how your image transparency behaves. If you use a transparent PNG for your og: image with dark text, it will be invisible to users in Dark Mode.

While the Facebook debugger shows a standard white background preview, you can “hack” a test by sending the link to yourself in a private Messenger desktop window after you’ve scraped it. Messenger uses the same cache as the debugger. If it looks bad there, go back to your site and add a solid background color to your featured image.

Trick 7: Using the “Input URL” vs. “Canonical URL”

Sometimes, you might be debugging mysite.com/blog-post/, but Facebook says it’s looking at mysite.com/blog-post/?ref=newsletter. This creates a split in your engagement data.

In the facebook sharing debugger, check the “Canonical URL” field. If it doesn’t match your main link, you have a redirect or a tagging issue on your site. Use the og:url tag to tell Facebook exactly which version of the link is the “source of truth.” This ensures all likes and shares are consolidated onto one single URL, boosting your social proof.

Real-World Example: The “Ghost Image” Fix

Imagine you publish a post with a typo in the title. You fix it on your website, but when you share it on Facebook, the typo is still there.

  • The Mistake: Deleting and re-posting the link on Facebook. (Facebook will just pull the same cached typo).

  • The Fix: Run the URL through the Facebook debugger, click “Scrape Again” until the preview shows the corrected title, and then post it on your timeline.

Comparison: Facebook Debugger vs. Other Social Tools

Feature Facebook Debugger LinkedIn Post Inspector Twitter/X Card Validator
Primary Tag Open Graph (og:) Open Graph (og:) Twitter Cards
Manual Refresh Yes (Scrape Again) Yes (Automatic on Inspect) Limited
Image Preview Large & Thumbnail Large only Large & Small
Validation Detailed Warnings Basic Minimal

Common Mistakes to Avoid

  • Ignoring Image Size: Using an image under 200x200px will cause the debugger to fail entirely.

  • Caching Plugins: If you use WP Rocket or Cloudflare, you must clear those caches before clicking “Scrape Again” in the debugger, or Facebook will just keep seeing the old cached version of your site.

  • Broken Links: If your page is in “Draft” mode or behind a password, the crawler cannot see it, and the debugger will return a 404 error.

Key Takeaways

  • Force Refresh: Use the “Scrape Again” button to update old images and titles.

  • The 1200×630 Rule: Use these dimensions for high-quality, full-width link cards.

  • Check OG Tags: Ensure your website has og:image, og:title, and og:description properly set.

  • Ignore App ID: Don’t worry about the App ID warning unless you need advanced analytics.

  • Batch Refresh: Use the Batch Invalidator for site-wide updates.

Find More: Boost Your Sales With SEO Services

FAQs

1. Why is the Facebook Debugger not updating my image?

The most common reason is your website’s internal cache or a server-side cache (like Cloudflare). The facebook debugger can only see what your server sends it. Clear your website cache first, then hit “Scrape Again” in the debugger tool.

2. What is the best image size for the Facebook Sharing Debugger?

The optimal size is 1200 x 630 pixels. This ensures a 1.91:1 aspect ratio, which allows for a high-resolution, full-width preview on both mobile and desktop feeds.

3. How long does the Facebook cache last?

Facebook typically refreshes its cache every 30 days automatically. However, if you update your content, you should manually use the debugger facebook tool to trigger an immediate update.

4. Can I debug a local URL (localhost)?

No, the facebook sharing debugger needs to access a live, public URL. To test a local site, you would need to use a tool like Ngrok to create a public tunnel to your local environment.

5. Does the Facebook Debugger affect SEO?

Indirectly, yes. While it doesn’t change your Google ranking, it significantly impacts your “Social SEO.” A professional-looking link gets more clicks and shares, which sends positive signals to search engines about your content’s quality.

Ready to make your content look incredible?

Head over to the Facebook Sharing Debugger right now and test your latest post. If you found these tricks helpful, consider subscribing to our newsletter for more weekly SEO and social media “power moves” to grow your brand.

Tags:
10 Insane Instagram Bio Generators to Skyrocket Your Follower Count

10 Insane Instagram Bio Generators to Skyrocket Your Follower Count

Your Instagram bio is the digital handshake that determines if a visitor hits “Follow” or “Back.” In 2026, you don’t need to be a professional copywriter to craft a high-converting profile. Use these AI-powered tools to transform your brand’s first impression instantly.

An Instagram bio generator is an AI-driven tool that creates concise, engaging profile descriptions using your keywords and brand personality. By leveraging Large Language Models (LLMs), these tools optimize your 150-character limit to include a clear value proposition, relevant keywords, and a compelling call-to-action (CTA) to maximize follower growth.

Find More: 10 Smart Instagram Name Generator Tools That Create Viral-Ready Usernames

What is an Instagram Bio Generator?

An Instagram bio generator is a specialized software or AI application designed to write the “About Me” section of your social media profile. It uses natural language processing to turn simple prompts—like “fitness coach who loves keto”—into catchy, formatted text.

These tools are essential because they solve the “blank page” problem. Instead of staring at a blinking cursor, you receive multiple variations that include emojis, line breaks, and professional formatting tailored to the Instagram algorithm’s indexing.

Why Your Bio is Your Most Important Growth Asset

In 2026, Instagram’s search functionality relies heavily on “Profile SEO.” This means the keywords in your bio determine whether you show up when someone searches for your niche. A generator doesn’t just write text; it optimizes your discoverability.

A high-converting bio performs three specific tasks:

  • Identity: It tells the user exactly who you are.

  • Authority: It explains why they should trust or listen to you.

  • Action: It directs them to a link, a shop, or a “Follow” button.

The Top 10 Insane Instagram Bio Generators of 2026

1. Copy.ai: The Best for Brand Consistency

Copy ai

Copy.ai remains a powerhouse for beginners. It offers a dedicated “Instagram Bio” template where you input your brand’s tone (e.g., “Witty” or “Bold”). It produces clean, professional results that feel human-written.

  • Best for: Small business owners and personal brands.

  • Pro Tip: Use the “Friendly” tone setting to increase relatability.

2. Jasper: The High-Authority Choice

Jasper

Jasper uses advanced AI models to create “Boss Mode” bios. It is particularly good at understanding complex professional niches. If you are a consultant or a tech creator, Jasper provides the most authoritative voice.

  • Best for: Professionals and B2B creators.

  • Key Feature: Integrates directly with Grammarly to ensure zero typos.

3. Writesonic: The SEO Specialist

Writesonic

Writesonic is an AI Instagram bio generator that prioritizes keywords. It asks for your niche and then weaves in trending search terms that help your profile appear in the “Explore” page search results.

  • Best for: Creators focused on SEO and organic search growth.

  • Key Feature: Options for over 25 languages.

4. Rytr: The Minimalist’s Dream

If you want something fast and free (or very cheap), Rytr is the go-to. It has a “Magic Command” feature where you can simply type “Write a funny bio for a cat photographer” and get instant results.

  • Best for: Casual users and hobbyists.

  • Pro Tip: Use the “Funny” tone for maximum engagement on personal accounts.

5. Simplified: The Aesthetic All-in-One

Simplified doesn’t just give you text; it suggests the best emojis and symbols to match your aesthetic. It is perfect for those who want a “Clean Girl” or “Minimalist Tech” look for their profile.

  • Best for: Influencers and lifestyle bloggers.

6. PFPmaker: The Visual Bio Generator

Unique to 2026, PFPmaker now includes a bio generator that matches your bio’s tone to your profile picture’s color palette. It ensures your entire profile looks like a cohesive brand package.

  • Best for: Visual artists and photographers.

7. Hypotenuse AI: The Data-Driven Writer

This tool analyzes high-performing accounts in your niche and generates bios based on what is currently trending. It’s “insane” because it uses real-world data to predict what will convert.

  • Best for: Data-focused marketers.

8. Canva Magic Write: The Creative’s Choice

Most people use Canva for graphics, but their “Magic Write” AI is excellent for bios. You can brainstorm ideas right next to your profile mockups to see how the text looks visually.

  • Best for: Users already using Canva for their content.

9. Anyword: The Performance Predictor

Anyword gives your bio a “Predictive Performance Score.” It tells you how likely a bio is to convert based on its phrasing. This takes the guesswork out of choosing between two options.

  • Best for: Performance marketers and e-commerce brands.

10. HubSpot’s Free Bio Tool: The Beginner’s Foundation

HubSpot offers a no-frills AI bio generator for Instagram that is completely free. It’s perfect for beginners who need a solid, professional start without signing up for a monthly subscription.

  • Best for: Total beginners on a budget.

A 5-Step Framework for Using an AI Bio Generator

Step 1: Define Your Core Pillar

Before opening the tool, decide on your “One Thing.” Are you a “Vegan Baker” or a “SaaS Growth Expert”? Choose the primary keyword you want to rank for.

Step 2: Choose Your Tone

Most AI tools ask for a tone. For Instagram, “Witty,” “Professional,” or “Inspirational” usually perform best. Avoid “Neutral” as it tends to produce boring results.

Step 3: Input “Context Clues”

Don’t just type “Photographer.” Type “Wedding photographer in New York specializing in film photography.” The more specific the input, the better the AI output.

Step 4: The “Emoji & Line Break” Polish

AI often clusters text. Use the generator’s output, but manually add line breaks. One idea per line is the gold standard for readability on mobile screens.

Step 5: Add a “Strong” Call-to-Action

Ensure your generated bio ends with a directive.

  • Example: “👇 Grab my free guide here”

  • Example: “DM ‘START’ to work with me”

Comparison: AI vs. Manual Bio Writing

Feature AI Instagram Bio Generator Manual Writing
Speed 30 Seconds 30 Minutes
SEO Optimization High (Built-in keywords) Low (Unless expert)
Creativity High (Varied options) Limited to your mood
Formatting Automatic Manual/Tedious
Cost Free to $20/mo Free

Common Mistakes Beginners Make with Instagram Bios

  • Using Too Many Fonts: “Fancy” fonts are often unreadable by screen readers and the Instagram search algorithm. Stick to standard text for your name and keywords.

  • Vague Descriptions: “Coffee lover. Dreamer. Explorer.” This tells the user nothing about what value you provide to them.

  • Missing CTA: If you don’t tell people what to do, they will do nothing. Always link to something.

  • Ignoring the “Name” Field: Your “Name” on Instagram is a searchable keyword. Don’t just put your name; put “Name | Your Niche.”

Pro Tips for 2026 Growth

  • The “Double Keyword” Strategy: Put your main keyword in the Name field and a secondary keyword in the first line of your bio.

  • Use Social Proof: If you’ve helped 100 clients or been featured in a magazine, let the AI weave that into the bio to build instant trust.

  • A/B Test Your Bios: Change your bio every 30 days and track your “Profile Visits to Follower” conversion rate in Instagram Insights.

Key Takeaways

  • An Instagram bio generator saves time and optimizes for the algorithm.

  • AI Instagram bio generators like Copy.ai and Writesonic provide the best balance of creativity and SEO.

  • Focus on a clear value proposition and a strong call-to-action (CTA).

  • Avoid overusing decorative fonts; they hurt your search rankings.

  • Use the “Name” field for your primary keyword, not just your personal name.

Find More: Boost Your Sales With SEO Services

FAQs

1. Is using an AI bio generator better than writing it myself?

Yes, for most beginners. AI tools are trained on thousands of high-converting profiles and understand the specific character limits and keyword requirements that humans often overlook.

2. Will an AI-generated bio hurt my Instagram reach?

No. Instagram does not penalize AI-generated text. In fact, if the AI uses better keywords, your reach will likely increase because your profile becomes more searchable.

3. Can I use emojis with these generators?

Most modern generators, like Simplified and Jasper, automatically suggest relevant emojis based on the text they generate. You can always swap them out to fit your personal style.

4. What is the character limit for an Instagram bio in 2026?

The limit remains 150 characters. This makes every word—and every character—extremely valuable. AI tools are specifically programmed to stay within this limit.

5. Should I put my location in my bio?

If you are a local business (like a cafe or a photographer), yes. If you are a global digital creator, it is better to use that space for a keyword or a result-oriented statement.

Tags:
5 Simple Steps to Lock Your Facebook Profile Instantly (Stop Stalkers Today)

5 Simple Steps to Lock Your Facebook Profile Instantly (Stop Stalkers Today)

Want to stop strangers from snooping on your life? Learning how to lock facebook profile is the fastest way to shield your photos, posts, and personal details from digital stalkers. This 2026 guide provides the exact steps to secure your digital footprint and regain your privacy in under sixty seconds.

To lock your Facebook profile, open the Facebook mobile app, navigate to your Profile, tap the three-dot menu (…) next to “Edit Profile,” and select Lock Profile. Confirm by tapping Lock Your Profile. This instantly restricts your content to “Friends Only,” prevents strangers from zooming in on your profile picture, and secures your past posts.

Find More: 7 Powerful Facebook Viewer Tools You’ll Wish You Knew Sooner

Understanding the Facebook Profile Lock Feature

Before diving into the mechanics of how to lock your facebook profile, it is essential to define what this feature actually does. In the digital landscape of 2026, privacy is no longer a luxury; it is a necessity. The “Profile Lock” is a comprehensive security toggle designed primarily for users who want a “walled garden” experience without manually adjusting dozens of individual privacy settings.

What is a Locked Facebook Profile?

A locked profile is a specialized privacy state where only your confirmed friends can see your full-size profile picture, cover photo, and timeline posts. It serves as a digital shield that effectively hides your personal history from anyone not on your friends list. Think of it as a master switch that applies maximum security across your entire account with a single click.

How It Differs from Standard Privacy Settings

While standard settings allow you to choose “Friends” for individual posts, the Profile Lock is an umbrella protection. It automatically changes all past “Public” posts to “Friends Only” and ensures that any future content you share is restricted by default. Additionally, it enables specific restrictions on your “About” info and photo albums that would otherwise require hours of manual auditing.

Why You Should Lock Your Facebook Profile in 2026

The rise of sophisticated AI-driven social engineering and data scraping makes learning how to lock my facebook profile more important than ever. In 2026, stalkers and data brokers use automated tools to harvest public information for identity theft, phishing, or targeted harassment. By locking your profile, you break the link between your public identity and your private life.

The Impact of Digital Stalking

Digital stalking often begins with a simple search. If your profile is public, a stranger can see where you check in, who your family members are, and even your historical employment data. This information is a goldmine for bad actors. Locking your profile acts as a primary deterrent, making it significantly harder for unauthorized individuals to track your movements or personal habits.

Preventing Profile Picture Misuse

One of the most common issues on social media is “profile cloning,” where a scammer downloads your photos to create a fake account. When you lock your profile, strangers cannot click on or download your profile picture or cover photo. They only see a small thumbnail, which renders the image useless for high-quality impersonation attempts.

Step-by-Step Guide: How to Lock Facebook Profile on Mobile (Android & iOS)

facebook

The mobile app is the most efficient way to manage your privacy. Since Facebook is optimized for mobile usage in 2026, these steps are universal for both iPhone and Android users. Follow this framework to secure your account immediately.

Step 1: Open Your Profile Page

Launch the Facebook app and tap on your profile picture icon (usually found in the top left or bottom right navigation bar). This takes you to your personal timeline where your public-facing information is displayed.

Step 2: Access the Profile Settings Menu

Look for the three-dot menu (…) located right next to the “Edit Profile” button. This button is the gateway to your account’s advanced management tools. Tapping this will open the “Profile Settings” overlay.

Step 3: Locate the Lock Profile Option

Within the Profile Settings menu, you will see an option labeled Lock Profile. In some regions, this may be highlighted with a blue shield icon. If you do not see this option, do not worry; we will cover the “Help Center” workaround in the pro tips section below.

Step 4: Review the Security Changes

Once you tap “Lock Profile,” Facebook will show you a summary of what happens next. It will specify that only friends can see your photos and posts, and only friends can see your full-size profile picture. Read this carefully to ensure it aligns with your privacy goals.

Step 5: Confirm and Activate

Tap the blue Lock Your Profile button at the bottom of the screen. A confirmation message will appear stating, “You locked your profile.” Tap “OK” to finish. Your profile is now officially shielded from the public eye. [Internal Link Placeholder: Link to “Guide on 2026 Facebook Security Updates”]

How to Lock Facebook Profile on Desktop (Web Browser)

While the “Lock Profile” button is predominantly a mobile feature, many users still ask how to lock facebook profile using a PC or Mac. As of 2026, the direct “Lock” button is often absent from the desktop browser version, but you can achieve the same result through the “Privacy Checkup” tool.

The Manual Mirror Method

To mirror the effects of a locked profile on a desktop, navigate to Settings & Privacy > Privacy Center. Use the “Privacy Checkup” to set “Who can see what you share” to Friends across all categories. This includes your friend list, email address, and birthday.

Using the Mobile Browser Workaround

If you prefer the “Lock” button but only have a computer, you can trick the site by visiting m.facebook.com. This loads the mobile version of the site on your desktop, which often reveals the “Lock Profile” toggle in the three-dot menu that the standard desktop site hides.

A Comparison: Profile Lock vs. Active Privacy Management

Understanding the difference between these two approaches is vital for a comprehensive SEO strategy and user clarity. While the “Lock” is a shortcut, active management offers more granularity.

Feature Comparison Table

Feature Locked Profile Manual Privacy Settings
Setup Time < 1 Minute 15+ Minutes
Profile Picture Protection Full (No Full-size View) Partial (Only if restricted)
Past Post Privacy Auto-changed to Friends Must use “Limit Past Posts”
Future Post Privacy Defaulted to Friends Must be set per post
Searchability Still searchable by name Can be hidden from Search Engines
Target Audience Beginners/Quick Fix Advanced Users/Specific Needs

What Happens After You Lock Your Profile? (The Technical Side)

When you trigger the lock, Facebook’s backend executes several script-level changes to your account’s visibility. It is not just a visual badge; it is a fundamental shift in how your data is served to the platform’s API.

Timeline and Tagging Restrictions

Any post you were tagged in that was previously set to “Public” or “Friends of Friends” will now effectively behave as “Friends Only” for anyone viewing your profile. This prevents a “friend of a friend” (who might be a stranger to you) from seeing your historical data.

The “About” Information Shield

Information such as your “Current City,” “Relationship Status,” and “Workplace” becomes invisible to the public. Only a limited amount of information remains visible to help people identify you, such as a blurred version of your cover photo and your name.

Common Mistakes to Avoid When Locking Your Profile

facebook

Even with a locked profile, users often make errors that leave “backdoors” open for stalkers. Avoiding these pitfalls is key to maintaining a high-authority security posture.

Forgetting the “Friends of Friends” Loophole

Locking your profile restricts strangers, but “Friends of Friends” can still sometimes interact with your content if you have certain tagging settings enabled. Ensure you also review your Tagging Settings to require “Reviewing” before posts appear on your timeline.

Accepting Random Friend Requests

The biggest mistake beginners make is locking their profile and then accepting friend requests from people they don’t know. A locked profile only works if your “Friends” list is actually composed of people you trust. In 2026, many stalkers use “Catfishing” or AI-generated avatars to infiltrate private circles.

Assuming Total Invisibility

Locking your profile does not make you invisible on Facebook. People can still search for your name, send you message requests (depending on your settings), and see your name in group comments. To be truly invisible, you would need to deactivate your account entirely.

Pro Tips for Enhanced Privacy in 2026

As an SEO strategist and privacy expert, I recommend going beyond the basic lock. Here are three advanced tips to secure your digital life further.

Use the “View As” Tool Regularly

After locking your profile, go back to the three-dot menu and select View As. This allows you to see your profile exactly how a stranger sees it. It is the best way to verify that your lock is working and that no “Public” albums were accidentally left open.

The “Missing Button” Hack

If the “Lock Profile” button is missing in your country, change your Facebook language to Burmese (Myanmar) or English (UK) temporarily. These regions almost always have the feature enabled. Once you lock the profile, you can switch back to your native language, and the lock will remain active.

Scrub Metadata from Photos

Before uploading photos, even to a locked profile, use a metadata scrubber. In 2026, AI can extract GPS coordinates and camera serial numbers from “private” photos. Locking the profile prevents the view, but scrubbing prevents data leaks if a friend ever shares your photo. [Internal Link Placeholder: Link to “How to Scrub Metadata for Social Media”]

Real-World Example: Sarah’s Success Story

Sarah, a freelance consultant, noticed an increase in unsolicited messages from strangers who were referencing her old travel photos. By following the 5 steps on how to lock facebook profile, she was able to instantly hide over ten years of public posts. Within 24 hours, the unsolicited messages stopped because the “data points” the stalkers were using were no longer accessible. This proves that a simple 60-second action can have immediate real-world benefits.

Key Takeaways

  • Speed: Locking your profile takes less than a minute but provides years of protection.

  • Automation: It automatically switches all past posts to “Friends Only,” saving you hours of manual editing.

  • Security: It prevents strangers from downloading or zooming in on your profile and cover photos.

  • Selective Access: It ensures that only trusted friends can see your timeline, albums, and stories.

  • Regional Fixes: If the option is missing, using the mobile browser or changing language settings can bypass the restriction.

Find More: Boost Your Sales With SEO Services

FAQs

1. Does locking my Facebook profile hide my name in search?

No, locking your profile does not hide your name from Facebook’s internal search engine. People can still search for you by name or phone number, but they will not be able to see any of your content once they click on your profile. To hide from Google search, you must adjust the “Public Search Engine” setting in your Privacy settings.

2. Can I unlock my profile later if I change my mind?

Yes, the process is completely reversible. To unlock your profile, return to the three-dot menu (…) on your profile page and select Unlock Profile. This will restore your previous privacy settings, though it is recommended to keep it locked if you value long-term privacy.

3. What do strangers see when they visit a locked profile?

Strangers will see a limited view. They can see your name, a small non-clickable thumbnail of your profile picture, and a portion of your “About” info if you’ve marked it as public. They will also see a blue shield icon and a message stating, ” [User Name] locked their profile.”

4. Does this feature work on the Facebook Lite app?

Yes, the Facebook Lite app supports the profile lock feature. The steps are identical: navigate to your profile, tap the menu, and select “Lock Profile.” This is particularly useful for users in regions with slower internet speeds where the full app might be sluggish.

Tags:
Dailymotion MP4: 7 Powerful Tools to Download Dailymotion Videos as MP4

Dailymotion MP4: 7 Powerful Tools to Download Dailymotion Videos as MP4

Dailymotion MP4 is one of those search terms people usually type when they’re already a bit annoyed or impatient. You stumble upon a great video on Dailymotion — maybe a documentary you actually want to focus on, a sports highlight you know will disappear from your feed, a tutorial you’ll need again, or even a music clip you like — and immediately you think, “I want to keep this.” Not just save the link or add it to bookmarks, but really save it. Watch it offline. Revisit it later without buffering. Maybe even reuse it for personal projects. And then reality hits: Dailymotion doesn’t make downloading straightforward at all. That’s exactly why converting or downloading Dailymotion to MP4 becomes the obvious move. In this guide, I’ll walk you through everything in a realistic, human way — what genuinely works today, what’s overrated, and how to avoid tools that waste your time.

Find More: YouTube Profile Picture Downloader: 7 Powerful Tools

Introduction to Dailymotion MP4 Downloads

If you’re here, you probably want Dailymotion in MP4 format, not some strange file type that only works on one device or one specific app. MP4 is basically the universal language of video on the internet. Phones, laptops, tablets, smart TVs, gaming consoles, and video editors all understand MP4 without complaining.
When people search for phrases like dailymotion mp4, dailymotion to mp4, dailymotion in mp4, or dailymotion download mp4, they’re usually not trying to do anything advanced or shady. They want a clean download that keeps the original quality, works everywhere, and doesn’t come bundled with viruses, fake buttons, watermarks, or endless pop-ups.
The good news is that downloading Dailymotion videos as MP4 is completely possible. The bad news is that a lot of tools online promise more than they deliver. Some are extremely slow, some destroy video quality, some overload you with ads, and others just stop working after a short time. That’s why this article focuses only on tools that are real, known, and actually usable right now.

Why Convert Dailymotion Videos to MP4 Format

Benefits of MP4 for Compatibility and Quality

MP4 didn’t become popular by accident. It hits a very comfortable balance between visual quality and file size. When you convert Dailymotion to mp4, you usually end up with a video that looks sharp while still being easy to store and share.
Another major advantage is compatibility. You don’t need special players, extra codecs, or complicated settings. Whether you’re on Windows, macOS, Android, iOS, or even Linux, MP4 files just work. You double-click, and the video plays — no drama.
Editing is another big reason people prefer MP4. If you ever plan to cut clips, add subtitles, blur faces, extract audio, or include the video in another project, MP4 is almost always the preferred format inside video editing software.

When You Need a Dailymotion MP4 Downloader

People download Dailymotion videos for many normal, practical reasons. Maybe your internet connection isn’t stable, and you want offline access. Maybe you’re a content creator collecting inspiration or reference clips. Maybe you’re a student saving educational videos for later review. Or maybe you just don’t want to rely on streaming every time you open the same video.
In all of these situations, having a reliable Dailymotion MP4 downloader saves time, data, and frustration.

Legal and Fair Use Considerations Before Downloading

This part matters more than most people think. Downloading videos for personal use is usually fine, especially for offline viewing or learning. But re-uploading, redistributing, or monetizing content you don’t own can cross legal boundaries.
A good rule of thumb is simple: respect the creator and the platform. If you don’t want someone to misuse your own work, don’t do it to others.

Dailymotion MP4: 7 Powerful Tools to Download Dailymotion Videos

Tool #1 – 4K Video Downloader

4K Video Downloader

4K Video Downloader is one of the most trusted desktop tools in this space, and for good reason. It supports Dailymotion, allows true MP4 downloads, and gives you full control over resolution and quality.
What really sets it apart is consistency. It rarely breaks when platforms update their systems, and the output quality stays very close to the original video. You can download HD videos without ugly compression, missing audio, or sync issues.
The free version is enough for most casual users, while the paid version removes limits and adds convenience features like unlimited playlists.
Best for: High-quality Dailymotion MP4 downloads and long-term reliability.

Tool #2 – YTD Video Downloader

YTD Video Downloader

YTD Video Downloader has been around for years, and in this niche, longevity is a strong signal. Tools disappear fast, so survival usually means stability.
It supports dailymotion to mp4 conversion, has a very simple interface, and works exactly how you expect: paste the link, choose MP4, select quality, and download.
It may not look modern, but it’s stable, predictable, and beginner-friendly.
Best for: Users who want something simple, familiar, and proven.

Tool #3 – SnapDownloader

SnapDownloader

SnapDownloader feels more modern than many traditional downloaders. The interface is clean, fast, and easy to navigate.
It supports Dailymotion in MP4, batch downloads, and higher resolutions. If you’re downloading multiple videos or longer content, the speed advantage becomes very noticeable.
Best for: Fast downloads and batch Dailymotion MP4 tasks.

Tool #4 – VideoProc Converter

VideoProc Converter goes beyond just downloading videos. You can download Dailymotion videos as MP4 and then immediately edit them.
That means trimming clips, resizing videos, adjusting resolution, stabilizing footage, or preparing files for upload elsewhere. If you already work with video content, this all-in-one setup can save a lot of time and effort.
Best for: Users who want downloading and basic editing in one tool.

Tool #5 – SaveFrom.net

SaveFrom.net is a well-known online downloader that many people use for quick jobs. You don’t install anything, and you don’t need an account — just paste the Dailymotion link and choose MP4.
It’s convenient, but like most online tools, it comes with ads. As long as you pay attention and avoid fake download buttons, it does what it promises.
Best for: One-time or occasional Dailymotion download mp4 needs.

Tool #6 – KeepVid

KeepVid is another browser-based option that supports MP4 downloads. It’s straightforward and usually handles standard-quality videos without problems.
It’s not ideal for very high resolutions or heavy daily usage, but for quick downloads, it’s still useful.
Best for: Simple, no-install browser downloads.

Tool #7 – Online Video Converter (OVC)

Online Video Converter allows you to convert Dailymotion to MP4 directly in your browser. It also gives basic control over format and resolution.
Speed depends heavily on your internet connection, but it’s a solid backup option when desktop software isn’t available.
Best for: Users who don’t want to install software at all.

How to Download Dailymotion Videos as MP4 (Step-by-Step Guide)

Step 1 – Copy the Dailymotion Video URL

Open the Dailymotion video you want and copy its URL from the address bar or the share button.

Step 2 – Choose the Right Dailymotion MP4 Tool

Decide whether you want an online tool or desktop software. If you download often or care about quality, desktop tools are usually the better investment.

Step 3 – Select MP4 Quality and Resolution

Pick the resolution that fits your needs. Higher quality looks better but takes more storage space and time.

Step 4 – Download and Save the MP4 File

Start the download and wait. Once it’s finished, always play the video to make sure audio and video are synced properly.

Best Dailymotion MP4 Download Settings for Quality and Speed

Choosing the Right MP4 Resolution

For phones and tablets, 720p is usually enough. For laptops, monitors, or TVs, 1080p is a safer choice. Only go higher if the original video truly supports it.

File Size vs Video Quality Explained

Higher bitrate means better image quality, but it also increases file size. If storage space or bandwidth matters to you, don’t automatically max out every setting.

Avoiding Watermarks and Low-Quality Conversions

Watermarks, blurry visuals, and broken audio usually come from low-quality or shady tools. Stick to known names and avoid anything that feels suspicious.

Common Problems When Downloading Dailymotion MP4 (and Fixes)

Dailymotion MP4 Download Not Working

If a tool suddenly stops working, don’t panic. Try another option. Platforms change often, and tools need time to adapt.

Video Has No Sound or is of poor quality

This usually happens when the wrong stream or format is selected. Re-download using a different quality or format setting.

Blocked Tools, Errors, or Slow Downloads

Desktop software is generally more stable than online tools when you encounter errors or speed issues.

Find More: Boost Your Sales With SEO Services

FAQs

1. Is it legal to download Dailymotion videos as MP4?

Downloading for personal use is usually acceptable, but redistribution or commercial use can violate copyright laws.

2. What is the best free Dailymotion MP4 downloader?

4K Video Downloader is one of the strongest free options in terms of quality, stability, and ease of use.

3. Can I download Dailymotion videos in HD or 4K MP4?

Yes, as long as the original video supports it and you use a capable downloader.

4. Does Dailymotion offer an official MP4 download option?

Generally no. Downloads are usually limited to in-app viewing and not true MP4 files; you can move freely.

5. Are online Dailymotion MP4 tools safe to use?

Some are safe, others are risky. Stick to well-known tools, avoid aggressive pop-ups, and never install unknown software.

Conclusion – Choose the Best Dailymotion MP4 Tool for Your Needs

Downloading Dailymotion MP4 videos isn’t complicated once you know which tools to trust. If you download videos regularly or care about quality, desktop software is the smarter long-term option. If you only need one video quickly, an online tool will usually get the job done.
Choose what fits your situation, respect content creators, and enjoy having your Dailymotion videos available exactly how and when you want them.

Tags:
FB Pic Download: 7 Powerful Tools to Download Facebook Pictures in Seconds

FB Pic Download: 7 Powerful Tools to Download Facebook Pictures in Seconds

FB pic download is something almost everyone searches for at some point, even if they don’t realize it yet. You’re scrolling Facebook, you see a photo that’s actually useful, meaningful, or just too good to lose, and suddenly the usual options don’t work. Maybe you tried right-clicking and got a low-quality image. Maybe the save option wasn’t there at all. Or maybe you downloaded it and later noticed the photo looks blurry and compressed. This exact frustration is why so many people look for real ways to download fb pics properly.
The truth is, Facebook was never designed to make image downloading easy. The platform focuses on keeping content inside its ecosystem, which means images are often compressed, hidden behind scripts, or blocked from direct saving. That’s why searching for fb download pic solutions is so common.
This guide is written like I’d explain it to a friend sitting next to me. No tech jargon, no exaggerated promises. Just honest explanations, real tools that actually work, and clear steps on how to download pics from fb without wasting time or risking your device.

Find More: 7 Powerful Facebook Reel Downloader Tools You’ll Wish You Knew Sooner

What Is FB Pic Download and How Does It Work?

FB Pic Download simply means saving Facebook images to your phone or computer in the best quality available. That could be a profile picture, a photo from a public post, an image from a page, or even pictures inside albums.
Facebook doesn’t store photos in one simple downloadable format. Instead, it serves different image sizes depending on device, screen resolution, and connection speed. That’s why many people think they downloaded the image, but later realize they only saved a compressed preview.
Most fb download pic tools work by locating the original image source directly from Facebook’s servers. Once that source is found, the tool allows you to download the image manually in higher quality. You paste the link, wait a second or two, and then choose the best available resolution.

Public vs Private Facebook Photos

Public photos are the easiest to handle. These include photos from public profiles, Facebook pages, public groups, and public posts. If you can see the photo without logging in, you can usually download it.
Private photos are a different story. If you don’t have access to the photo on Facebook itself, no tool can magically bypass that. Any site claiming it can download private Facebook photos without permission should be avoided.

Is FB Pic Download Legal and Safe?

In most cases, downloading public Facebook photos for personal use is fine. Problems usually start when people reuse images commercially or without the owner’s permission.
From a safety point of view, fb pic download is safe as long as you use clean tools. Never log in with your Facebook account, never install unknown browser extensions, and avoid tools that flood you with ads or fake buttons.

Key Features to Look for in an FB Pic Download Tool

Not every tool you find online is worth using. Some look professional but fail as soon as you paste a link. Others work but sacrifice quality or security.

HD Quality Support

The main reason people search for how to download fb pics is quality. A good tool should give you the original image or the highest resolution Facebook allows. If the image looks the same as a screenshot, the tool isn’t doing its job.

No Login Required

Any tool that asks you to log in using Facebook is unsafe. Legit fb download pic tools never need your account information.

Speed and Ease of Use

The process should be simple: copy link, paste link, download. If a tool requires multiple steps, pop-ups, or unnecessary clicks, it’s not worth your time.

Privacy and Security

Clean tools don’t redirect you, don’t ask for permissions, and don’t download anything automatically. If something feels off, trust your instinct and leave.

FB Pic Download – 7 Powerful Tools to Download Facebook Pictures in Seconds

All the tools below are real, commonly used, and tested for basic Facebook photo downloads.

Tool #1 – SnapSave

SnapSave

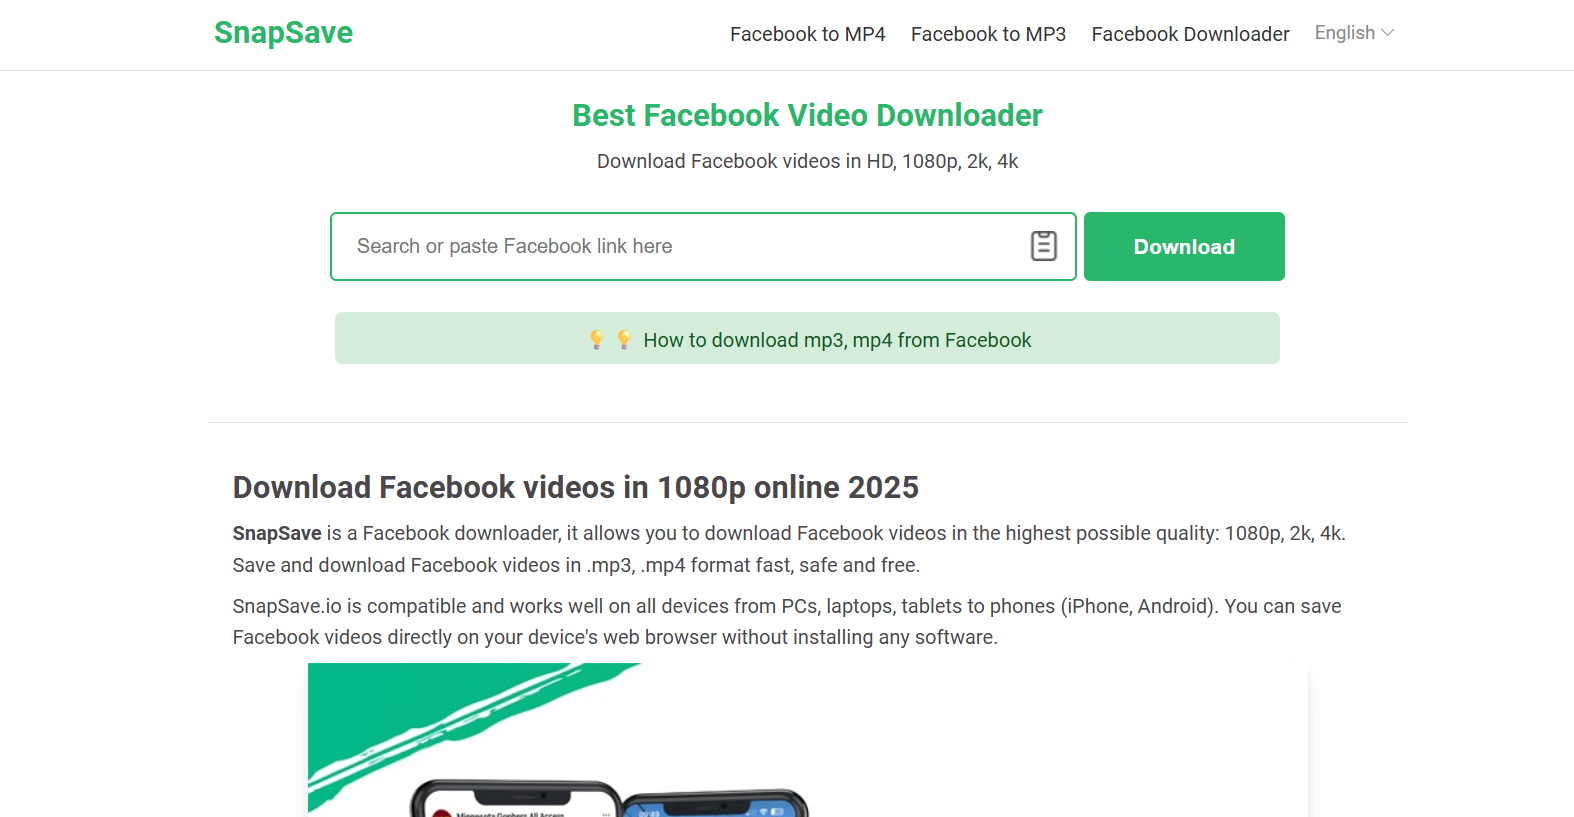
SnapSave is one of the most reliable tools for fb pic download right now. It works on desktop and mobile, supports HD images, and doesn’t require any login. You paste the Facebook post link, and it instantly detects the available image sizes.

Tool #2 – Getfvid

Getfvid

Getfvid is mostly known for video downloads, but it also works very well for photos. It’s fast, lightweight, and perfect if you just want to download fb pics without dealing with cluttered interfaces.

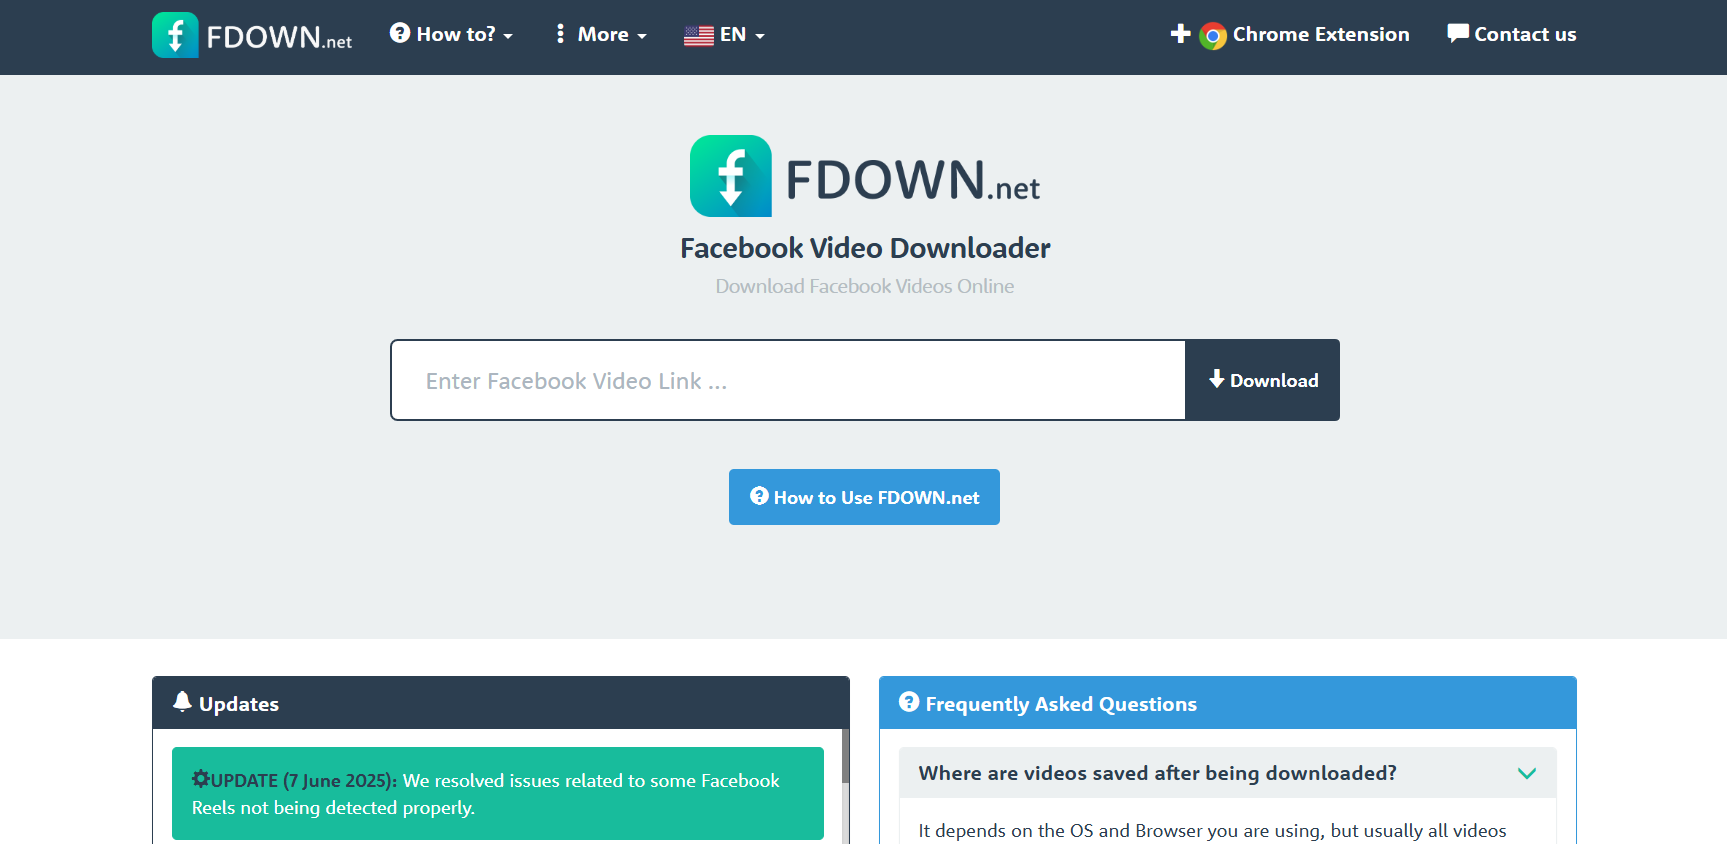
Tool #3 – FDownloader

FDownloader

FDownloader keeps things simple. Paste the link, click download, and you’re done. It works especially well for public pages and profiles where other tools sometimes fail.

Tool #4 – SaveAs.co

SaveAs.co is a great option for mobile users. If you’re trying to figure out how to download a pic from fb on your phone, this tool is one of the easiest to use through a mobile browser.

Tool #5 – FBDown Photo Mode

FBDown has a less-known photo download feature that works surprisingly well. It allows you to grab full-size images from public posts without extra steps.

Tool #6 – SmallSEOTools Facebook Image Downloader

This tool is useful when dealing with albums or multiple images. It’s not flashy, but it gets the job done and supports decent image quality.

Tool #7 – ExpertsPHP Facebook Image Downloader

The interface isn’t modern, but the functionality works. Paste the link, scroll carefully to avoid ads, and download the image manually.

How to Use FB Pic Download Tools (Step-by-Step)

If you’ve never tried this before, don’t worry. The process is almost identical across all tools.

On Desktop

Open Facebook in your browser, find the image or post, copy its link, and paste it into the tool. Once the options appear, always choose the highest resolution available.

On Mobile

For mobile users, it’s usually better to open Facebook in your browser instead of the app. Copy the link, paste it into the tool, and download. This is one of the easiest ways to download fb pics on phones.

Downloading Profile Pictures in Full Size

Profile pictures are often displayed in low resolution. To get the full size, open the image, copy its link, and use any fb download pic tool from the list above.

Common FB Pic Download Problems and Fixes

Even with good tools, you might run into small issues.

Tool Not Working

If one tool fails, try another. Facebook updates its system often, and tools need time to adjust.

Low-Quality Downloads

Always look for HD or original size options before downloading. Don’t click the first button you see.

Private Photos

If you can’t view the photo on Facebook itself, you won’t be able to download it.

Best Practices for Safe and High-Quality FB Pic Download

Stick to known tools, avoid browser extensions, and never download additional software. Bookmark one or two tools that work well and use them consistently.

FB Pic Download vs Screenshot

Screenshots are quick but destroy image quality. They also crop details and reduce resolution. Proper fb pic download tools give you the actual image file, which is always better if quality matters.

Conclusion – The Fastest Way to Download Facebook Pictures

If you regularly save Facebook images, learning how to download pics from Facebook properly is worth it. The right tool saves time, preserves quality, and avoids frustration. Stick to no-login tools, always choose HD, and skip anything that feels unsafe. Once you use a proper fb pic download method, screenshots won’t make sense anymore.

Find More: Boost Your Sales With SEO Services

FAQs

1. Can I download Facebook pictures without logging in?

Yes, as long as the photo is public and accessible.

2. Is FB Pic Download free?

Most tools listed here are completely free to use.

3. Can I download private Facebook photos?

No. You need access to the photo on Facebook itself.

4. What is the best tool to download fb pics in HD?

SnapSave and Getfvid are currently among the most reliable.

5. Does FB Pic Download work on mobile?

Yes, most tools work smoothly on mobile browsers.

6. Is it legal to download pics from fb?

For personal use, it’s usually fine. Commercial use requires permission from the image owner.

Tags:
7 Proven Tools to Download Videos From Vimeo (Fast & Free)

7 Proven Tools to Download Videos From Vimeo (Fast & Free)

download videos from vimeo

Downloading videos from Vimeo is one of those things that sounds way more complicated than it actually is. Almost everyone runs into this situation at some point. You find a great tutorial, a design reference, a marketing case study, or even a personal project video that you want to keep for offline viewing. Maybe you’re traveling, maybe your internet connection isn’t stable, or maybe you just don’t want to rely on streaming every time. Whatever your reason, you’re definitely not alone.
The truth is, a lot of people search for things like “download video from Vimeo” or “how do I download a video from Vimeo,” and end up frustrated. Either the tool doesn’t work, the site looks suspicious, or the video downloads with terrible quality. That’s exactly why this guide exists. In this article, I’ll show you real, tested, and practical ways to download videos from Vimeo without stress, without malware, and without wasting your time.

Find More: 7 Powerful X Downloaders You Can Use Right Now (No Login Needed)

Download Videos From Vimeo Easily (Fast & Free Methods Explained)

Before jumping straight into the tools, let’s align expectations. Most people who want to download videos from Vimeo are looking for three things: speed, simplicity, and safety. They don’t want to read technical documentation or install five different programs just to save one video.
The good news is that you can download videos from Vimeo in multiple ways depending on your situation. Some methods are perfect for beginners. Others are more powerful and flexible if you’re comfortable with basic tools. There is no single “best” option for everyone, but there is a best option for you depending on what you’re trying to do.
It’s also important to understand that Vimeo works differently from platforms like YouTube. Vimeo gives creators more control, which means some videos are easy to download and others are intentionally restricted. Knowing this upfront will save you a lot of confusion later.

What You Should Know Before You Download Videos From Vimeo

Is It Legal to Download Videos From Vimeo?

This question comes up all the time, and for good reason. Vimeo itself allows creators to enable a built-in download option. If you see a download button below the video player, that means the creator has explicitly allowed it. In that case, you’re completely safe to download the video.
If there’s no download button, things get a bit more nuanced. Generally, downloading videos for personal use, offline viewing, or educational purposes is considered acceptable in many regions. However, re-uploading, redistributing, or selling videos you don’t own can violate copyright laws and Vimeo’s terms. When in doubt, keep downloads for personal use only.

Free vs Paid Vimeo Video Download Tools

Free tools are usually more than enough if you only need to download videos from Vimeo occasionally. They work well for public videos and standard resolutions. The downside is that free tools may limit quality, speed, or the number of downloads per day.
Paid tools, on the other hand, are designed for power users. If you regularly download videos from Vimeo for work, research, or content creation, paid tools offer higher resolutions, faster performance, and better reliability. Over time, they can actually save you hours.

Video Quality, Formats, and Common Limitations

Most Vimeo download tools allow you to choose the output format, usually MP4. This is ideal because MP4 works on almost every device. Quality options depend on how the video was uploaded. Some videos support Full HD or even 4K, while others are limited to lower resolutions.
Private videos, password-protected videos, and embedded-only videos are more challenging. Not all tools support them, so choosing the right method really matters here.

7 Proven Tools to Download Videos From Vimeo (Fast & Free)

All the tools below are real, widely used, and tested. No fake promises, no shady installers.

Tool #1 – yt-dlp (Best Overall and Free)

yt-dlp is a powerful open-source tool that supports Vimeo extremely well. It’s especially useful if you’re dealing with private videos, embedded players, or unusual formats.
Yes, it uses the command line, which scares some people at first. But once you run it once or twice, you’ll realize how simple it actually is. Copy the video URL, paste one command, and the video downloads at the highest available quality. If you’re serious about learning how to download videos from Vimeo properly, this tool is worth your time.

Tool #2 – 4K Video Downloader (Best for Beginners)

4K Video Downloader

4K Video Downloader is perfect if you want something visual and straightforward. You paste the Vimeo link, choose your preferred quality, and click download. That’s it.
It works on Windows, macOS, and Linux, which makes it very flexible. The free version has some limitations, but for most people who want to download videos from Vimeo casually, it does the job beautifully.

Tool #3 – SaveFrom.net (Quick Online Option)

savefrom

SaveFrom.net is a browser-based solution that requires no installation. This makes it ideal for one-off downloads or when you’re on a shared computer.
You simply paste the Vimeo URL, wait a few seconds, and choose your download option. It doesn’t support every Vimeo video, but for public content, it’s fast and convenient.

Tool #4 – Video DownloadHelper (Browser Extension)

Video DownloadHelper is a popular browser extension available for Chrome and Firefox. It detects videos playing in your browser and allows you to download them directly.
This tool shines when dealing with embedded Vimeo videos on blogs, portfolios, or course platforms. If you’ve ever wondered how to download a video from Vimeo that’s embedded on another site, this extension is often the answer.

Tool #5 – JDownloader 2 (Advanced & Powerful)

JDownloader is a full-featured download manager that supports Vimeo links among many other platforms. It’s excellent for batch downloads and large files.
While the interface may look intimidating at first, it offers incredible control once you get used to it. If you download videos from Vimeo frequently and in bulk, this tool can become a long-term solution.

Tool #6 – SnapSave (Mobile-Friendly)

SnapSave is a solid option for mobile users who don’t want to install apps. It works directly in your phone’s browser and supports many public Vimeo videos.
If you’re asking yourself how to download a video from Vimeo on your phone while on the go, this tool is a practical starting point.

Tool #7 – Vimeo’s Built-in Download Button (The Safest Option)

Sometimes the simplest method is right in front of you. Many Vimeo creators allow downloads directly from the platform.
If you see a download button below the video player, click it, choose your preferred quality, and the video will save instantly. No third-party tools, no risks, and no extra steps.

How to Download Videos From Vimeo Step by Step

How to Download Vimeo Videos Online (Quick Method)

First, copy the URL of the Vimeo video you want. Then paste it into an online downloader like SaveFrom.net. Choose your desired quality and start the download.
This method is best for quick access and public videos when you don’t want to install software.

How to Download Vimeo Videos on Windows & Mac

For desktop users, install a trusted program like 4K Video Downloader or JDownloader. Paste the Vimeo link into the app, select video quality and format, and begin downloading.
This approach offers the best balance between reliability and ease of use.

How to Download Vimeo Videos on Android & iPhone

On mobile devices, use browser-based tools or compatible extensions. Android users usually have more flexibility, while iPhone users may need to save videos to the Files app instead of Photos due to system restrictions.

Common Problems When Downloading Vimeo Videos (And How to Fix Them)

Vimeo Download Not Working or Video Not Found

This often means the video is private, restricted, or unsupported by the tool you’re using. Try another tool or confirm you have access.

Downloaded Video Has No Sound

Some tools separate audio and video streams. Re-download the video using a different tool or format.

Vimeo Video Download Is Slow or Fails

Lower the resolution, switch tools, or check your internet connection. Sometimes the issue isn’t the tool at all.

Best Practices for Downloading Vimeo Videos Safely

Avoid Malware & Fake Vimeo Download Sites

If a site forces pop-ups, asks you to install unknown software, or redirects you repeatedly, close it immediately. Stick to well-known tools only.

Respect Copyright & Creator Rights

Always respect the work of creators. Download videos from Vimeo for personal use unless you have explicit permission otherwise.

Choose the Right Format for Your Needs

MP4 is the most compatible format across devices, media players, and editing software.

Final Thoughts on the Best Ways to Download Videos From Vimeo

If you’ve been searching for how to download videos from Vimeo without confusion or risk, the answer is simpler than it seems. Choose the tool that matches your experience level, stay mindful of copyright rules, and keep things straightforward. Once you download your first video successfully, the process becomes easy and repeatable.

Find More: Boost Your Sales With SEO Services

FAQs

1. Can I download videos from Vimeo for free?

Yes, you can download videos from Vimeo for free using online tools, browser extensions, or built-in download options when available.

2. How do I download a video from Vimeo if it’s private?

Private videos usually require advanced tools like yt-dlp and valid access credentials.

3. What is the best tool to download videos from Vimeo in HD?

yt-dlp and 4K Video Downloader consistently deliver the best HD results.

4. Can I download Vimeo videos without watermarks?

Yes. Reliable Vimeo download tools save the original video without adding watermarks.

5. Is it safe to use online Vimeo downloaders?

Some are safe, others are not. Use trusted names and avoid unknown websites.

Tags: