...
UK: +44 2038074555 info@atamgo.com
9 Secret Tools to Save Instagram Photos Without Losing Quality (2026 Guide)

9 Secret Tools to Save Instagram Photos Without Losing Quality (2026 Guide)

Struggling with blurry screenshots or losing that “pro” look when saving your favorite IG finds? In 2026, standard downloads often crush image data. Here are the 9 secret tools to save Instagram photos in crystal-clear HD.

To save an Instagram photo without losing quality, use a high-fidelity downloader like SaveInsta, SnapInsta, or 4K Stogram. These tools bypass the app’s compression by fetching the original source URL. Simply copy the post link, paste it into the tool, and select the highest resolution (usually 1080px) to ensure a lossless save to your device.

Understanding Instagram Photo Saving

Before we dive into the toolkit, it is essential to understand why “saving” isn’t as simple as right-clicking.

Definition: Instagram Image Compression

Instagram uses aggressive compression algorithms to make the app load faster. When you take a screenshot, you are capturing a “preview” of the image limited by your screen resolution. A dedicated Instagram photo downloader fetches the original file stored on Meta’s servers before that compression happens.

Find More: 7 Shocking Facts: Does Instagram Notify When You Screenshot? (2026 Update)

Top 9 Tools to Save Instagram Photos in 2026

Here are the most reliable, high-authority tools currently used by professional content curators and beginners alike.

1. SaveInsta (Best for Web-Based Speed)

SaveInsta

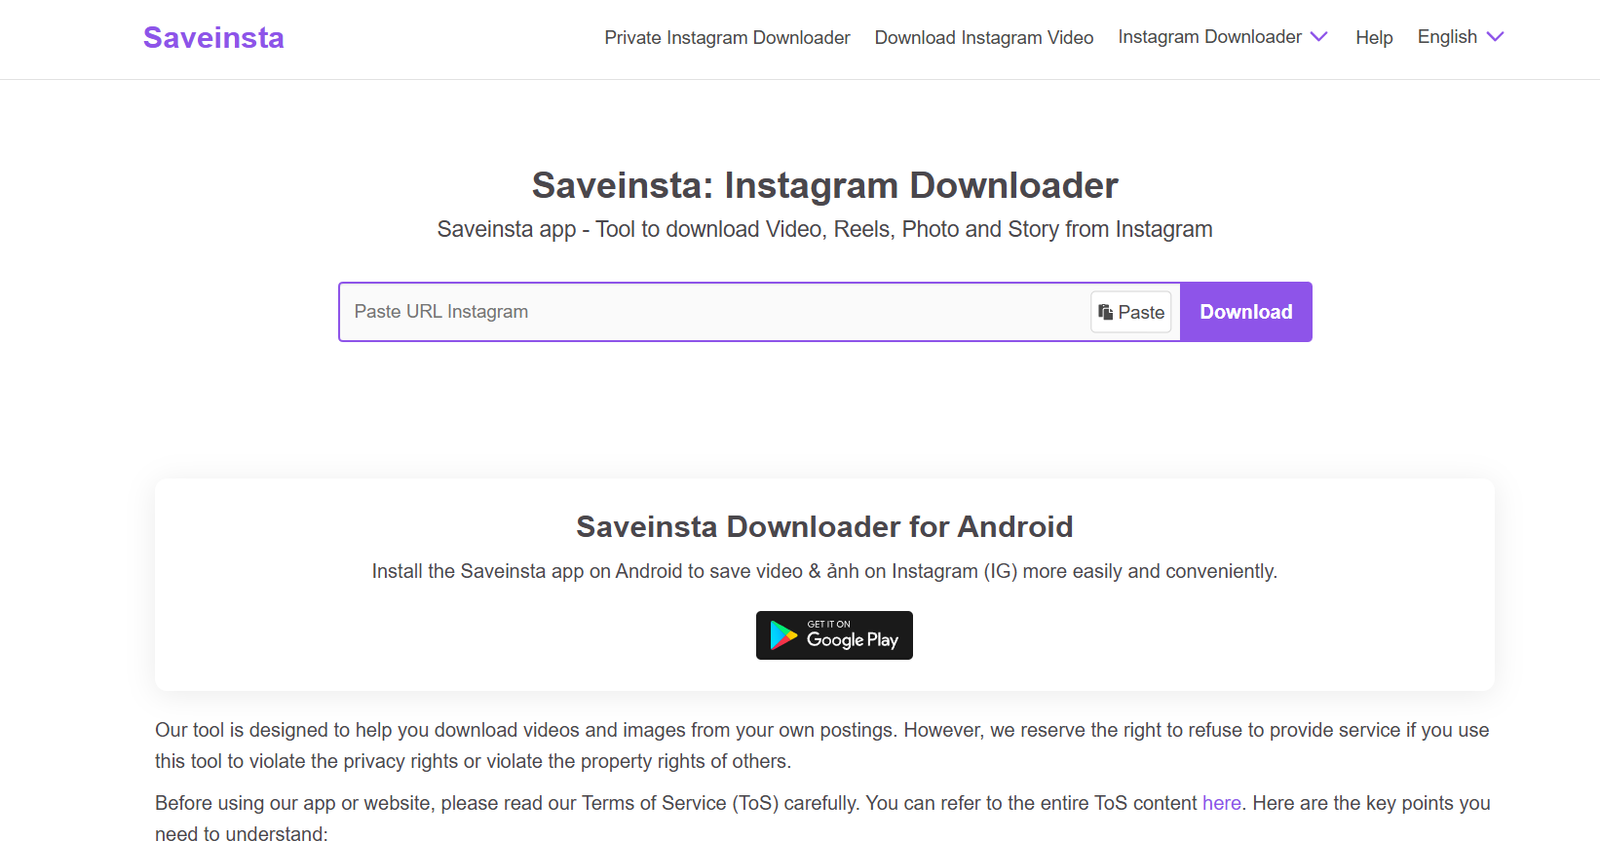
SaveInsta remains the gold standard for browser-based saving. It works on any device and requires no installation.

  • Pros: Fast, free, and supports Carousels (multiple photos in one post).

  • Best for: Quick, one-off saves on mobile or desktop.

2. SnapInsta (Best for High-Definition 4K)

SnapInsta

If the original uploader used a high-res file, SnapInsta is the best at identifying and pulling the maximum available pixel count.

  • Pros: Minimal ads compared to competitors; high reliability.

  • Best for: Photographers needing original resolution.

3. 4K Stogram (Best for Bulk Archiving)

This is a desktop application (Windows/Mac) that allows you to download entire profiles.

  • Pros: Can “subscribe” to an account to automatically save new posts.

  • Best for: Backing up your own account or competitor research.

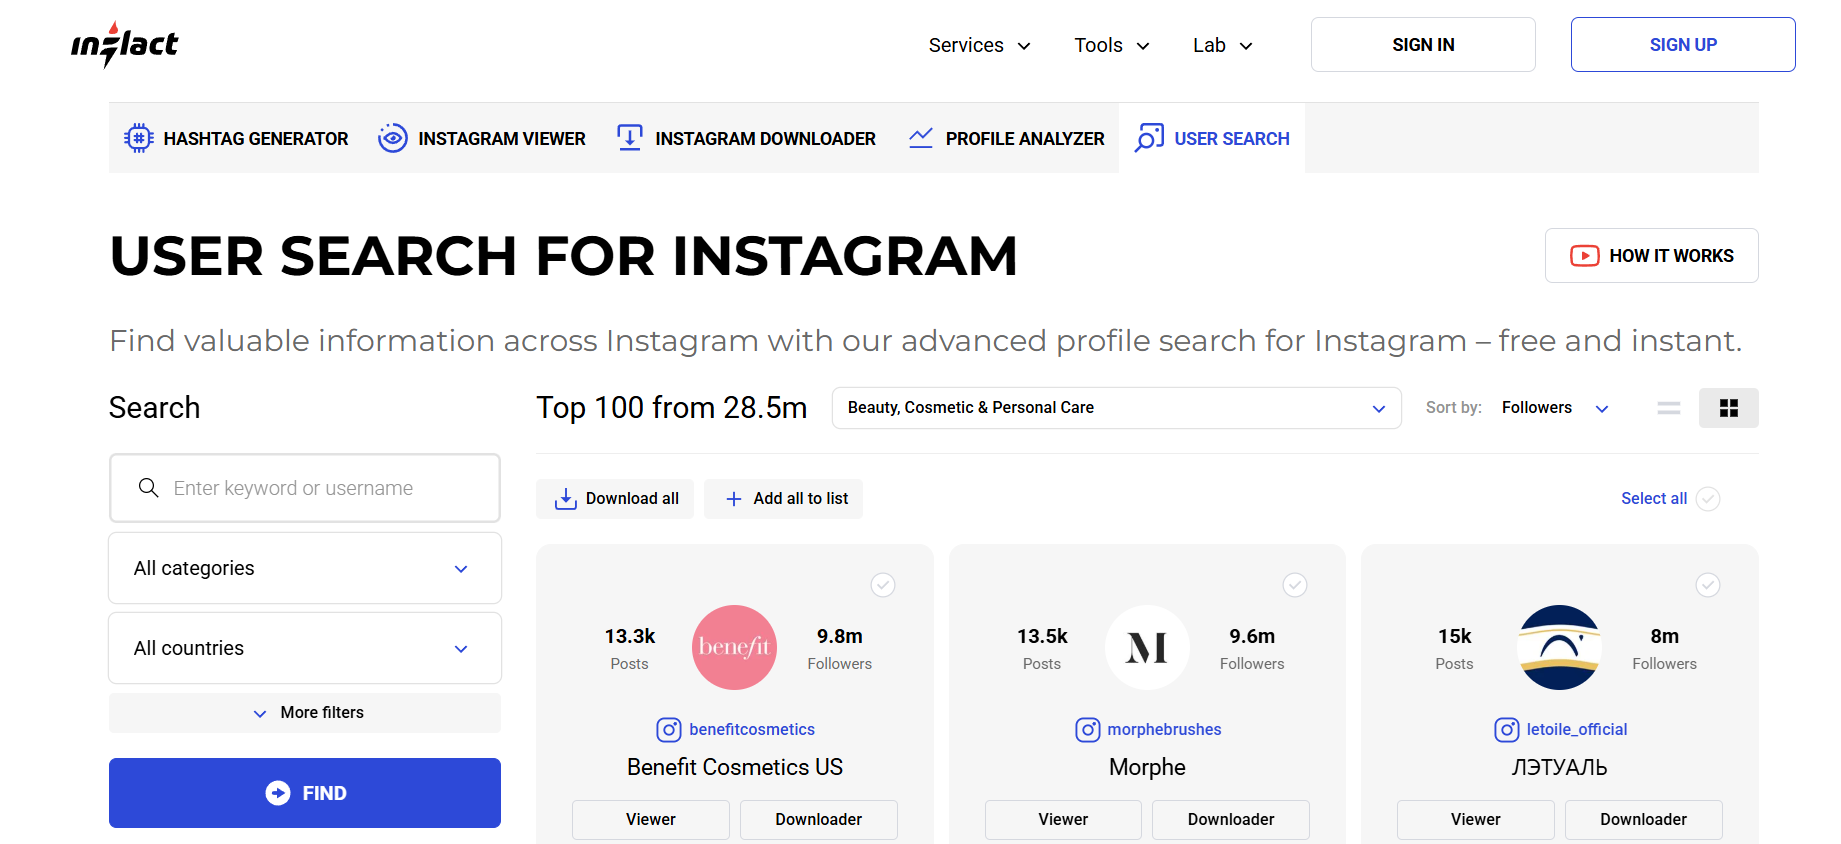
4. Inflact (The Professional Marketing Toolkit)

Formerly Ingramer, Inflact is more than a downloader; it’s a full dashboard.

  • Pros: Can save Stories and Highlights that haven’t expired yet.

  • Best for: Social media managers.

5. iGram (Best for Carousel Selection)

Most tools force you to download every photo in a slider. iGram lets you pick and choose specific slides.

  • Pros: Very clean interface; excellent for “Top 10” list posts.

  • Best for: Saving specific images from a multi-photo post.

6. Instander (Best for Android Power Users)

This is a modified version of the Instagram app. It adds a “Download” button directly under every post in your feed.

  • Pros: Seamless integration; no need to copy/paste links.

  • Best for: Android users who save content daily.

7. Turbo Downloader (Best Chrome Extension)

If you browse Instagram on a laptop, this extension adds a download icon to every image as you scroll.

  • Pros: One-click saving; works in the background.

  • Best for: Desktop power users.

8. QuickSave (Best Mobile App for iOS/Android)

A dedicated app that monitors your clipboard. When you copy a link in Instagram, QuickSave automatically prepares the download.

  • Pros: Very beginner-friendly; organizes photos into a dedicated gallery.

  • Best for: Casual mobile users.

9. Toolzu (Best for Profile-Wide Saving)

Toolzu allows you to enter a username and see a grid of all their photos, making it easy to save multiple high-res shots at once.

  • Pros: No login required; high-speed fetching.

  • Best for: Building inspiration boards quickly.

How to Save Instagram Photos: The Step-by-Step Framework

Follow this universal process to ensure you never lose image clarity.

Step 1: Locate the Content

Open Instagram and find the specific photo or carousel you want to archive.

Step 2: Copy the Link

Tap the three dots (…) in the top right corner of the post and select “Copy Link.” If you are on a desktop, simply copy the URL from your browser’s address bar.

Step 3: Choose Your Tool

Navigate to a tool like SaveInsta.app or open your downloaded software like 4K Stogram.

Step 4: Paste and Process

Paste the link into the search bar. Click “Download” or “View.” The tool will now “scrape” the high-resolution source file from the server.

Step 5: Select Quality and Save

If given the option, select 1080px or “Original Quality.” Long-press the image (on mobile) or click the download button to save it to your local storage.

Comparison: Native App vs. Third-Party Tools

Feature Screenshot (Native) Professional Downloader
Resolution Limited to Screen Size Full Original (Up to 1080p)
Metadata Lost Preserved
Compression High (Blurry) Zero (Lossless)
Carousel Support Manual (One by One) Automatic (Bulk)
Ease of Use Instant 10-20 Seconds

Common Mistakes Beginners Make

  • Relying on Screenshots: This is the #1 way to get “pixelated” photos. Even on a 2026 smartphone, screenshots lose about 40% of the image’s original detail.

  • Using Low-Quality Apps: Some “free” apps on the Play Store compress the image further to save their own server space. Stick to the verified list above.

  • Downloading via Direct Message (DM): If someone sends you a photo in DMs, Instagram compresses it heavily. Always try to find the original post link.

  • Ignoring File Formats: Saving as a JPEG is standard, but if a tool offers PNG, use it for graphics or text-heavy images to keep edges sharp.

Pro Tips for High-Authority Saving

  • Check the “Upload at Highest Quality” Setting: If you are saving your own photos to a new device, ensure your Instagram settings (Settings > Account > Data Usage) have “Upload at Highest Quality” toggled ON. This ensures the version you’re downloading is the best one possible.

  • Use a VPN: Some downloader tools are region-locked or throttled by ISPs. A VPN can speed up the “fetching” process.

  • Organize with Folders: Don’t let your “Downloads” folder become a mess. Create themed folders (e.g., “Design Inspo,” “Travel Gear”) as you save.

Key Takeaways

  • Screenshots are for convenience; downloaders are for quality.

  • SaveInsta and SnapInsta are the best all-around web tools in 2026.

  • 1080px is the maximum width for Instagram photos—always aim for this resolution.

  • Bulk tools like 4K Stogram are essential for creators who need to archive large amounts of data.

  • Respect Copyright: Always credit the original creator if you plan to reshare saved content.

Find More: Boost Your Sales With SEO Services

FAQs

1. Is it legal to save Instagram photos?

Yes, it is legal to save photos for personal use (like inspiration or offline viewing). However, resharing them without permission or using them for commercial purposes can violate copyright laws.

2. Why do my saved photos look blurry?

This usually happens if you used the screenshot method or a low-quality downloader. Use a tool that fetches the source URL (like iGram) to get the original 1080px file.

3. Does the user get notified if I save their photo?

No. Unlike Snapchat, Instagram does not notify users when you screenshot or use a third-party tool to download their feed posts.

4. Can I save photos from a private account?

Most web-based tools cannot access private accounts. To save these, you typically need to use a desktop tool like 4K Stogram and log in with an account that already follows the private user.

5. What is the best format to save Instagram photos?

JPEG is the standard and best for photos. If the image has text or a logo, PNG is preferred as it prevents “ghosting” around the letters.

Tags:
7 Best Instagram Thumbnail Downloader Tools in 2026: A Beginner’s Guide

7 Best Instagram Thumbnail Downloader Tools in 2026: A Beginner’s Guide

Capturing high-quality visuals from Instagram is essential for creators, researchers, and marketers. Whether you need a cover image for a presentation or a reference for a mood board, grabbing the perfect frame shouldn’t be a struggle. This guide reveals the top-tier tools that actually work in 2026.

To download an Instagram thumbnail, you can use specialized web-based tools like Inflact, Toolzu, or SaveInsta. Simply copy the URL of the Instagram Reel or video, paste it into the downloader’s search bar, and select the desired image quality to save the high-resolution cover photo directly to your device.

Find More: 15 Proven Ways to Get Instagram Followers Fast (Most People Ignore #7)

Understanding Instagram Thumbnail Downloaders

An Instagram thumbnail downloader is a specialized digital tool designed to extract the static cover image (the “thumbnail”) from a Reel, IGTV, or video post. Unlike a standard screenshot, these tools fetch the original file hosted on Instagram’s servers, ensuring you get the highest resolution available without UI overlays like play buttons or view counts. In 2026, these tools have evolved to handle encrypted data streams, making them faster and more reliable than ever for beginners.

Why You Need a Thumbnail Downloader in 2026

The digital landscape has shifted toward high-velocity content consumption. Relying on manual screenshots often results in blurry, low-quality images that unprofessional. A dedicated Instagram reel thumbnail downloader preserves the 1080×1920 aspect ratio, which is critical for repurposing content or performing competitive product research.

1. Inflact: The Professional Choice

Inflact Instagram Username Checker

Inflact remains a powerhouse in 2026 due to its clean interface and multi-functional capabilities. It isn’t just a thumbnail downloader Instagram users love; it’s a full marketing suite.

How to Use Inflact

  • Copy the link of the Instagram post.

  • Navigate to the Inflact “Download” section.

  • Paste the link and hit “Download.

  • Choose the “Preview” image to save the thumbnail.

2. Toolzu: Best for High-Resolution Extraction

Toolzu

Toolzu is highly recommended for beginners because it requires no registration. It specifically targets the Instagram video thumbnail downloader niche by offering a dedicated tab for covers, ensuring you don’t accidentally download the whole video when you only want the image.

Key Features

  • Cloud-based processing for instant results.

  • Compatibility with all mobile and desktop browsers.

  • Free-to-use model with minimal ads.

3. SaveInsta: The Speed King

SaveInsta

If you are in a rush, SaveInsta is the most efficient Instagram reels thumbnail downloader on the market. It uses a streamlined API that bypasses heavy scripts, loading the high-definition cover almost instantly after you paste the link.

Step-by-Step Framework for SaveInsta

  • Locate: Find the Reel you want to analyze.

  • Copy: Tap the three dots and select “Copy Link.

  • Paste: Enter the URL into the SaveInsta input field.

  • Save: Click the “Download Photo” button located beneath the video preview.

4. SnapInsta: Ideal for Bulk Research

For users doing extensive market research, SnapInsta allows for quick transitions between different posts. It is a robust Instagram thumbnail downloader that handles high traffic without crashing, which is a common issue with free web tools.

Pro Tip

Use the “Private Downloader” feature if you need to access content from accounts you follow that aren’t public, provided you are logged in via your browser.

5. IGDownloader: The Minimalist’s Favorite

IGDownloader removes all the “fluff.” It provides a single search bar and one button. This is the perfect thumbnail downloader Instagram tool for those who want zero distractions and a purely functional experience.

6. FastDL: Optimized for Mobile

FastDL is specifically optimized for Android and iOS browsers. In 2026, most users are working on the go. This tool ensures that the “Save Image” dialogue box triggers correctly on mobile operating systems without requiring a third-party file manager.

7. DownloadGram: The Reliable Classic

One of the oldest names in the game, DownloadGram has updated its backend to support the newest Instagram encryption protocols. It remains a top Instagram reels thumbnail downloader because of its simplicity and the high quality of the extracted .jpg files.

Comparison of Top Downloaders

Tool Name Best For Speed Quality Registration Required?
Inflact Professionals Fast Ultra HD No
Toolzu Beginners Medium High No
SaveInsta Mobile Users Very Fast High No
SnapInsta Bulk Usage Fast High No
FastDL Social Media Managers Fast High No

The Ultimate Framework for Downloading Thumbnails

To ensure you get the best results every time, follow this professional framework:

  • Source Selection: Always ensure the post is public. Private posts require specific browser-extension-based tools.

  • Link Verification: Ensure the URL includes “reel/” or “p/” to signify a valid post.

  • Quality Check: Before saving, right-click the preview and select “Open image in new tab” to verify the resolution.

  • Organization: Save files with descriptive names (e.g., “Competitor_A_Thumbnail_01.jpg”) for easier retrieval later.

Common Mistakes Beginners Make

  • Using Screenshots: This lowers the quality and includes unwanted icons.

  • Ignoring Copyright: Downloading a thumbnail for research is fine, but using it in your own ads without permission can lead to legal issues.

  • Not Checking Resolution: Some tools default to a low-res preview. Always look for the “HD” or “Download Original” option.

  • Malicious Sites: Avoid any tool that asks you to download an .exe file or enter your Instagram password.

Expert Insights for 2026

In 2026, the meta-data attached to Instagram images is more complex. Advanced users are now using these thumbnails not just for visuals, but to analyze the color palettes and text-overlay strategies of trending creators. Use a thumbnail downloader Instagram tool to build a “swipe file” of successful covers to inspire your own content strategy.

Key Takeaways

  • Instagram thumbnail downloaders are essential for high-quality content research.

  • Tools like SaveInsta and Toolzu offer the best balance of speed and quality.

  • Avoid screenshots to maintain the professional integrity of your files.

  • Always respect intellectual property and use downloaded images for inspiration or internal reference.

Find More: Boost Your Sales With SEO Services

FAQs

1. Is it legal to download Instagram thumbnails?

Downloading thumbnails for personal use, research, or inspiration is generally considered acceptable. However, republishing someone else’s thumbnail as your own or using it for commercial purposes without permission violates copyright laws.

2. Why does the thumbnail look blurry when I download it?

This usually happens if you save the “preview” image instead of clicking the actual “Download HD” button. Ensure you are using a reputable Instagram video thumbnail downloader that pulls the original source file.

3. Can I download thumbnails from private accounts?

Standard web-based downloaders cannot access private accounts because they cannot bypass Instagram’s privacy walls. You would need to use a browser extension that utilizes your own logged-in session, though this carries higher security risks.

4. Do these tools work on Instagram Reels?

Yes, most modern tools are specifically optimized as an Instagram reels thumbnail downloader. The process is the same: copy the Reel link and paste it into the tool.

5. What is the best file format for thumbnails?

JPEG (.jpg) is the standard for Instagram thumbnails as it offers a great balance between high visual quality and a small file size, making it easy to store and share.

Tags:
15 Proven Ways to Get Instagram Followers Fast (Most People Ignore #7)

15 Proven Ways to Get Instagram Followers Fast (Most People Ignore #7)

Stop chasing “ghost” followers and start building a real community. In 2026, the Instagram algorithm prioritizes authentic engagement over raw numbers. This guide reveals the exact framework to scale your profile from zero to thousands using modern, AI-optimized strategies.

To get Instagram followers fast in 2026, you must optimize your profile for SEO, post high-retention Reels consistently, and engage with “suggested” accounts in your niche. Focus on creating “Save-worthy” content and utilizing Instagram’s advanced AI Categorization to ensure your posts reach the right Explore pages and Reels feeds immediately.

Find More: 7 Essential Instagram Reel Size Rules Most Creators Ignore

What Does it Mean to Get Instagram Followers?

instagram

Before diving into the steps, let’s define the landscape. Getting followers is the process of attracting users to hit the “Follow” button on your profile, granting you a permanent audience for your content. In 2026, this isn’t just about a number; it’s about Social Authority.

Definitions to Know:

  • The Algorithm: The AI-driven system that determines which content appears in a user’s Feed, Reels, and Explore tabs.

  • Reach: The total number of unique users who see your content.

  • Engagement Rate: The percentage of your audience that interacts (likes, comments, saves) with your posts.

  • SEO (Search Engine Optimization): Using keywords in your bio and captions so your profile appears in Instagram’s native search results.

1. Optimize Your Profile for Instagram SEO

Most beginners treat their bio like a diary. Instead, treat it like a landing page. Use your primary keyword, get instagram followers, or your specific niche (e.g., “Fitness Coach”) in your “Name” field, not just your username.

Instagram’s search bar functions like Google. If your name field includes your industry, you will appear when people search for those terms. Add a clear CTA (Call to Action) and a link to your most important asset.

2. Master the “High-Retention” Reels Formula

Reels are the #1 engine for growth. To get more followers on instagram, your Reels must hook the viewer in the first 1.5 seconds. Use “closed loops”—where the end of the video seamlessly transitions back to the start—to increase watch time.

High watch time signals to the AI that your content is valuable, pushing it to a wider “cold” audience. Aim for 7–12 second videos with fast-paced captions and trending (but relevant) audio.

3. The 3-2-1 Engagement Strategy

You cannot grow in a vacuum. Every day, find five influential accounts in your niche. Find three of their recent posts. Like two of their photos and leave one meaningful, 5+ word comment.

This triggers the “Suggested for You” algorithm. When users follow those big accounts, Instagram’s AI is more likely to show your profile as a recommended follow because it recognizes the topical relationship between your accounts.

4. Use “Save-Worthy” Educational Carousels

While Reels bring the reach, Carousels build the trust. Create 7–10 slide posts that solve a specific problem. In 2026, “Saves” are the most weighted metric for the algorithm.

If someone saves your post, Instagram views it as “high-value” content. This increases your chances of hitting the Explore page. Use the last slide to explicitly ask for the follow: “Follow for more [Niche] tips.”

5. Leverage Interactive Stories for Retention

Customizable Instagram Follower Packages

Followers who engage with your Stories are more likely to see your Feed posts. Use polls, sliders, and “Add Yours” stickers. This builds a “warm” relationship with your current audience, which prevents “follower churn” (people unfollowing you).

A high retention rate among current followers tells Instagram your content is worth showing to new people. Use Stories to show the “behind-the-scenes” and humanize your brand.

6. Use Niche-Specific, Low-Competition Hashtags

Stop using #love or #instagood. These are too broad. Instead, use a mix of 5–10 hashtags: three broad (1M+ posts), three medium (100k–500k), and four highly specific (under 50k).

In 2026, Instagram relies more on Keywords in captions than hashtags, but hashtags still act as “folders” for the AI to categorize your content. Place them at the very bottom of your caption or in the first comment.

7. The “Collab” Post Secret (The Most Ignored Tip)

This is the fastest way to how do we get followers on instagram overnight. Use the “Invite Collaborator” feature. When you collab with another creator, the post appears on both profiles and shares the same like/comment count.

This exposes you to 100% of their audience instantly. It’s not just a tag; it’s a shared piece of digital real estate. Even if you have a small following, find “micro-creators” in your space and propose a value-driven collaboration.

8. Post During Your “Active User” Peak

Check your Insights. Post 30 minutes before your audience is most active. This allows your “super-fans” to engage immediately, giving the post the momentum it needs to be pushed to the Explore page when the rest of your audience logs on.

9. Implement a Consistent Visual Theme

Beginners often post random photos. A “messy” grid is a conversion killer. When a new visitor lands on your profile, they decide to follow within 3 seconds.

A consistent color palette or template style signals professionalism. It tells the user exactly what kind of content they can expect if they hit follow. Use tools like Canva to maintain a unified look.

10. Write Long-Form “Micro-Blog” Captions

Instagram is shifting toward a search-heavy model. Use your captions to provide real value. Include your secondary keywords like how to get followers on instagram naturally within the text.

Longer captions increase “dwell time” (the amount of time someone spends on your post). The longer they stay, the more the algorithm favors your content. Start with a bold hook and end with a question to spark comments.

11. Run a Viral Giveaway (The Right Way)

Grow Your Instagram

Giveaways can get you followers fast, but they often result in “unqualified” followers. To do it right, ensure the prize is only relevant to your niche.

If you are a photographer, don’t give away an iPad; give away a lens or a Lightroom preset pack. Require entrants to follow you and tag two friends who would actually enjoy your content.

12. Use Keyword-Rich Alt Text

This is a hidden “pro” move. Before posting, go to Advanced Settings > Write Alt Text. Describe your image using your target keywords. This helps Instagram’s AI “see” your post and show it to users interested in those specific topics, even if they don’t follow you yet.

13. Geotag Strategic Locations

Don’t just tag your city. Tag specific, high-traffic locations where your target audience hangs out. If you’re a fitness influencer, tag popular gyms or health food spots. People often browse location tags to find local creators and businesses.

14. Reply to Every Single Comment

The first 24 hours of a post are critical. When you reply to a comment, it counts as a second interaction on that post. It also encourages the user to reply back, creating a “comment thread” that signals high engagement to the algorithm.

15. Cross-Promote on Vertical Platforms

Don’t rely solely on Instagram. Take your best-performing Reels and post them on TikTok and YouTube Shorts with a watermark or a CTA to “Follow on IG for the full guide.” This creates a funnel of high-intent followers from other ecosystems.

Step-by-Step Framework for New Accounts

  1. Phase 1 (Days 1-5): Profile Optimization. Set up your SEO bio and post 6 high-quality “anchor” posts to fill the grid.
  2. Phase 2 (Days 6-15): The Reels Blitz. Post one Reel every day using trending audio and niche keywords.
  3. Phase 3 (Days 16-30): Community Outreach. Spend 20 minutes daily on the 3-2-1 strategy and responding to stories of others in your niche.

Common Mistakes to Avoid

  • Buying Followers: This destroys your engagement rate. The AI will see thousands of followers and zero likes, concluding your content is bad and hiding it from real people.

  • Engagement Pods: Groups that like each other’s posts are easily detected by AI in 2026. It leads to “shadowbanning” or reduced reach.

  • Inconsistency: Posting 5 times in one day and then disappearing for a week confuses the algorithm.

Comparison: Organic Growth vs. Paid Growth

Feature Organic Growth Paid (Instagram Ads)
Cost $0 (Time intensive) Scalable Budget
Follower Quality Very High (Loyal) Moderate (Interest-based)
Speed Slow to Moderate Instant
Longevity Permanent Authority Stops when budget ends

Key Takeaways

  • SEO is King: Your Bio and Captions are searchable; use keywords wisely.

  • Reels for Reach: Use short, looping videos to hit the Explore page.

  • Carousels for Trust: Use educational content to earn “Saves.”

  • Engagement is Two-Way: You must interact with others to be seen by the AI.

  • Quality > Quantity: One high-value post beats seven “filler” posts.

Find More: Boost Your Sales With SEO Services

FAQs

1. How long does it take to see results?

If you follow the 30-day framework, most accounts see a significant uptick in reach within 14 days and consistent follower growth by the end of the month.

2. Should I switch to a Professional account?

Yes, absolutely. A Professional (Creator or Business) account gives you access to “Insights,” which are essential for seeing which posts are actually bringing in followers.

3. Does the “Shadowban” actually exist?

In 2026, it is rarely a “ban” and usually just a “reach penalty” for violating community guidelines or using banned automation tools. Stick to organic methods to stay safe.

4. How many times a day should I post?

Quality is more important than frequency. Aim for 3–5 Reels per week and 2 Carousels. Stories should be posted daily (3–5 slides) to keep your audience engaged.

5. Can I get followers without showing my face?

Yes. “Faceless” niche pages are huge in 2026. Focus on high-quality stock footage, AI-generated visuals, and extremely high-value text-based information.

Tags:
7 Shocking Facts: Does Instagram Notify When You Screenshot? (2026 Update)

7 Shocking Facts: Does Instagram Notify When You Screenshot? (2026 Update)

Curious if your “secret” screenshot just sent a red alert to your crush or a competitor? The rules of Instagram privacy have shifted significantly this year. Before you hit those buttons again, you need to see what’s changed in 2026.

Do Instagram notify screenshot?

As of 2026, Instagram does not notify users when you screenshot their Stories, Posts, Reels, or regular Direct Messages. However, Instagram will immediately notify the sender if you screenshot a “Disappearing” photo/video or any content sent while “Vanish Mode” is active in your DM chat.

Find More: Instagram Followers Free: 9 Powerful Ways to Grow Your Audience in 2026

Understanding Instagram Screenshot Notifications in 2026

In the early days of social media, the “screenshot notification” was a source of constant anxiety. Today, Instagram has refined its policy to balance general user freedom with high-level privacy for temporary content. To navigate the app safely, you must understand the difference between Persistent Content and Ephemeral Content.

What is Persistent Content?

This refers to anything that stays on a profile until the user manually deletes it. Because this content is considered “public” or “semi-permanent,” Instagram does not track or notify others when you save a copy via screenshot.

What is Ephemeral Content?

This is content designed to disappear, such as “View Once” photos or messages in Vanish Mode. Because the sender intends for this to be temporary, Instagram enforces strict notification rules to protect their privacy.

The 7 Shocking Facts About Instagram Screenshots

1. Stories are 100% Safe to Screenshot

Despite persistent rumors and “warning” TikToks, Instagram does not notify creators when you screenshot their Stories. This applies to:

  • Public Stories

  • Stories from Private Accounts (if you follow them)

  • Close Friends Stories

2. Vanish Mode is the “Red Zone”

If you are chatting in Vanish Mode (where messages disappear after the chat is closed), Instagram will trigger a notification the second you take a screenshot. A text alert saying “[Username] took a screenshot” will appear directly in the chat bubble for both parties to see.

3. Disappearing Media Triggers a “Spiral” Icon

When someone sends a “View Once” or “Allow Replay” photo directly in your DMs, screenshotting it does more than just send a notification. A small loading-style spiral icon will appear next to the message in the sender’s chat list, acting as a permanent receipt of your action.

4. Reels and Posts Remain Private

You can screenshot or even screen record any Reel or Feed post without the creator knowing. Instagram views these as public-facing assets meant for sharing and discovery.

5. Profile Bio Screenshots are Anonymous

Need to save someone’s contact info or website link from their bio? You can screenshot a user’s entire profile page—including their profile picture and follower list—without an alert being sent.

6. Third-Party “Notification Apps” are Scams

how to repost story on instagram

There is no app in the App Store or Play Store that can tell you who screenshotted your Story. These apps often aim to steal your login credentials or sell your data. If Instagram’s own API doesn’t track the data, a third-party app cannot “discover” it.

7. The “Airplane Mode” Trick is Failing

In 2026, Instagram’s code has become more sophisticated. Taking a screenshot in Airplane Mode and then clearing the cache used to work, but the app now often “queues” the notification and sends it the moment you reconnect to the internet.

The Step-by-Step Privacy Framework

If you want to save content without overstepping boundaries, follow this framework to ensure you stay undetected and ethical.

How to Save Content Safely (The Pro Way)

  1. Check the Chat Type: Look for a dark background or the “Vanish Mode” label. If it’s there, do not screenshot.
  2. Use the “Save” Feature: For Feed posts and Reels, tap the Bookmark icon. This saves the post to a private collection in your app that only you can see.
  3. Screen Recording vs. Screenshotting: For Stories, both are safe. For disappearing DMs, both will trigger a notification.
  4. Desktop Workaround: Currently, taking a screenshot of Instagram via a web browser on a PC often bypasses the notification system for disappearing media, though this is considered a “gray area” bug.

Common Mistakes to Avoid

how to repost someone's story on instagram

  • Assuming “Close Friends” is Private: Just because you are on a Close Friends list doesn’t mean the user won’t be hurt if they find out you’re saving their private moments.

  • Trusting Screen Recording: Many beginners think screen recording is “invisible” to the app. In 2026, Instagram treats a screen recording exactly like a screenshot in sensitive areas (Vanish Mode).

  • Forgeting to Check the Bottom of the DM: Before screenshotting a DM, look for the “View Once” label on the image. If it’s not a standard gallery upload, an alert will be sent.

Comparison: When You’re Caught vs. When You’re Safe

Content Type Notification Sent? Notification Type
Instagram Story No None
Feed Post / Reel No None
User Profile/Bio No None
Regular DM Text No None
Vanish Mode Chat YES In-chat text alert
Disappearing Photo (DM) YES Alert + Spiral Icon
Close Friends Story No None

FAQs

1. Does Instagram notify when you screenshot a DM?

Only if the message is sent in Vanish Mode or if it is a “disappearing” photo/video. Regular text conversations and permanent images sent from the gallery do not trigger notifications.

2. Can someone see if I screen record their Story?

No. Screen recording a Story is treated the same as a screenshot; Instagram does not notify the creator in either case.

3. Is there a way to see who screenshotted my post?

No. Instagram does not provide any metrics or notifications for screenshots of your feed posts, Reels, or regular Stories.

4. Does the user get a notification if I screenshot a “Close Friends” story?

No. Even though Close Friends stories are for a limited audience, the screenshot rules remain the same as public stories.

5. What happens if I screenshot a disappearing photo on a laptop?

Usually, the notification is not triggered when using a web browser on a desktop or laptop, but Instagram frequently updates its web security to close this loophole.

Find More: Boost Your Sales With SEO Services

Key Takeaways

  • Stories, Posts, and Reels are always safe to screenshot without notifications.

  • Vanish Mode and Disappearing Media in DMs will always alert the sender.

  • The Bookmark Feature is the best way to save content without cluttering your phone’s gallery.

  • Privacy Settings like making your account “Private” are your only real defense against others screenshotting your content.

Tags:
Instagram Followers Free: 9 Powerful Ways to Grow Your Audience in 2026

Instagram Followers Free: 9 Powerful Ways to Grow Your Audience in 2026

Stop chasing “ghost” accounts and bots that kill your engagement. In 2026, the secret to getting free Instagram followers isn’t a hack; it’s about mastering the new AI-driven discovery algorithm to turn viewers into loyal fans.

Direct Answer: How to Get Instagram Followers for Free

To get free Instagram followers in 2026, you must optimize your profile for “Search-First” discovery, leverage high-retention Reels, and engage in “Collab” posts. Focus on SEO-rich captions and interactive Stories to trigger the algorithm. Avoid “free follower” apps, which lead to shadowbans; instead, use organic growth frameworks like the “Hook-Value-Action” model to gain real, active followers.

Find More: 7 Best Tools to Download Instagram Audio in Seconds (2026 Guide)

What Does “Free Instagram Followers” Really Mean?

In the modern social media landscape, free Instagram followers refer to organic growth. This means gaining new subscribers without paying for Instagram Ads or using third-party “click-farm” services. Organic growth is superior because these followers are real humans who will actually buy your products, click your links, and engage with your content.

The Evolution of the 2026 Instagram Algorithm

The 2026 algorithm prioritizes “Interest Graphs” over “Social Graphs.” This means Instagram shows your content to people based on what they like, not just who they follow. If you provide value, Instagram will distribute your content for free to thousands of potential followers.

The 9 Most Powerful Ways to Get Free Instagram Followers

1. Master Instagram SEO (Search Engine Optimization)

Instagram is now a search engine. Users search for keywords just like they do on Google. To be found, you must optimize every part of your profile.

  • Username and Name: Include your primary keyword (e.g., “Fitness Coach” or “Digital Marketing”).

  • Bio: Use 2–3 relevant hashtags and a clear “What’s in it for them” statement.

  • Alt Text: Manually edit the Alt Text of your images to include free ig followers keywords for better visibility in the “Explore” tab.

2. The “Looping Reel” Strategy

Reels remain the #1 way to reach non-followers. In 2026, the algorithm favors “Watch Time.”

  • The Hook: Start with a bold text overlay in the first 2 seconds.

  • The Loop: Design your video so the end flows seamlessly back into the beginning. This tricks the system into seeing 200% watch time, pushing your video to a global audience.

  • The CTA: Always include a “Follow for more [Topic]” text at the end.

3. Utilize “Collab” Posts with Micro-Influencers

The “Invite Collaborator” feature is a goldmine for free instagram followers. When you collaborate, the post appears on two profiles and reaches two different audiences.

  • Step 1: Find a creator in a similar niche with 1,000–5,000 followers.

  • Step 2: Propose a high-value educational post or a funny skit.

  • Step 3: Post as a collaboration. You instantly inherit their trust and followers.

4. High-Frequency “Broadcast Channels”

While most people think channels are for big creators, they are now a discovery tool. By keeping an active, public Broadcast Channel, Instagram often suggests your channel to people interested in your niche, leading to a steady stream of free ig followers.

5. The “Engagement First” Framework

You cannot expect followers if you don’t give attention first.

  • The 50/50 Rule: Spend 50 minutes engaging with others for every 50 minutes you spend creating.

  • Targeting: Go to a competitor’s page, click on their most recent post, and engage with the people who commented there. They are active and interested in your niche.

6. AI-Powered Content Pillars

Use AI tools to analyze what is currently trending in your specific niche. Instead of guessing, create content around “High-Intent” topics.

  • Educational: “How to [Goal] in 2026.”

  • Inspirational: “My journey from 0 to 10k.”

  • Entertaining: Relatable “POV” (Point of View) videos.

7. Use Interactive Stories to Trigger “Signals”

The more a user interacts with your Stories (Polls, Sliders, Q&A), the more the algorithm thinks they love you. It will then push your main posts to the top of their feed and show your profile to similar people.

  • Pro Tip: Post a “This or That” poll every morning. It’s the easiest way to get a “micro-engagement.”

8. Optimized Carousel Posts

Carousels have the highest “Save” rate on Instagram. Saves are the strongest signal to Instagram that your content is high-quality.

  • Slide 1: A “Stop the Scroll” headline.

  • Slides 2-9: Actionable tips (1 tip per slide).

  • Slide 10: A “Save this for later” reminder.

9. Participate in Niche Challenges

Trending audio and challenges aren’t just for dancing. Adapt a trending sound to your business or niche. This places you in the “Audio Page” directory, where users go to find new creators.

Step-by-Step Framework for 1,000 Free Followers

instagram

Follow this 30-day “Fast-Track” plan to see immediate results:

  1. Days 1–5 (Audit): Clean your bio, switch to a Professional Account, and set up your SEO keywords.
  2. Days 6–15 (Volume): Post 1 Reel per day. Use trending audio (under 10k uses) and focus on “educational hooks.”
  3. Days 16–25 (Networking): Reach out for 3 collaborations and comment on 20 “Big Creator” posts daily with meaningful insights (not emojis).
  4. Days 26–30 (Conversion): Run a “Follower-Only” giveaway or lead magnet (e.g., “Follow me and DM ‘GUIDE’ for a free PDF”).

Common Mistakes to Avoid in 2026

  • Buying Followers: This is the fastest way to kill your account. Bots do not engage, and Instagram’s 2026 AI is highly efficient at detecting and Shadowbanning accounts with fake metrics.

  • Engagement Pods: Groups that like each other’s posts are now easily identified by the algorithm as “inauthentic behavior.”

  • Over-Hash-tagging: Using 30 hashtags looks like spam. In 2026, 3–5 highly specific hashtags are the “sweet spot” for SEO.

  • Ignoring DMs: If someone messages you, reply! The algorithm tracks “Relationship Strength,” and DMs are a massive positive signal.

Find More: Boost Your Sales With SEO Services

Comparison: Organic vs. Paid vs. Fake Followers

Feature Organic (Free) Paid Ads Fake/Bots
Cost $0 High Low
Trust/Authority Extremely High Medium Zero
Engagement Rate 5% – 10% 2% – 5% 0%
Account Safety Safe Safe High Risk
Long-term ROI Massive Moderate Negative

FAQs

1. Can I still get free Instagram followers in 2026?

Yes. While the platform is more competitive, the shift toward AI-driven discovery means that high-quality content can go viral more easily than ever before, regardless of your current follower count.

2. Do hashtags still work for getting free ig followers?

They work differently. In 2026, hashtags act as “categories” rather than “discovery tags.” Use 3-5 specific tags so the AI knows exactly who to show your content to in the “Suggested” feed.

3. How often should I post to grow for free?

The “Sweet Spot” in 2026 is 3–5 Reels per week and 2 Carousels. Daily posting is no longer required as long as your content has high “Retention Time” and “Saves.”

4. Is there an app for free instagram followers?

Any app promising “free followers” is a scam or a bot service. These apps will compromise your account security and lead to a permanent ban from Instagram. Always grow organically.

5. How do I turn viewers into followers?

Use a “Value Proposition.” Instead of just saying “Follow me,” say “Follow for daily tips on [Topic].” Give them a reason to want to see your content in their feed every day.

Key Takeaways for 2026 Growth

  • SEO is King: Your profile must be searchable with keywords like free instagram followers.

  • Engagement > Reach: Focus on getting saves and shares rather than just views.

  • Collaborate: Use the audience of others to build your own.

  • Consistency over Intensity: It is better to post 3 times a week for a year than every day for a week and quit.

  • Authenticity Wins: In an AI-heavy world, showing your face and being “human” is a competitive advantage.

Tags:
7 Essential Instagram Reel Size Rules Most Creators Ignore

7 Essential Instagram Reel Size Rules Most Creators Ignore

Your Instagram Reels are getting blurry, cut off, or ignored by the algorithm because you’re likely breaking the golden rules of aspect ratios. In 2026, high-quality resolution is no longer a luxury—it is the baseline for organic reach. If your content doesn’t fit the screen perfectly, users will scroll past before your hook even lands.

The standard Instagram Reel size is 1080 x 1920 pixels, maintaining a 9:16 aspect ratio. To ensure your content remains visible, keep all essential text and visual elements within the “Safe Zone” (the central 1080 x 1350 area) to avoid being covered by the UI or captions.

Find More: 7 Powerful Private Instagram Viewer Tools That Actually Work in 2026

Understanding Instagram Reel Size and Dimensions

Before filming, you must understand the technical framework of a Reel. A Reel isn’t just a vertical video; it’s a specific data package that Instagram’s compression engine needs to process correctly. If you upload the wrong size, Instagram will “stretch” or “crop” your footage, resulting in a pixelated mess that hurts your brand authority.

What is the 9:16 Aspect Ratio?

The aspect ratio refers to the relationship between the width and the height of your video. For Reels, this is 9:16. This means for every 9 units of width, there are 16 units of height. This is the inverse of the traditional widescreen 16:9 ratio used for YouTube or television.

Ideal Pixel Resolution

While the aspect ratio tells you the shape, the resolution tells you the quality. The gold standard for Instagram Reels is 1080 x 1920 pixels. This is considered Full HD (High Definition). While 4K video (2160 x 3840) is popular, Instagram often compresses these files so aggressively that they can actually look worse than a well-exported 1080p file.

Rule 1: The “Safe Zone” is Your Most Critical Asset

The biggest mistake beginners make is placing text or faces at the very top or bottom of the frame. Instagram overlays its own User Interface (UI) elements—like your profile picture, username, caption, and music title—over your video.

The 4:5 Safe Zone Explained

While the full Reel is 1080 x 1920, the “Safe Zone” is approximately 1080 x 1350. This is the middle section of your video. Anything placed in the top 15% or the bottom 25% of the screen risks being obscured by the Instagram UI. If your call-to-action (CTA) is at the very bottom, half of your audience won’t be able to read it.

How to Visualise the Safe Zone

  • Top Margin: Keep the top 220 pixels clear of important text.

  • Bottom Margin: Keep the bottom 420 pixels clear of captions and buttons.

  • Side Margins: Maintain a small 30-50 pixel “breathing room” on the left and right.

Rule 2: Instagram Reel Cover Size and Grid Consistency

Your Reel doesn’t just live in the Reels tab; it appears on your main profile grid. If your cover image isn’t optimized, it will look awkward and unprofessional when someone visits your profile.

The Two Shapes of a Cover

  1. Reels Tab View: This uses the full 9:16 (1080 x 1920) vertical view.
  2. Profile Grid View: This crops your cover into a 1:1 (1080 x 1080) square.

Pro Tip for Covers

When designing your cover in a tool like Canva or Photoshop, always place your headline or “hook” text directly in the center square. This ensures that when the video is cropped for your grid, the text remains perfectly legible.

Rule 3: Frame Rate and File Format Optimization

Size isn’t just about pixels; it’s about how those pixels move. Instagram’s algorithm prefers videos that feel smooth but don’t take up massive amounts of server space.

The 30 FPS Rule

Most professional creators shoot in 30 FPS (frames per second) or 60 FPS. While 60 FPS looks very “smooth” and is great for slow-motion, 30 FPS is the standard for talking-head content and most lifestyle vlogs. It provides a more natural, cinematic look and results in smaller file sizes that upload faster without losing quality.

Supported File Types

  • MP4: The industry standard and preferred format.

  • MOV: Also accepted, typically used by Apple devices.

  • H.264 Codec: This is the specific compression type you should select when exporting from apps like CapCut or Premiere Pro.

Rule 4: Managing File Size and Compression

You might have a 2GB 4K masterpiece, but Instagram will crush that file down to a few megabytes. Large files often trigger heavy compression, making the video look “muddy.”

The “Sweet Spot” for File Size

Try to keep your final export under 50MB to 100MB. To do this without losing quality:

  1. Set your bitrate to 10-15 Mbps for 1080p.
  2. Ensure you are connected to high-speed Wi-Fi during the upload.
  3. Crucial Step: Go to Instagram Settings > Account > Data Usage > and toggle on “Upload at Highest Quality.” Many creators ignore this, and Instagram defaults to a lower-quality upload to save data.

Rule 5: The Header and Caption Space

In 2026, SEO (Search Engine Optimization) is vital for Reels. Instagram “reads” the text on your screen and in your captions to categorize your content.

Text Placement for SEO

Instead of just using the Instagram caption box, include “On-Screen Text.” However, remember the size rules: place this text in the upper-middle third of the 1080 x 1920 frame. This keeps it above the caption but below the top “notch” area of modern smartphones.

Real-World Example

Imagine a “Day in the Life” Reel. If the title “My Morning Routine” is too high, it gets hidden by the phone’s clock. If it’s too low, it’s buried under your username. By centering it at the 1080×1080 mark, you win on all fronts.

Rule 6: Consistency Across Multi-Platform Sizes

Most creators are “cross-posting” to TikTok and YouTube Shorts. While all three platforms use 9:16, their UI overlays are slightly different.

The Comparison Table: Reels vs. TikTok vs. Shorts

Feature Instagram Reels TikTok YouTube Shorts
Aspect Ratio 9:16 9:16 9:16
Ideal Resolution 1080 x 1920 1080 x 1920 1080 x 1920
Safe Zone Center 4:5 area Center-Left focused Center focused
Max Length 90 seconds 10 minutes 60 seconds
UI Density Moderate High (Right side) Low (Bottom-heavy)

The “Universal” Strategy

To create one video for all platforms, keep all essential content within the center 60% of the screen. This “Universal Safe Zone” ensures that no matter where the “Like” button or “Share” arrow is located on a specific app, your content remains the star.

Rule 7: Lighting and Contrast as “Size” Modifiers

This is a rule most creators ignore. If your video is poorly lit, the pixels appear grainy. This grain (noise) makes it harder for Instagram’s compression to define edges, making your “size” feel smaller and lower resolution than it actually is.

The Expert Insight

Always prioritize front-facing natural light. When your edges are sharp, the 1080×1920 resolution pops. High-contrast text (e.g., white text with a black background) is also easier for the AI to “read” and index for search results.

Step-by-Step Framework for the Perfect Reel Export

Follow these steps every time you create to ensure maximum quality:

  1. Set Camera Settings: Shoot in 1080p at 30 FPS. Avoid 4K unless you plan to crop in significantly.
  2. Edit in 9:16: Use a vertical canvas (1080 x 1920) in your editing software.
  3. Check the Safe Zone: Use an overlay template to ensure text isn’t in the “danger zones” at the top or bottom.
  4. Export Settings: Select MP4, H.264 codec, and a bitrate of 12 Mbps.
  5. Design the Cover: Create a 1080 x 1920 image with the main subject/text in the center 1080 x 1080 square.
  6. Upload Quality Check: Ensure “Upload at Highest Quality” is turned on in your app settings.
  7. Final Review: Once uploaded, watch the Reel on a different device to ensure no text is cut off.

Common Mistakes to Avoid

  • Using Horizontal Video: Never upload 16:9 video with black bars. It looks lazy and the algorithm will limit its reach.

  • Watermarks: Instagram actively demotes Reels that have TikTok or other app watermarks. Use a clean file.

  • Excessive Zoom: If you shoot in 1080p and zoom in 200%, you are effectively reducing your resolution to 540p. Always try to frame your shot correctly while filming.

  • Busy Backgrounds: If your background is too “busy,” it can distract from on-screen text, especially if that text is small or thin.

Key Takeaways

  • 1080 x 1920 is the non-negotiable resolution for Instagram Reels.

  • The 9:16 aspect ratio must be maintained for a full-screen immersive experience.

  • Stay within the Safe Zone (1080 x 1350) to avoid the UI covering your message.

  • Set your Instagram app to “Upload at Highest Quality” to prevent auto-blurring.

  • Optimize your Reel Cover for both the 9:16 Reels tab and the 1:1 Profile Grid.

Find More: Boost Your Sales With SEO Services

FAQs

1. Why does my Instagram Reel look blurry after I upload it?

This usually happens because “Upload at Highest Quality” is turned off in your Instagram settings, or you have a weak internet connection during the upload process. Additionally, if your file size is too large (like a 4K file), Instagram’s aggressive compression can cause blurriness.

2. Can I use a 4K video for Instagram Reels?

Yes, you can, but it isn’t always better. Instagram displays Reels in 1080p. If you upload in 4K, the app will downscale your video. To get the best results, many pros recommend shooting in 4K (for editing flexibility) but exporting in 1080p for the actual upload.

3. What is the best aspect ratio for Instagram Reel covers?

The best aspect ratio for a cover is 9:16 (1080 x 1920 pixels). However, you must keep your important text or imagery in the center 1:1 square (1080 x 1080) so that it looks good when cropped for your main profile grid.

4. How long can an Instagram Reel be in 2026?

While Instagram has tested various lengths, the standard maximum for a recorded Reel is 90 seconds. However, if you upload a video as a post, Instagram often treats any video under 15 minutes as a Reel, though shorter, punchier content (7-15 seconds) usually performs best.

5. Does the file size of my Reel affect its reach?

Directly, no. Indirectly, yes. If your file size is massive, it may take longer to load for users with slow data, leading to a higher “bounce rate.” If people scroll past because the video hasn’t loaded, the algorithm will stop showing it to new people.

Tags:
Seraphinite AcceleratorOptimized by Seraphinite Accelerator
Turns on site high speed to be attractive for people and search engines.