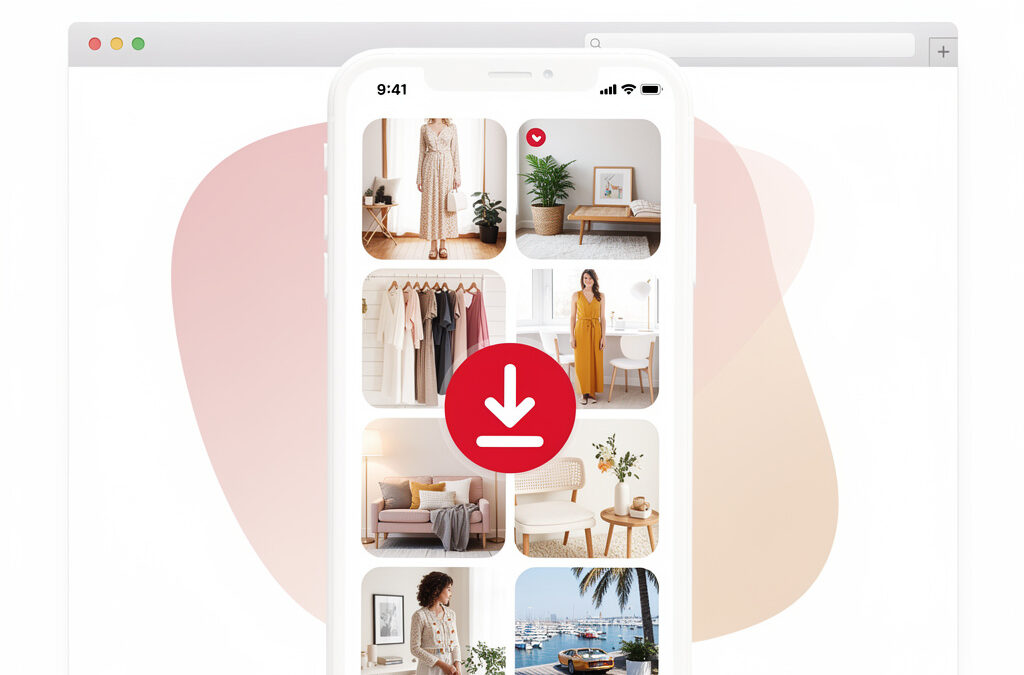
UK: +44 2038074555 info@atamgo.com
7 Essential Instagram Reel Size Rules Most Creators Ignore

7 Essential Instagram Reel Size Rules Most Creators Ignore

Your Instagram Reels are getting blurry, cut off, or ignored by the algorithm because you’re likely breaking the golden rules of aspect ratios. In 2026, high-quality resolution is no longer a luxury—it is the baseline for organic reach. If your content doesn’t fit the screen perfectly, users will scroll past before your hook even lands.

The standard Instagram Reel size is 1080 x 1920 pixels, maintaining a 9:16 aspect ratio. To ensure your content remains visible, keep all essential text and visual elements within the “Safe Zone” (the central 1080 x 1350 area) to avoid being covered by the UI or captions.

Find More: 7 Powerful Private Instagram Viewer Tools That Actually Work in 2026

Understanding Instagram Reel Size and Dimensions

Before filming, you must understand the technical framework of a Reel. A Reel isn’t just a vertical video; it’s a specific data package that Instagram’s compression engine needs to process correctly. If you upload the wrong size, Instagram will “stretch” or “crop” your footage, resulting in a pixelated mess that hurts your brand authority.

What is the 9:16 Aspect Ratio?

The aspect ratio refers to the relationship between the width and the height of your video. For Reels, this is 9:16. This means for every 9 units of width, there are 16 units of height. This is the inverse of the traditional widescreen 16:9 ratio used for YouTube or television.

Ideal Pixel Resolution

While the aspect ratio tells you the shape, the resolution tells you the quality. The gold standard for Instagram Reels is 1080 x 1920 pixels. This is considered Full HD (High Definition). While 4K video (2160 x 3840) is popular, Instagram often compresses these files so aggressively that they can actually look worse than a well-exported 1080p file.

Rule 1: The “Safe Zone” is Your Most Critical Asset

The biggest mistake beginners make is placing text or faces at the very top or bottom of the frame. Instagram overlays its own User Interface (UI) elements—like your profile picture, username, caption, and music title—over your video.

The 4:5 Safe Zone Explained

While the full Reel is 1080 x 1920, the “Safe Zone” is approximately 1080 x 1350. This is the middle section of your video. Anything placed in the top 15% or the bottom 25% of the screen risks being obscured by the Instagram UI. If your call-to-action (CTA) is at the very bottom, half of your audience won’t be able to read it.

How to Visualise the Safe Zone

  • Top Margin: Keep the top 220 pixels clear of important text.

  • Bottom Margin: Keep the bottom 420 pixels clear of captions and buttons.

  • Side Margins: Maintain a small 30-50 pixel “breathing room” on the left and right.

Rule 2: Instagram Reel Cover Size and Grid Consistency

Your Reel doesn’t just live in the Reels tab; it appears on your main profile grid. If your cover image isn’t optimized, it will look awkward and unprofessional when someone visits your profile.

The Two Shapes of a Cover

  1. Reels Tab View: This uses the full 9:16 (1080 x 1920) vertical view.
  2. Profile Grid View: This crops your cover into a 1:1 (1080 x 1080) square.

Pro Tip for Covers

When designing your cover in a tool like Canva or Photoshop, always place your headline or “hook” text directly in the center square. This ensures that when the video is cropped for your grid, the text remains perfectly legible.

Rule 3: Frame Rate and File Format Optimization

Size isn’t just about pixels; it’s about how those pixels move. Instagram’s algorithm prefers videos that feel smooth but don’t take up massive amounts of server space.

The 30 FPS Rule

Most professional creators shoot in 30 FPS (frames per second) or 60 FPS. While 60 FPS looks very “smooth” and is great for slow-motion, 30 FPS is the standard for talking-head content and most lifestyle vlogs. It provides a more natural, cinematic look and results in smaller file sizes that upload faster without losing quality.

Supported File Types

  • MP4: The industry standard and preferred format.

  • MOV: Also accepted, typically used by Apple devices.

  • H.264 Codec: This is the specific compression type you should select when exporting from apps like CapCut or Premiere Pro.

Rule 4: Managing File Size and Compression

You might have a 2GB 4K masterpiece, but Instagram will crush that file down to a few megabytes. Large files often trigger heavy compression, making the video look “muddy.”

The “Sweet Spot” for File Size

Try to keep your final export under 50MB to 100MB. To do this without losing quality:

  1. Set your bitrate to 10-15 Mbps for 1080p.
  2. Ensure you are connected to high-speed Wi-Fi during the upload.
  3. Crucial Step: Go to Instagram Settings > Account > Data Usage > and toggle on “Upload at Highest Quality.” Many creators ignore this, and Instagram defaults to a lower-quality upload to save data.

Rule 5: The Header and Caption Space

In 2026, SEO (Search Engine Optimization) is vital for Reels. Instagram “reads” the text on your screen and in your captions to categorize your content.

Text Placement for SEO

Instead of just using the Instagram caption box, include “On-Screen Text.” However, remember the size rules: place this text in the upper-middle third of the 1080 x 1920 frame. This keeps it above the caption but below the top “notch” area of modern smartphones.

Real-World Example

Imagine a “Day in the Life” Reel. If the title “My Morning Routine” is too high, it gets hidden by the phone’s clock. If it’s too low, it’s buried under your username. By centering it at the 1080×1080 mark, you win on all fronts.

Rule 6: Consistency Across Multi-Platform Sizes

Most creators are “cross-posting” to TikTok and YouTube Shorts. While all three platforms use 9:16, their UI overlays are slightly different.

The Comparison Table: Reels vs. TikTok vs. Shorts

Feature Instagram Reels TikTok YouTube Shorts
Aspect Ratio 9:16 9:16 9:16
Ideal Resolution 1080 x 1920 1080 x 1920 1080 x 1920
Safe Zone Center 4:5 area Center-Left focused Center focused
Max Length 90 seconds 10 minutes 60 seconds
UI Density Moderate High (Right side) Low (Bottom-heavy)

The “Universal” Strategy

To create one video for all platforms, keep all essential content within the center 60% of the screen. This “Universal Safe Zone” ensures that no matter where the “Like” button or “Share” arrow is located on a specific app, your content remains the star.

Rule 7: Lighting and Contrast as “Size” Modifiers

This is a rule most creators ignore. If your video is poorly lit, the pixels appear grainy. This grain (noise) makes it harder for Instagram’s compression to define edges, making your “size” feel smaller and lower resolution than it actually is.

The Expert Insight

Always prioritize front-facing natural light. When your edges are sharp, the 1080×1920 resolution pops. High-contrast text (e.g., white text with a black background) is also easier for the AI to “read” and index for search results.

Step-by-Step Framework for the Perfect Reel Export

Follow these steps every time you create to ensure maximum quality:

  1. Set Camera Settings: Shoot in 1080p at 30 FPS. Avoid 4K unless you plan to crop in significantly.
  2. Edit in 9:16: Use a vertical canvas (1080 x 1920) in your editing software.
  3. Check the Safe Zone: Use an overlay template to ensure text isn’t in the “danger zones” at the top or bottom.
  4. Export Settings: Select MP4, H.264 codec, and a bitrate of 12 Mbps.
  5. Design the Cover: Create a 1080 x 1920 image with the main subject/text in the center 1080 x 1080 square.
  6. Upload Quality Check: Ensure “Upload at Highest Quality” is turned on in your app settings.
  7. Final Review: Once uploaded, watch the Reel on a different device to ensure no text is cut off.

Common Mistakes to Avoid

  • Using Horizontal Video: Never upload 16:9 video with black bars. It looks lazy and the algorithm will limit its reach.

  • Watermarks: Instagram actively demotes Reels that have TikTok or other app watermarks. Use a clean file.

  • Excessive Zoom: If you shoot in 1080p and zoom in 200%, you are effectively reducing your resolution to 540p. Always try to frame your shot correctly while filming.

  • Busy Backgrounds: If your background is too “busy,” it can distract from on-screen text, especially if that text is small or thin.

Key Takeaways

  • 1080 x 1920 is the non-negotiable resolution for Instagram Reels.

  • The 9:16 aspect ratio must be maintained for a full-screen immersive experience.

  • Stay within the Safe Zone (1080 x 1350) to avoid the UI covering your message.

  • Set your Instagram app to “Upload at Highest Quality” to prevent auto-blurring.

  • Optimize your Reel Cover for both the 9:16 Reels tab and the 1:1 Profile Grid.

Find More: Boost Your Sales With SEO Services

FAQs

1. Why does my Instagram Reel look blurry after I upload it?

This usually happens because “Upload at Highest Quality” is turned off in your Instagram settings, or you have a weak internet connection during the upload process. Additionally, if your file size is too large (like a 4K file), Instagram’s aggressive compression can cause blurriness.

2. Can I use a 4K video for Instagram Reels?

Yes, you can, but it isn’t always better. Instagram displays Reels in 1080p. If you upload in 4K, the app will downscale your video. To get the best results, many pros recommend shooting in 4K (for editing flexibility) but exporting in 1080p for the actual upload.

3. What is the best aspect ratio for Instagram Reel covers?

The best aspect ratio for a cover is 9:16 (1080 x 1920 pixels). However, you must keep your important text or imagery in the center 1:1 square (1080 x 1080) so that it looks good when cropped for your main profile grid.

4. How long can an Instagram Reel be in 2026?

While Instagram has tested various lengths, the standard maximum for a recorded Reel is 90 seconds. However, if you upload a video as a post, Instagram often treats any video under 15 minutes as a Reel, though shorter, punchier content (7-15 seconds) usually performs best.

5. Does the file size of my Reel affect its reach?

Directly, no. Indirectly, yes. If your file size is massive, it may take longer to load for users with slow data, leading to a higher “bounce rate.” If people scroll past because the video hasn’t loaded, the algorithm will stop showing it to new people.

Tags:
7 Proven TikTok to MP3 Tools That Actually Work in 2026

7 Proven TikTok to MP3 Tools That Actually Work in 2026

If you’ve ever scrolled through TikTok and found a sound so catchy you needed it as a ringtone or for your next edit, you know the struggle. TikTok doesn’t offer a “save as MP3” button, but in 2026, several high-quality tools make this process instant and safe.

To convert TikTok to MP3, simply copy the video link from TikTok, paste it into a reliable converter like SSSTik, SnapTik, or UniConverter, and select the MP3 output format. These tools extract the high-quality audio stream directly from the video, allowing you to save it for offline use without any watermarks.

Find More: 7 Genius TikTok Thumbnail Downloader Tools That Actually Work in 2026

What is a TikTok to MP3 Converter?

A TikTok to MP3 converter is a specialized digital tool designed to extract the audio track from a TikTok video and save it as a standalone audio file. Since TikTok videos are stored in MP4 (video) format, these tools strip away the visual data and re-encode the audio into the universal MP3 format.

This is essential for creators, DJs, or casual fans who want to:

  • Create custom phone ringtones or alarms.

  • Archive trending sounds for future content creation.

  • Listen to TikTok-exclusive remixes or lo-fi beats offline.

7 Best TikTok to MP3 Tools for 2026

1. SSSTik.io (Best Overall for Speed)

SSSTik remains the gold standard for beginners in 2026. It is a web-based tool, meaning you don’t need to install any bulky software. It’s famous for being one of the fastest “link to MP3” engines currently available.

  • Best For: Users who want the audio immediately without any setup.

  • Pros: 100% free, no registration, works on mobile and desktop.

  • Cons: Contains some display ads.

2. SnapTik (Best for High-Quality Bitrates)

SnapTik

While many tools compress audio to save space, SnapTik has updated its 2026 engine to prioritize audio fidelity. It often provides a cleaner, 320kbps-equivalent sound compared to more basic converters.

  • Best For: Audiophiles and creators who need “crystal clear” sound for editing.

  • Pros: Minimalistic interface, high-resolution extraction.

  • Cons: Interface can be slightly slower on older browsers.

3. Wondershare UniConverter (Best Professional Desktop Tool)

Wondershare UniConverter

If you are converting TikTok links in bulk, web tools can be tedious. UniConverter is a desktop powerhouse for Windows and macOS. In 2026, it features an “Auto-Paste” mode that detects TikTok links on your clipboard and converts them instantly.

  • Best For: Professional editors and power users.

  • Pros: Batch conversion, built-in audio trimmer, zero ads.

  • Cons: Paid software (though a free trial is available).

4. MusicallyDown (Best for Mobile Users)

MusicallyDown has optimized its 2026 interface specifically for Android and iOS Safari/Chrome browsers. It’s incredibly lightweight and handles the “Share to Copy Link” workflow better than almost any other site.

  • Best For: Converting audio while on the go.

  • Pros: Very mobile-friendly, very few intrusive pop-ups.

  • Cons: Occasionally struggles with private or region-locked videos.

5. Flixier (Best for Immediate Audio Editing)

Flixier isn’t just a downloader; it’s a cloud-based editor. When you paste a TikTok link, it loads the audio into a timeline. You can trim the “silent” parts at the start or end before you even hit download.

  • Best For: People who only need a specific 5-second clip of a long song.

  • Pros: Built-in trimming, cloud-based (no download needed), AI noise reduction.

  • Cons: Requires a free account to save projects.

6. SaveTT.cc (The Reliable Backup)

In the world of SEO and AI tools, websites often go down due to high traffic. SaveTT.cc is the most reliable “always-up” backup. It uses a simplified API that rarely fails, even when TikTok updates its platform security.

  • Best For: When your favorite tool isn’t working.

  • Pros: Extreme stability, very simple “one-click” download.

  • Cons: Basic features only; no advanced quality settings.

7. 4K Video Downloader Plus (Best for Playlists)

If you find a TikTok “Collection” or a series of videos you love, this tool can grab the audio from all of them at once. In 2026, its “Smart Mode” allows you to set “MP3” as a permanent preference, so every link you paste is automatically handled.

  • Best For: Archiving entire sound libraries or artist profiles.

  • Pros: Extremely powerful, supports multiple platforms (YouTube, IG, TikTok).

  • Cons: Desktop installation required.

Step-by-Step Framework: How to Convert TikTok to MP3

Follow this universal 3-step framework to get your audio in under 60 seconds:

  1. Copy the Link: Open TikTok, find your video, tap the Share (arrow) icon, and select Copy Link.
  2. Paste the Link: Open your chosen tool (e.g., SSSTik), click into the search box, and paste the URL.
  3. Download the MP3: Click the Download button. Ensure you select the option that says “Download MP3” or “Download Audio” instead of the video file.

Comparison of Top 2026 Tools

Tool Platform Best Feature Cost
SSSTik Web/Mobile Raw Speed Free
SnapTik Web/App Audio Quality Free
UniConverter Desktop Batch Processing Paid / Trial
Flixier Web (Cloud) Trim Before Download Free / Pro
4K Downloader Desktop Playlist Support Free / Paid

Common Mistakes to Avoid

  • Downloading from “Private” Accounts: Most tools cannot “see” videos from private accounts. If the video isn’t public, the converter will return an error.

  • Clicking “Fake” Download Buttons: Many free sites use “Ad-Buttons” that look like the real thing. Always look for the plain text links or the official primary button.

  • Using Low-Quality Bitrates: If a tool offers a choice, always pick 128kbps or higher. Anything lower will sound “tinny” or distorted.

  • Ignoring Copyright: Just because you can download it doesn’t mean you own it. Avoid re-uploading these sounds to Spotify or Apple Music as your own.

Find More: Boost Your Sales With SEO Services

Expert Pro Tips for 2026

The “Browser Shortcut” Trick: On desktop, many users use browser extensions that add a “Download” button directly under TikTok videos. This saves you from having to copy-paste links manually.

Check the “Original Sound” Link: If you want the clearest version of a song, don’t convert a video where someone is talking over the music. Click the spinning record icon at the bottom right of the TikTok to find the “Original Sound” page, and use a link from a video that has the cleanest audio.

FAQs

1. Is it legal to convert TikTok to MP3?

It is generally legal for personal use (like a ringtone). However, using copyrighted music for commercial purposes or re-distributing the files can lead to copyright strikes or legal issues.

2. Do these tools work on iPhones?

Yes. In 2026, iOS allows direct downloads through Safari. When you click download, the file will go to your “Files” app in the “Downloads” folder.

3. Will these tools give my device a virus?

The tools listed above are vetted for 2026. However, always avoid sites that ask you to download “.exe” or “.apk” files just to convert a simple link. Stick to browser-based tools or reputable software like Wondershare.

4. Can I convert a 10-minute TikTok video to MP3?

Yes. Most modern tools support the longer video formats TikTok introduced. Be aware that the file size will be larger and may take 10–20 seconds longer to process.

5. Why is the audio quality lower than the video?

TikTok compresses audio to make videos load faster. When you convert it to MP3, you are limited by the quality of the original upload. Using a tool like SnapTik helps preserve as much data as possible.

Key Takeaways

  • Speed vs. Quality: Use SSSTik for speed and SnapTik for quality.

  • Mobile vs. Desktop: Web tools are great for one-offs; desktop apps are better for bulk downloads.

  • Safety First: Never provide personal information or credit card details to a “free” converter.

  • The Process: It’s always Copy > Paste > Download.

Tags:
7 Best Tools to Download Instagram Audio in Seconds (2026 Guide)

7 Best Tools to Download Instagram Audio in Seconds (2026 Guide)

Finding the perfect trending sound on Instagram is easy; saving it to your device for offline use or video editing used to be the hard part. This guide reveals the fastest, safest ways to extract high-quality audio from Reels and videos instantly.

To download Instagram audio, copy the URL of the Reel or video, paste it into a reliable third-party extraction tool like SnapInsta or SaveInsta, select the MP3 format, and click download. These web-based tools convert video files into high-bitrate audio files (320kbps) compatible with all modern editing software and mobile devices.

Find More: 9 Best Times to Post on Instagram Today (Backed by Fresh Data)

Understanding Instagram Audio Extraction

Before diving into the tools, it is essential to understand what Instagram audio download actually entails. When you “save” a sound within the Instagram app, you are merely bookmarking it for use within their ecosystem. To use that audio in a professional video editor or listen to it offline, you must extract the audio data from the video container.

What is an Instagram Audio Downloader?

An Instagram audio downloader is a specialized web-based utility or application designed to strip the visual layer from an Instagram Reel or post, leaving only the audio track. Most modern tools in 2026 output this data in MP3 or WAV formats to ensure universal compatibility.

7 Simple Tools to Download Instagram Audio in Seconds

1. SnapInsta (Best for Speed)

SnapInsta

SnapInsta remains a market leader due to its minimalist interface and lack of aggressive pop-up ads. It handles high-traffic requests without slowing down, making it the go-to for creators who need files immediately.

  • Best Feature: One-click MP3 conversion.

  • Compatibility: Browser-based (iOS, Android, PC).

2. SaveInsta (High-Fidelity Audio)

SaveInsta

If you are a professional editor, audio quality matters. SaveInsta often preserves the original bitrate of the uploaded audio, preventing the “tinny” sound found in lower-end converters.

  • Best Feature: Supports 320kbps audio exports.

  • Compatibility: All web browsers.

3. InstaVideoSave (Best for Batch Processing)

When you are researching trends and need to download ten different sounds at once, InstaVideoSave provides a stable environment for multiple tabs without crashing the browser cache.

  • Best Feature: High stability for long Reels.

  • Compatibility: Mobile-optimized UI.

4. Kapwing (Best for Creators)

Unlike simple downloaders, Kapwing is a full-scale cloud editor. You can paste an Instagram link, and it will load the video into a timeline where you can trim the audio before downloading it.

  • Best Feature: Built-in trimming and fading tools.

  • Note: Requires a free account for some features.

5. FDownloader (Reliable Mirror)

FDownloader is a classic “utility” site. It is extremely lightweight, which makes it perfect for users with slower internet connections or older mobile devices.

  • Best Feature: Extremely low data usage.

  • Compatibility: Works well on older browsers.

6. ReelSaver.net (Dedicated Reel Extraction)

Specifically tuned for the Reels algorithm, this tool is excellent at bypassing the “private account” blocks that sometimes hinder other general-purpose downloaders (provided you have access to the link).

  • Best Feature: Fast processing of 60-90 second audio tracks.

  • Compatibility: Android and iOS.

7. Online-Convert (Best for File Formats)

If you need a specific file type like .ogg or .flac for a specific project, Online-Convert allows you to set advanced parameters before the extraction begins.

  • Best Feature: Customizable sampling rates and channels (Mono/Stereo).

  • Compatibility: Desktop-heavy interface.

The Universal Step-by-Step Framework

Regardless of which tool you choose, the process for a successful Instagram reels audio download follows a standard 4-step framework. Follow these steps to avoid errors:

Step 1: Locate and Copy the Link

Open Instagram and find the Reel or video containing the audio you want. Tap the “Share” icon (the paper airplane) and select “Copy Link.” Ensure you are copying the link to the specific post, not the creator’s profile.

Step 2: Access the Downloader

Open your preferred browser (Chrome, Safari, or Brave) and navigate to one of the tools listed above. Avoid using “in-app” browsers from other social media platforms as they often block downloads for security reasons.

Step 3: Paste and Process

Paste the URL into the input field. Most tools will have a button labeled “Download,” “Convert,” or “Get.” Click it and wait for the server to fetch the video data. This usually takes 2–5 seconds.

Step 4: Save the MP3

Select the “Download Audio” or “MP3” option. On iPhones, the file will typically go to your “Files” app under “Downloads.” On Android, it will appear in your “Downloads” folder or your default music player.

Real-World Examples of Use Cases

  • Content Creation: A YouTuber downloads a trending “meme” sound from Instagram to use as a comedic sound effect in their latest long-form video.

  • Podcast Intros: A podcaster finds an atmospheric lo-fi track shared by an indie artist on Reels and uses it as a background bed for their intro (with permission).

  • Offline Inspiration: A choreographer saves a specific remix of a song to practice their routine in a studio that lacks stable Wi-Fi.

Comparison Table: Top 3 Downloaders

Feature SnapInsta Kapwing SaveInsta
Primary Use Quick MP3s Editing/Trimming High-Quality Audio
Speed ⚡ Fast 🐢 Moderate 🚀 Very Fast
Account Req. No Yes (for some) No
Mobile Friendly Yes Desktop Best Yes

Common Mistakes to Avoid

  1. Trying to Download from Private Accounts: Third-party tools cannot access videos from accounts set to “Private” unless the tool specifically has a “Private Downloader” feature that requires you to log in (which is generally not recommended for security).
  2. Using Low-Quality Bitrates: Many generic converters default to 128kbps. Always look for tools that offer 320kbps to ensure your audio sounds professional when played on speakers.
  3. Clicking “Fake” Download Buttons: Many free sites are funded by ads. Be careful of large, flashing “Download” buttons that are actually advertisements. The real button is usually smaller and located directly next to the video thumbnail.
  4. Ignoring Copyright Laws: Downloading audio for personal use is generally fine, but using copyrighted music in commercial projects without a license can lead to legal action or “DMCA” takedowns.

Pro Tips for Power Users

  • Browser Extensions: If you download frequently, look for Chrome or Firefox extensions. They add a “Download” button directly onto the Instagram web interface.

  • Check the “Save” Original: Before downloading, check if the artist has a “Link in Bio” to a high-quality version of the song on Spotify or SoundCloud. Supporting the artist directly is always the best practice.

  • The “Screen Record” Hack: If a tool is down, you can screen record the Reel, then use a “Video to MP3” converter on your phone. It’s a bit slower but works 100% of the time.

Find More: Boost Your Sales With SEO Services

FAQs

1. Is it legal to download Instagram audio?

It is legal for personal, offline use. However, re-uploading someone else’s audio as your own or using it in a commercial advertisement without permission violates copyright laws and Instagram’s Terms of Service.

2. Do I need to provide my Instagram password?

No. You should never use a tool that asks for your Instagram login credentials. Reputable downloaders only require the public URL of the post.

3. Can I download audio from a private Instagram account?

Standard downloaders cannot access private content. To download from a private account, you must be a follower of that account and use a specialized browser-based “Private Downloader” that captures the page source.

4. Why is the audio quality low after downloading?

This usually happens because the original uploader used a low-quality file, or the downloader compressed the file to save server space. Use SaveInsta or SnapInsta for the best results.

5. Where do the files go on my iPhone?

By default, iOS saves downloaded files to the “Downloads” folder within the Files app. You can move these to your Music library or import them into apps like CapCut or LumaFusion.

Key Takeaways

  • Speed is Key: Tools like SnapInsta provide the fastest path from URL to MP3.

  • Quality Matters: Always aim for 320kbps if the option is available to avoid muffled sound.

  • Safety First: Never share your password; use web-based tools that only require a link.

  • Creative Freedom: Use extracted audio to enhance your own content, provided you respect intellectual property rights.

  • Versatility: These tools work across all devices including iPhones, Androids, and desktops.

Tags:
7 Powerful Ways to View an Anonymous Instagram Story (Without Them Knowing)

7 Powerful Ways to View an Anonymous Instagram Story (Without Them Knowing)

Curious about a “stealth mode” for Instagram? Whether you are conducting market research or just staying low-profile, viewing stories without appearing in the “Seen” list is a common goal. Here is how to stay invisible in 2026.

Direct Answer: How to View an Anonymous Instagram Story

To view an anonymous Instagram story, the most effective methods are using third-party web viewers (like StoriesIG or Mollygram), enabling Airplane Mode after pre-loading the app, or using the “Half-Swipe” technique. These methods prevent your account ID from being sent to Instagram’s servers, ensuring your name never appears on the creator’s viewer list.

Find More: 9 Best Times to Post on Instagram Today (Backed by Fresh Data)

What is an Anonymous Instagram Story Viewer?

An anonymous Instagram story viewer is any tool or technique that allows you to watch a user’s ephemeral content (Stories) without your profile appearing in their analytics. By default, Instagram tracks every view and displays it to the creator. Anonymous viewing bypasses this tracking by either disconnecting from the internet or using a “middleman” server to fetch the data.

1. Use Third-Party Web Viewers (Easiest Method)

In 2026, web-based tools remain the most popular choice because they require no login and zero installation.

  • How it works: These sites act as a proxy. You give them a username, their server fetches the story, and they show it to you on their own page.

  • Top 2026 Tools:

    • StoriesIG: Known for high-speed loading and clean UI.

    • Mollygram: Best for viewing both stories and archived highlights.

    • InstaNavigation: Excellent for downloading HD story videos.

  • Step-by-Step:

  1. Copy the Instagram username of the target profile.
  2. Visit a reputable viewer site (e.g., storiesig.info).
  3. Paste the username into the search bar.
  4. Click “View” and watch the content privately.

2. The Airplane Mode Trick (No Tools Required)

This is the classic “ninja” move. It relies on Instagram’s “pre-loading” feature, which downloads stories to your phone’s local cache before you even tap them.

  • Step-by-Step:

  1. Open the Instagram app and find the profile at the top of your feed.
  2. Wait 10–15 seconds to allow the stories to pre-load (cache) in the background.
  3. Turn on Airplane Mode (ensure Wi-Fi and Data are both OFF).
  4. Tap the story and watch it.
  5. Crucial: Force-close the app completely before turning Airplane Mode back off.
  • Expert Insight: If you don’t force-close the app, Instagram will “sync” the view once you reconnect to the internet.

3. The “Half-Swipe” Technique

Best for a quick “peek” without specialized tools. This allows you to see the first frame of a story without triggering the “viewed” status.

  • Step-by-Step:

  1. Open the story of the person immediately to the right of your target.
  2. Place your finger on the screen to pause that story.
  3. Slowly and carefully swipe to the left to “peek” at the target story.
  4. Do not let go of the screen or swipe all the way.
  5. Swipe back to the original story and close it.

4. Create a “Burner” Account (Finsta)

If you need to watch stories frequently and want to do it directly within the app, a secondary account is the most reliable long-term solution.

  • Pro Tip: Use a VPN and a fresh email address. Do not link your phone number or sync your contacts, as Instagram may suggest your new “secret” account to your real-life friends.

  • Setup: Give the account a realistic but generic bio and a non-identifying profile picture to avoid looking like a bot.

5. Browser Extensions for Chrome/Edge

For desktop users, extensions like “Hiddengram” or “Ghostify” allow you to browse Instagram.com while automatically blocking the “view” signal.

  • How to use: Install the extension from the Chrome Web Store, toggle it to “On,” and browse stories as usual. The extension prevents the API call that marks a story as seen.

6. Use a Friend’s Account

The simplest “analog” version of anonymity. If a friend already follows the account, you can view the story on their device. Since your name isn’t on the list, you remain anonymous.

7. Professional Monitoring Tools (For Experts)

If you are a marketer or researcher, tools like uMobix or Glassagram offer “Ghost Mode” features. Unlike free web viewers, these are paid services that provide a dashboard to track stories, posts, and even deleted content over time.

Comparison of Methods

Method Ease of Use Reliability Works on Private Accounts?
Web Viewers Very High Medium No
Airplane Mode Medium High Yes (if following)
Half-Swipe Medium Low Yes (if following)
Burner Account Low Very High Yes (if approved)
Browser Ext. High Medium Yes (if following)

Common Mistakes to Avoid

  • Logging In: Never enter your main Instagram password into a third-party website. Only use “no-login” tools.

  • Forgetting to Force-Close: In the Airplane Mode trick, if you don’t kill the app, you will be caught.

  • Checking Private Accounts: None of the free web tools can bypass a private account’s security. If a site claims it can, it’s likely a scam or phishing attempt.

  • Accidental Interaction: Be careful not to double-tap (Like) or reply to a story while using the “Half-Swipe” or a burner account.

Key Takeaways

  • Web tools are the fastest way to view public profiles anonymously.

  • Airplane Mode works for people you already follow but requires careful execution.

  • Private profiles remain the “Great Wall”—you must be a follower to see their stories.

  • Privacy first: Always use a VPN when using third-party sites to mask your IP address.

Find More: Boost Your Sales With SEO Services

FAQs

1. Can someone see if I viewed their Instagram story via a third-party site?

No. These websites do not use your personal account to fetch the data. The creator will see a view from a generic data center or a bot account, but they cannot trace it back to you.

2. Do anonymous story viewers work on private accounts?

Generally, no. Most tools only work on public profiles. To see a private story anonymously, you would need to follow them using a secondary “burner” account or use high-end monitoring software that requires device access.

3. Is it legal to use an anonymous Instagram story viewer?

Yes, it is legal to view publicly available information. However, using these tools to harass or stalk individuals violates Instagram’s Terms of Service and ethical digital boundaries.

4. Why do some web viewers stop working?

Instagram frequently updates its API and security layers to block “scraping.” When this happens, web viewers may go offline for a few hours or days until they update their code.

5. Can I download stories anonymously too?

Yes. Most 2026 web viewers like InstaNavigation or Mollygram include a “Download” button that allows you to save the story directly to your device without the user being notified.

Tags:
9 Best Times to Post on Instagram Today (Backed by Fresh Data)

9 Best Times to Post on Instagram Today (Backed by Fresh Data)

Stop guessing when your audience is scrolling. In 2026, the Instagram algorithm favors “Initial Velocity”—the speed at which your post gains traction in the first 10 minutes. If you miss the window today, your content dies in the feed. This guide provides the exact timestamps and data-backed shifts you need to dominate Thursday’s engagement cycles.

The best time to post on Instagram today, Thursday, March 5, 2026, is during the three peak engagement windows: 7:00 AM – 9:00 AM (morning commute), 12:00 PM – 1:00 PM (lunch break), and the high-intensity period from 7:00 PM – 9:00 PM. For Reels, the absolute peak for “Initial Velocity” occurs at 8:00 PM tonight.

Find More: 10 Proven Hacks for Free Instagram Followers Without Risking a Shadowban

Defining Instagram Peak Engagement in 2026

To master your posting schedule, you must understand two critical metrics that define “best time” in the current landscape. Initial Velocity refers to the rate of engagement (likes, shares, saves) a post receives within seconds of going live. The algorithm uses this to determine if your post deserves a spot on the “Explore” page or the top of follower feeds. Audience Habituation is the second factor; it describes the predictable patterns of user behavior based on their daily routine, such as the “morning scroll” or “bedtime browsing.” By aligning your content with these windows, you ensure your media appears when user density is at its highest, maximizing the probability of viral triggers.

The 9 Best Times to Post on Instagram Today

Based on real-time 2026 analytics across major industries, these are the 9 specific timestamps to target today.

1. 7:15 AM – The Early Bird Hook

This is the “pre-work” window. Users check their phones immediately upon waking. Content should be light, inspirational, or news-oriented.

2. 8:30 AM – The Commuter Surge

As professionals settle into their transit or home offices, there is a massive spike in Story views. This is the best time for quick, interactive polls.

3. 10:00 AM – The Mid-Morning Break

Engagement dips slightly but stabilizes. This is a “low competition” window where high-quality carousels can stand out without being drowned out by major brands.

4. 12:15 PM – The Lunchtime Peak

This is the second-largest traffic spike of the day. Users are looking for entertainment. If you are wondering what is the best time to post on Instagram today for educational content, this is it.

5. 2:30 PM – The Afternoon Slump

Focus shifts toward Reels. Users looking for a mental break from work tend to engage with short-form video content during this period.

6. 5:00 PM – The Transition Window

As the workday ends, there is a flurry of activity. Use this time for “Behind the Scenes” content that feels personal and relatable.

7. 7:00 PM – The Prime Time Launch

This is the beginning of the highest engagement block of the week. Thursday evenings are statistically stronger than Mondays or Tuesdays.

8. 8:00 PM – The Best Time to Post Reels on Instagram Today

Data shows that 8:00 PM on Thursdays is the “Sweet Spot” for the 2026 algorithm. Engagement density is at 98% of its daily maximum.

9. 10:30 PM – The Late-Night Scroll

This window belongs to Gen Z and night owls. Content here should be aesthetic, moody, or deeply engaging to capture the “winding down” audience.

Step-by-Step Framework for Finding Your Custom Best Time

While global peaks provide a baseline, your specific “Best Time” depends on your unique followers. Follow this 4-step framework to find your “Power Hour.” Step 1: Analyze Your Insights Navigate to Professional Dashboard > Insights > Total Followers. Scroll to the bottom to see “Most Active Times.” Note the difference between hours and days. Step 2: Cross-Reference Time Zones If 40% of your audience is in New York (EST) and 30% is in London (GMT), your “Global Peak” must be a compromise. Today, aiming for 1:00 PM EST captures both the US lunch break and the UK evening wind-down. Step 3: Test the “15-Minute Lead” Rule Post 15 minutes before a major peak (e.g., 7:45 PM for an 8:00 PM peak). This allows the 2026 AI to index your content so it is at the top of the feed exactly when the mass of users logs on. Step 4: Audit Engagement Velocity Check your post after 30 minutes. If the likes-to-reach ratio is below 5%, your timing or your hook failed. Adjust your next post by 60 minutes in either direction.

Real-World Examples of Timing Success

Consider a fitness influencer posting a “Thursday HIIT Circuit.” Posting at 6:00 AM today would capture users looking for a workout before work, leading to high “Saves.” Conversely, a luxury jewelry brand posting at 8:00 PM targets users in a “shopping and leisure” mindset, leading to higher “Direct Messages” and sales. A third example is a B2B SaaS company posting at 11:00 AM; this catches professionals during their peak productivity hours when they are looking for tools to solve workday problems. These variations prove that the best time to post today on Instagram is industry-dependent.

Comparison: Posting Today vs. The Weekend

Understanding the difference between a Thursday and a Saturday is vital for content strategy.

  • Thursday (Today): Higher engagement for educational content, B2B services, and career-oriented Reels. Users are in a “routine” mindset.

  • Saturday/Sunday: Lower “Initial Velocity” but longer “Shelf Life.” Content is usually lifestyle, travel, or family-oriented.

  • The Verdict: If you have high-value, “how-to” content, today is superior to the weekend. Today, users are looking for solutions; on the weekend, they are looking for an escape.

Common Mistakes to Avoid Today

1. Ignoring Your Specific Time Zone: Posting at 9:00 AM your time when your audience is 8 hours ahead is a “dead post” strategy. 2. Posting Too Frequently: In 2026, quality over quantity is king. Posting twice within 3 hours cannibalizes your own reach. The algorithm won’t push two of your posts to the same user simultaneously. 3. Forgetting the Caption Hook: Even at the “perfect” time, a weak first line will result in a scroll-past. 4. Neglecting Stories: Many users check Stories before the main feed. If you post to the feed, share a “teaser” in your Stories at the exact same time.

Pro Tips for Thursday Dominance

  • The “Double-Down” Strategy: If a post from this morning is performing well, do not post again tonight. Let the momentum carry.

  • Use Interactive Stickers: Post a poll 30 minutes before your main feed post. This “warms up” your followers and signals to the algorithm that they are active.

  • Reply to Comments Instantly: For the first 30 minutes after posting today, stay in the app. Rapid-fire replies signal high engagement levels to the 2026 AI.

Key Takeaways

  • Peak Windows: Aim for 7-9 AM, 12-1 PM, and 7-9 PM.

  • Reels Priority: The best time to post reels on Instagram today is 8:00 PM.

  • Velocity Matters: Initial engagement in the first 10 minutes dictates the next 24 hours of reach.

  • Consistency: Thursday is a “high-intent” day; use it for your most important announcements.

Find More: Boost Your Sales With SEO Services

FAQs

1. Does the 2026 algorithm still care about posting times?

Yes, but differently than before. It cares about “Engagement Density.” Posting when more followers are online increases the chance of rapid interactions, which triggers the algorithm to push your content to non-followers.

2. Should I post every day?

Not necessarily. Data suggests that 3-4 high-quality posts per week, timed perfectly to “High-Traffic Thursdays” and “Social Sundays,” outperform daily posting with mediocre content.

3. How do I know if my post was timed correctly?

Check your “Reach from Non-Followers” in Insights. If that number is high, your “Initial Velocity” was strong enough to break out of your immediate circle—a sign of perfect timing.

4. Is there a “worst” time to post today?

Generally, 2:00 PM to 4:00 PM is a “dead zone” for most niches as it sits between the lunch break and the end-of-work transition. Avoid important launches during this window.

5. Can I use scheduling tools for the best time?

Yes, provided the tool uses “Real-Time Optimization.” In 2026, static scheduling is less effective than AI-driven tools that adjust your post time based on when your followers actually log in each specific day.

Tags: