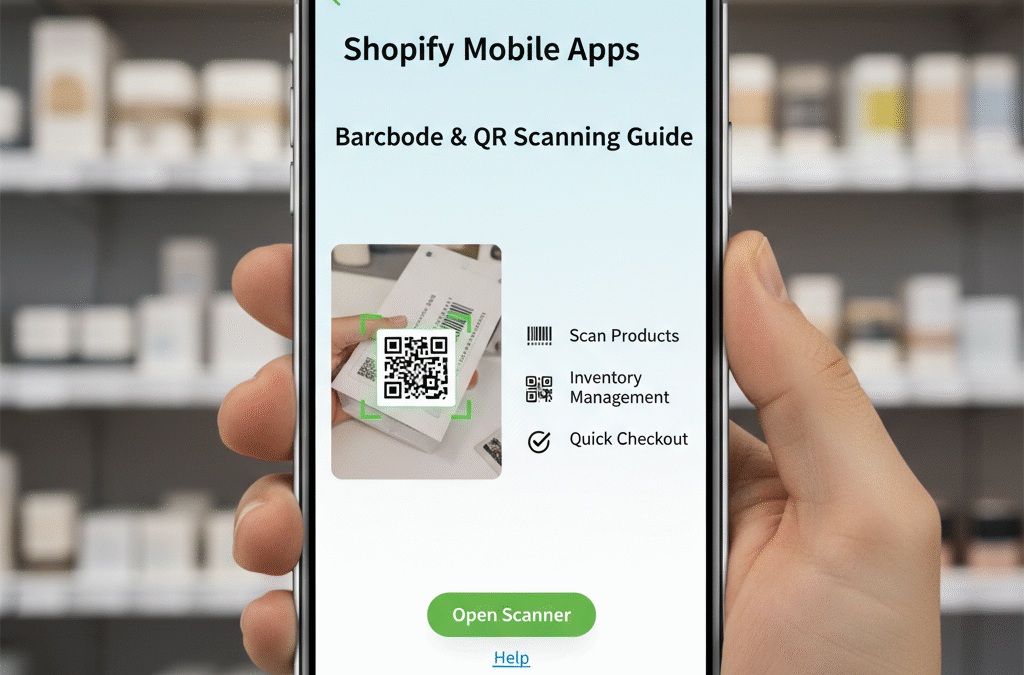
Shopify Mobile Apps: Barcode & QR Scanning Guide

Turning a phone into a reliable scanner sounds simple—open the camera, point, and go. Anyone who’s tried to run inventory counts or pack orders with a jittery camera knows it’s not that easy. Good scanning in a Shopify mobile app depends on the right SDK, a few UX choices, and guardrails that keep performance solid in ugly real-world conditions like low light, wrinkled labels, or spotty Wi-Fi. This guide cuts through the noise so you can ship a scanner that your team actually trusts.
Why scanning belongs in your Shopify app
Speed is obvious, but the real win is accuracy. Barcodes remove guesswork from SKU selection, cut mis-picks, and make returns less painful. QR codes add a marketing angle: scan to redeem, scan to subscribe, scan to track offline campaigns. If you already have a Shopify storefront and some flavor of custom app, scanning is the next small feature that unlocks big process wins. If you’re still mapping your app path, this walkthrough on turning a store into a mobile app is a handy starting point from our library.
What to scan—and where it lives in Shopify
Most merchants start with product barcodes (EAN/UPC/ISBN) and location labels for bins or shelves. Some print internal barcodes that encode the Shopify variant ID for unambiguous picking. For QR, the targets are links to product pages, return portals, or subscriber flows. Shopify’s guidance on product barcodes is worth a skim when you’re deciding whether to adopt existing codes or assign your own ranges.
Once you know the payloads, decide when scanning appears. Inventory teams want scan-first screens—open the app, the camera is ready. Store associates running pop-ups need a quick toggle between scan and manual lookup. Marketing teams bury QR scanning behind a campaign tab and only light it up for events. The point is to fit the scanner to the job, not the other way around.
The short list: features a good mobile scanner must have
If you don’t write anything else into your brief, write this: it has to scan fast, handle the codes you actually use, and work when your connection is flaky. You can get fancy later.
On the technical side, focus on symbology support (UPCs, EANs, Code 128 for internal labels, and QR at minimum), continuous scanning (no extra taps between items), low-light tolerance with torch control, and crop/zoom for small codes. If you’re scanning PDFs or images from the photo roll, you’ll want a library that can decode from stills as well as live video. Many teams compare SDKs using a checklist; this explainer on on-device scanning requirements is a good reference when you evaluate accuracy, device coverage, and offline reliability.
For teams that prefer native or cross-platform code with a Google-maintained library, ML Kit’s barcode docs are a useful yardstick for supported formats and performance notes.
Picking a barcode SDK without getting lost
You’ve got three broad paths: platform APIs, open libraries, and commercial SDKs. Platform APIs (AVFoundation on iOS, CameraX + ML Kit on Android) are fine for basic needs, but you’ll spend time tuning edge cases across devices. Open libraries give you more formats and community fixes, though the maintenance burden is real. Commercial SDKs trade license fees for faster setup, support, and edge-case handling (glare, curved labels, motion blur).
Whichever route you choose, try a simple bake-off. Select five to ten barcodes you actually use—shiny packaging, tiny labels, a crumpled return slip, a shelf label at a distance—and time first read, misread rate, and behavior under dim lighting. Test on two or three device tiers: a flagship, a mid-range, and that old phone your warehouse still uses. Keep notes. A day of testing beats a month of refactoring.
UX patterns that make scanning feel snappy
A quick scanner still feels slow if the UI gets in the way. Launch to camera when scanning is the job to be done. Keep a large “hold to torch” icon near the thumb. Use a light haptic bump on successful reads so users don’t stare at the screen. Show the last scanned item as a small card with quantity controls; if the user is picking two of the same SKU, they shouldn’t have to aim twice. For batch work, let users set a default quantity increment.
When you encode business rules, show them at the right moment. If scanning a return requires an RMA status check, do it immediately and explain why an item is blocked rather than failing silently. If marketing scans unlock a subscriber flow, prefill known fields and avoid dumping people into generic forms.
Offline matters more than you think
Warehouses and back rooms have dead spots. Farmers’ market booths and festivals are worse. If the scanner dies without a connection, the team will revert to manual entry and never come back. Cache product metadata the app needs for lookups, queue offline scans with timestamps, and reconcile when the device comes back online. Quieter but equally important: store settings for “what to do” on read (add to picklist, add to cart, toggle inventory). With a default action, staff won’t hunt for buttons between scans.
Where scanning meets Shopify data
You’re not building a camera demo; you’re moving data. Before you code, decide the source of truth for inventory adjustments, order status, and customer actions. Many teams build a thin app layer that talks to Shopify APIs and pushes events to a lightweight middleware service—useful if you need to enrich a scan with location data or staff ID, or if you plan to add more endpoints later. If you’re not set up for custom app development, our primer on scoping and vendor selection walks through the trade-offs.
For marketing use cases, this is also a good time to think about attribution. QR codes can carry UTM parameters or link to campaign-specific landing pages. That’s basic, but it’s what helps you prove that a postcard or table tent pulled traffic you wouldn’t have seen otherwise. If you need help lining up the marketing side, our Shopify specialists can point you to the right building blocks.
Security and privacy aren’t afterthoughts
A scanner touches product data and sometimes customer details. Keep everything in transit over TLS, and store the minimum on the device—ideally just the short-term cache you need for offline work. If you print QR codes that link to account portals or discount pages, treat them as open entry points and guard the downstream action with normal auth and rate-limiting.
On the device side, permissions should be clear and narrow. Ask for camera access only when the user taps “Scan,” and explain why it’s needed. Don’t prompt on app launch. If you’re using analytics, disclose the events you track and keep PII out of them unless you’ve got explicit consent.
A lightweight way to roll this out
You don’t have to ship everything at once. Pick one workflow that causes the most pain—cycle counts, curbside pickup, pop-up checkout—and add scanning there. Debut with a small team, gather notes for a week, and fix the two or three things they complain about. Then expand. The win here is adoption. A scanner that staff trust in one context spreads on its own.
If you’re building a brand-new mobile app alongside scanning, keep the scope tight and sensible. The how-to we mentioned earlier on turning a store into a mobile app outlines a path that avoids six months of over-engineering. Once the base app is live, scanning becomes another screen instead of a project that delays everything else.
Troubleshooting quick hits
If reads are slow, check your frame rate and auto-focus settings before you blame the SDK. If small codes fail, give users a tap-to-zoom option or expand your scan window. If glare is the villain, nudge label design toward matte finishes and increase contrast on the print. And if your success rate tanks on one Android device, test the same scene on another to rule out a camera sensor quirk.
When all else fails, go back to the checklist. Symbology support, continuous scanning, low-light behavior, offline flow, clear UI. Get those right and the rest is just iteration.
The bottom line on Shopify mobile barcode & QR scanning
A solid Shopify mobile scanner isn’t magic. It’s a careful choice of SDK, a couple of UX details that remove friction, and a plan for offline and data handoff so your team isn’t left stranded. Start with real labels in real light, evaluate against sensible on-device scanning requirements, and add scanning to the one workflow that needs it most. Ship that, learn, and roll it out wider. You’ll save time in the aisles, cut errors at the packing table, and turn QR codes into a practical bridge between offline moments and your storefront.